Android Charging Port Cleaning Guide (USB-C & Micro-USB)

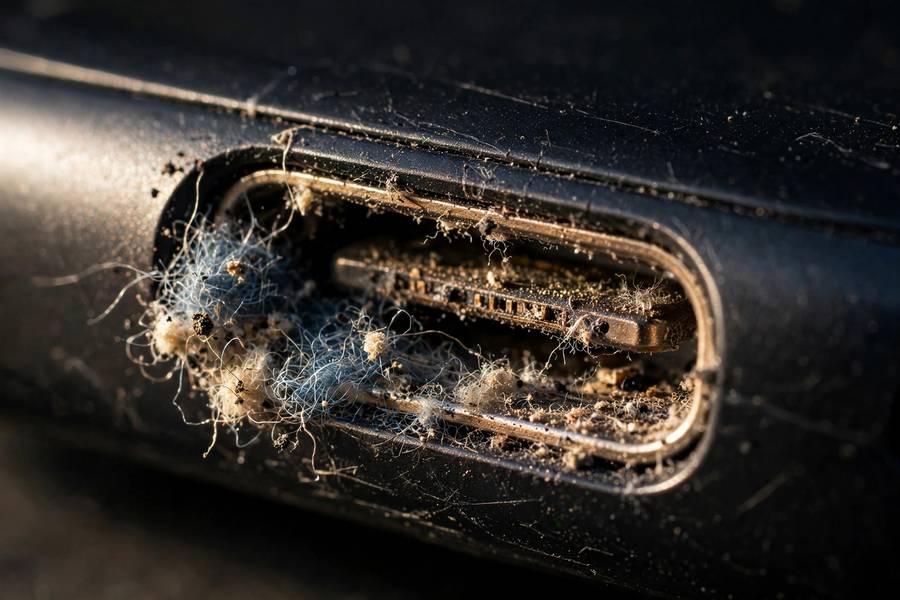
If your Android phone has started charging intermittently — you plug it in, it connects, you breathe on it wrong and it disconnects — there’s a good chance nothing is broken. In my experience, the most common cause of charging problems on Android phones isn’t a failing battery or a bad cable. It’s lint. Pocket lint, packed tight into the charging port over months, preventing the cable from seating fully. I’ve fixed “dead” phones in two minutes with a toothpick.
This guide covers everything about cleaning an Android charging port safely: how to tell lint is your problem, the tools that work (and the ones that don’t), step-by-step cleaning for USB-C and Micro-USB ports, what to do when cleaning doesn’t fix it, and how to keep the port clean going forward. Android ports have their own quirks compared to iPhones — if you’re on iOS, my companion guide on how to clean an iPhone charging port covers the Lightning and USB-C iPhone specifics.
Symptoms: How to Tell It’s Lint, Not a Broken Phone
Lint buildup has a distinctive signature. The cable doesn’t click in firmly — it feels loose or wobbly. Charging starts and stops if the phone moves. You have to hold the cable at an angle or push it in hard to get a connection. Wireless charging (if your phone supports it) works fine while wired charging is flaky. If this sounds familiar, it’s almost certainly lint.
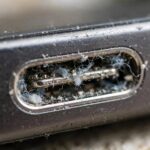
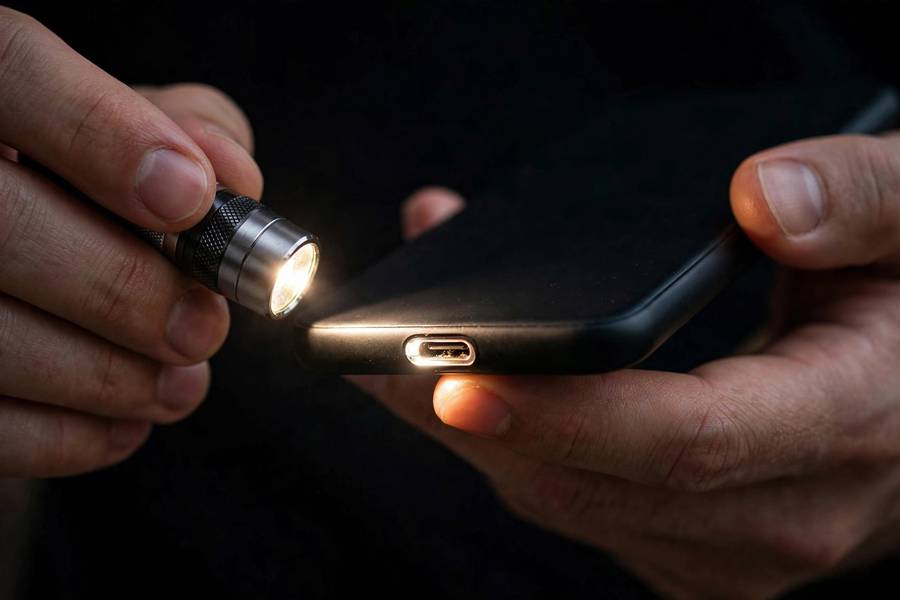
Here’s a quick diagnostic: power off the phone, grab a flashlight, and look into the port. On USB-C (the oval port on modern Androids), you’ll often see gray or blue-gray fuzz packed around the central tongue. It can be remarkably dense — months of pocket lint compresses into something resembling felt. If you see it, you’ve found your problem.
Contrast this with genuine hardware failure: the port feels physically loose even with a new cable, there’s visible corrosion (green or white crust), the phone won’t charge with any cable including new ones after cleaning, or the port area gets hot during charging. Those point to damage or electrical issues, not lint — and cleaning won’t fix them.
Safety First: What Never to Put in a Charging Port
Before we talk about what works, let’s be clear about what doesn’t — because the wrong tool can turn a lint problem into a broken phone.
Never use anything metal: no paperclips, no needles, no SIM ejector tools, no metal dental picks. Metal conducts electricity and can short the pins inside the port, potentially damaging the phone’s charging circuitry. Never use anything wet: no damp cotton swabs, no alcohol drips, no “cleaning solutions” poured into the port. Liquid and electronics are a bad combination, and the port’s tight spaces trap moisture.
Never blow into the port with your mouth — breath contains moisture that condenses inside. And never use high-pressure air carelessly (more on compressed air below — it has its place, but with caveats). The golden rule: power the phone off before cleaning, use only non-conductive tools, and be gentle. The pins inside are delicate, and bending one creates a real repair bill.
The Right Tools for the Job
You don’t need a repair kit. The best tools are probably in your house already.
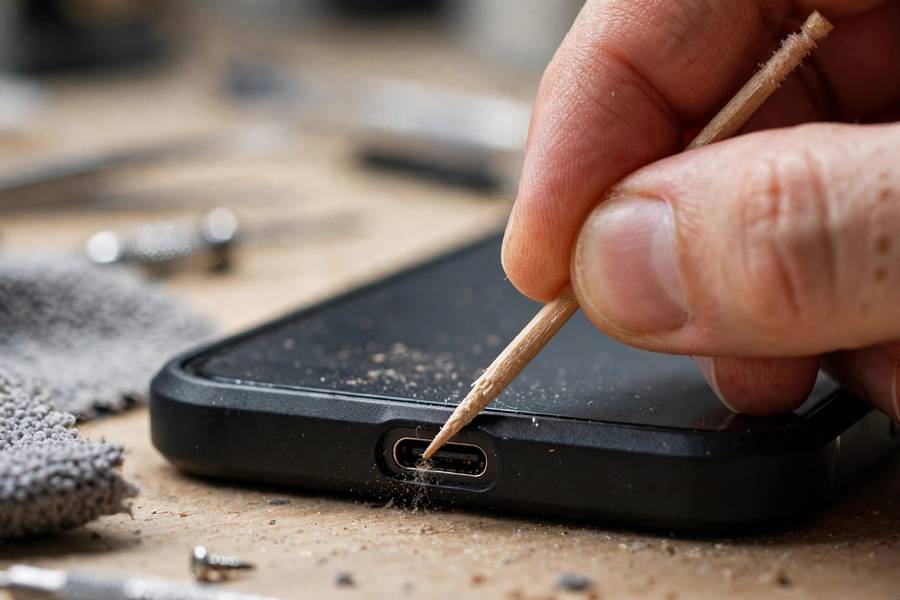
A wooden or plastic toothpick is the number one tool — non-conductive, thin enough to reach in, slightly soft so it won’t scratch contacts. A soft-bristled brush (a clean, dry soft toothbrush or a small electronics brush) works for surface dust. A can of compressed air is useful for loose debris, with important caveats I’ll cover in the dedicated section. A flashlight or your other phone’s flashlight is essential for seeing what you’re doing. That’s genuinely the whole kit.
What about those “port cleaning kits” sold online? Most are just repackaged toothpicks and brushes at a markup. Save your money. The one exception worth having is a set of plastic dental picks (the soft kind) — they’re the perfect size and shape for USB-C ports. But a toothpick does the same job for free.
One tool note for the cautious: if your phone is still under warranty and you’re nervous, there’s no shame in taking it to the manufacturer’s service center for cleaning. It’s a quick job for them. But honestly, this is one of the safest DIY phone maintenance tasks there is — gentler than most people expect.
Step by Step: Cleaning a USB-C Port
USB-C is the port on virtually all Android phones from the last several years. It’s an oval port with a thin tongue in the middle. Lint packs in around that tongue, underneath it, and along the walls.
Step 1: Power off the phone completely. Not sleep — full power off. This eliminates any short-circuit risk while you work.
Step 2: Shine a light into the port and assess. Note where the buildup is — usually a gray mass at the back of the port, behind the tongue.
Step 3: Take a wooden toothpick and gently scrape along the walls of the port — the top, bottom, and sides, avoiding direct pressure on the central tongue. Use light, short strokes, pulling debris outward toward the opening. You’ll be surprised how much comes out. Work around the tongue carefully; it’s the most fragile part.
Step 4: For stubborn packed lint behind the tongue, slide the toothpick gently under the tongue and tease the lint out. Go slowly — the tongue has the electrical contacts on it, and bending it is the main risk of this whole procedure. If something won’t come out with gentle pressure, leave it and try compressed air instead of forcing it.
Step 5: Use short bursts of compressed air to blow out loosened debris — hold the can upright, keep the nozzle a few inches away, and use brief puffs rather than a sustained blast. Then inspect with the light again.
Step 6: Power on and test with your cable. It should click in firmly with a satisfying snap. If charging is still flaky, repeat once more — sometimes the first pass loosens what the second pass removes.
Step by Step: Cleaning a Micro-USB Port
Older Android phones (and some budget models) use Micro-USB — the trapezoidal port with a small tongue. The cleaning principle is identical, but the port is smaller and the tongue more fragile, so extra gentleness applies.
Power off, inspect with light, and use the toothpick with even lighter pressure than USB-C. The Micro-USB tongue is thin and bends easily — focus your scraping on the port walls rather than around the tongue. Short strokes, pulling outward. Compressed air puffs help dislodge what the toothpick loosens.
Honestly, if you’re still on Micro-USB in 2026, your phone is quite old — and that’s fine, but be aware that charging issues on aging phones can also come from worn cables and aging batteries. If cleaning doesn’t help, try a new cable before assuming the phone is failing. And make sure your important data is protected regardless — see how to back up an Android phone so a hardware failure never costs you photos and messages.
After Cleaning: Testing and Next Steps
After cleaning, test methodically. Plug in your regular cable — it should seat firmly with an audible or tactile click. Check that charging starts immediately and continues when you gently wiggle the cable (a little movement is normal; disconnecting is not). Leave it charging for ten minutes and confirm the battery percentage actually climbs.
Test with a second cable if you have one. Cables wear out too, and a frayed or stretched cable mimics lint symptoms perfectly. If the phone charges fine with one cable but not another, the cable was part of the problem — replace it. Use quality cables; the cheapest ones have loose connectors that both charge poorly and push lint deeper.
Also test data transfer if you use it: connect to a computer and confirm the phone is recognized. A port can charge fine but have damaged data pins — rare, but worth checking if you sync via cable. Understanding how your devices communicate helps diagnose whether a port issue is power-only or data-related.
When It’s Not Lint: Other Charging Problems
If thorough cleaning doesn’t fix charging, work through these possibilities before assuming the worst.
Try a different cable and a different charger — preferably the manufacturer’s original or a certified equivalent. Cheap chargers and cables cause an enormous share of “phone won’t charge” complaints. Try a different wall outlet, and if you were using a computer’s USB port or a car charger, try a proper wall charger instead — some ports don’t deliver enough power.
Check for software causes: restart the phone, check for system updates (charging management is software-controlled on modern phones), and look at battery health in Settings. On Samsung: Settings, Battery, Battery health. If the battery health is severely degraded, no amount of port cleaning helps — the battery itself needs replacement.
Look for physical damage: a port that’s visibly bent, has broken plastic inside, or shows corrosion needs professional repair. Water damage indicators (check your model’s guide for location) turning red means liquid got inside — don’t keep trying to charge a water-damaged phone; take it for service. And if the phone charges wirelessly but not via cable after cleaning, the wired charging circuitry may have failed — a repair shop job, usually affordable.
Keeping Your Port Clean
Once it’s clean, keeping it clean is easy. The lint comes from pockets — that’s the source for nearly everyone. A few habits make a big difference.
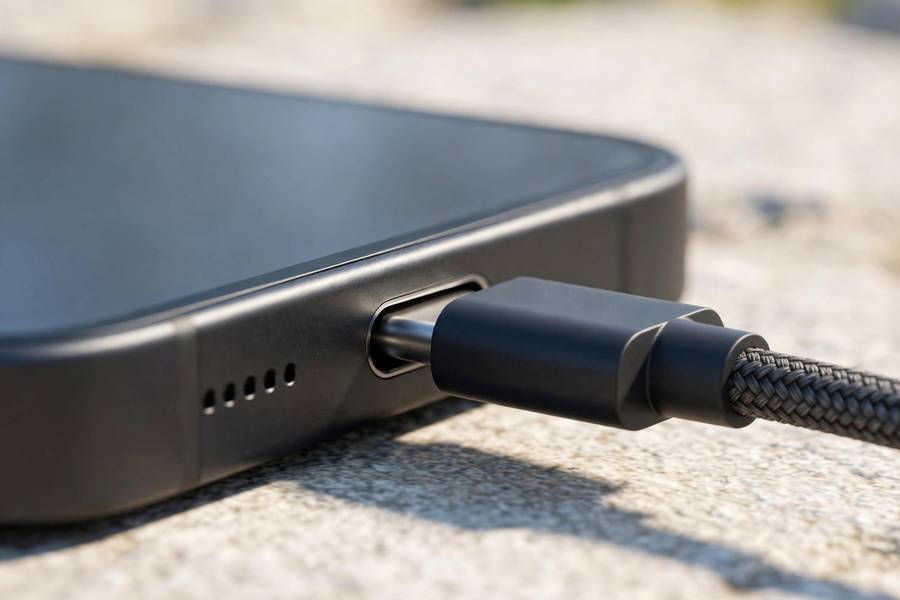
Consider a port plug: tiny silicone or plastic dust plugs that sit in the USB-C port when you’re not charging. They cost almost nothing, come in multi-packs, and completely prevent lint entry. The only downside is remembering to remove them to charge — which becomes habit within days. If you work in dusty environments (construction, workshops), these are essentially mandatory.
Carry your phone in a pocket without lint-heavy companions — tissues and receipts are the worst offenders. A dedicated phone pocket, or simply putting the phone in port-up, reduces accumulation. And give the port a quick visual check every few months; catching buildup early means a ten-second brush instead of a full excavation.
Finally, treat cables well: don’t yank them out by the cord, don’t let the phone dangle by the cable, and replace cables when the connector gets loose. A tight cable seats fully and doesn’t grind lint deeper; a loose one does the opposite. iPhones collect lint exactly the same way, and the safe cleaning principles are identical across both platforms.
Frequently Asked Questions
This is the classic symptom of lint packed in the charging port. The debris prevents the cable from seating fully, so only certain angles make contact. Power off the phone and clean the port with a wooden toothpick and compressed air — this fixes the problem in the majority of cases.
Yes, if you follow basic precautions: power the phone off first, use only non-conductive tools (wooden or plastic toothpick, soft brush), never use metal objects or liquids, and be gentle around the port’s central tongue. It’s one of the safest DIY phone maintenance tasks.
No. Metal objects like paperclips, needles, and SIM tools can short the electrical pins inside the port and damage the charging circuitry. Always use non-conductive tools — a wooden toothpick is ideal and costs nothing.
For most people, a quick visual check every few months is enough, with a full cleaning once or twice a year. If you carry your phone in lint-heavy pockets or work in dusty environments, check more often — or use a silicone dust plug to prevent buildup entirely.
Try a different cable and charger first — worn cables mimic lint symptoms. Then restart the phone, check for system updates, and look at battery health in Settings. If none of that helps and the port looks physically damaged or corroded, take it to a professional repair shop.