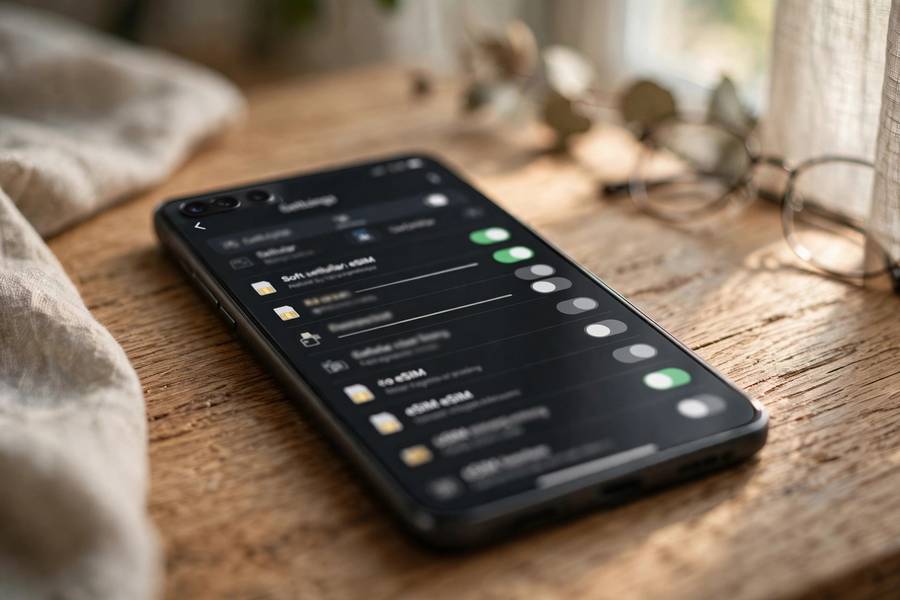
The first time I activated an eSIM, I did everything right and it still took forty minutes. The problem was embarrassingly simple: the phone needed Wi-Fi to finish the job, and I wasn’t on a working network.
Most eSIM guides make it sound like: scan, done, enjoy. The real process has a few more steps — mostly the boring checks nobody mentions. I’ve activated eSIMs on iPhones, Samsung Galaxy phones, and Pixels. Here’s everything that matters, in the order it matters.
Table of Contents
- Before You Scan Anything: The 5-Minute Pre-Flight Checklist
- What “Activating” Actually Means (It’s Not the Same as Installing)
- How to Activate an eSIM on iPhone
- How to Activate an eSIM on Samsung Galaxy
- How to Activate an eSIM on Google Pixel
- How to Know It’s Actually Activated (Not Just Installed)
- Stuck on “Activating…”? Fix It in Order
- Dual-SIM Life: Running Two Lines After Activation
- Mistakes Worth Avoiding
- The Short Version
Before You Scan Anything: The 5-Minute Pre-Flight Checklist
Most eSIM failures trace back to this list, not to the QR code.
Is Your Phone Actually eSIM-Compatible?
The quick rule: iPhones from the XS/XR (2018) onward support eSIM; on Android, most Samsung Galaxy S/Z flagships from the S20 up, Pixels from the 3 up. Plenty of sub-$300 Androids still skip the eSIM chip.
On iPhone, Settings → General → About should show an EID number. On Samsung, Settings → Connections → SIM card manager should offer “Add eSIM”; on Pixel, Settings → Network & internet → SIMs should too. If you’re still deciding between formats, my eSIM vs physical SIM breakdown covers which fits whom.
Is Your Phone Carrier-Unlocked?
An eSIM from a different carrier won’t activate on a locked phone. On iPhone, Settings → General → About → Carrier Lock should say “No SIM restrictions.” If you bought on a carrier installment plan, assume it’s locked — get it unlocked first.
What You Need in Hand
Three things:
- A stable Wi-Fi connection. Captive-portal Wi-Fi that needs a browser login will break the download — finish the login page first or use a hotspot.
- Your activation details — usually a QR code, sometimes an SM-DP+ address plus activation code. Keep it open on another screen or printed.
- Your carrier account login and phone passcode — some carriers gate the QR code behind their app.
Moving your main number over? Take a fresh backup first — my guide to backing up your Android phone takes five minutes.
What “Activating” Actually Means (It’s Not the Same as Installing)
Remember: installing an eSIM and activating it are two separate steps.
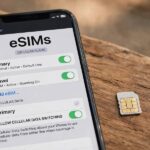
Installing means your phone downloaded the eSIM profile — an encrypted identity card — from the carrier’s server. You’ll see the new plan listed in Settings. Activation is when the carrier’s network registers that profile and lights up your line. Until that handshake completes, you’ll see the plan name with no signal or a permanent “activating” status.
No bars right after scanning is normal for a minute or two. If it’s still sitting there after ten minutes with Wi-Fi on, the carrier-side half didn’t finish — see the troubleshooting section below.
How to Activate an eSIM on iPhone
Apple’s flow is the smoothest of the three platforms.
Method 1: Scanning the QR Code
- Connect to Wi-Fi — actually connected, pages loading.
- Open Settings → Cellular → Add eSIM.
- Tap Use QR Code and point the camera at the carrier’s code.
- When the plan appears, tap Continue, then label it something recognizable — don’t keep the default gibberish.
- Choose your defaults: which line handles calls/texts and which handles mobile data.
- Wait a minute — the plan downloads, then activates. Done when signal bars appear next to the plan in Settings → Cellular.
Scan from a printed code or a second device when possible — scanning off a dim screen at an angle is the number-one reason the camera fails. If the code arrived by email, open it on a laptop, not on the same phone.
Method 2: Entering Details Manually
No QR code? On the Add eSIM screen, tap Enter Details Manually and fill in the SM-DP+ address and activation code exactly — case-sensitive. Then the flow is identical.
Method 3: Transferring from Your Old iPhone
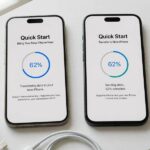
Upgrading? Settings → Cellular → Add eSIM → Transfer from Nearby iPhone beams the plan over — no QR code. Failures are almost always the carrier not authorizing it. For a full new-phone setup, my setting up a new iPhone walkthrough covers the transfer alongside everything else.
How to Activate an eSIM on Samsung Galaxy
- Wi-Fi on and actually working.
- Go to Settings → Connections → SIM card manager.
- Tap Add eSIM, then Scan QR code.
- Scan, tap Add, and name the plan immediately — Samsung’s “eSIM 1” defaults become a guessing game with two plans.
- Set your preferred SIM for calls, texts, and mobile data — you can split these per function: home line for calls, travel eSIM for data.
The manual path is on the same screen: Enter activation code with the same SM-DP+ address and activation code.
Gotcha: Samsung sometimes keeps using the physical SIM for data after you add the eSIM. If your new data plan “isn’t working,” check SIM card manager → Mobile data first — it’s usually the wrong line selected.

How to Activate an eSIM on Google Pixel
- Wi-Fi connected.
- Go to Settings → Network & internet → SIMs.
- Tap +, then Download a SIM instead? (wording varies — it means “add eSIM”).
- Scan the QR code, or tap to enter the code manually.
- Name the plan, choose defaults for calls/texts/data, and wait for signal.
Keep the phone awake during the download — Pixels’ aggressive battery optimization can stall it if the screen locks.
How to Know It’s Actually Activated (Not Just Installed)
All four of these should be true:
- Signal bars appear next to the plan — not a spinner, not “activating,” actual bars.
- The carrier name shows up correctly — the network has registered your line.
- A test call or text goes through — for a data-only travel eSIM, load a webpage with Wi-Fi off.
- Default-line settings stuck — calls/data defaults point at the line you intended.
Stuck on “Activating…”? Fix It in Order
If the plan has sat in “activating” for ten-plus minutes with good Wi-Fi, work through this list:
- Confirm the Wi-Fi is real — load a page in a browser. Captive portals and “connected but no internet” networks are the top cause.
- Restart the phone — this fixes more stuck eSIMs than everything else combined.
- Toggle airplane mode on for 30 seconds, then off. Give it a full minute after.
- Re-scan the QR code — delete the half-installed profile first. Check the next step before deleting.
- Check whether the QR code is single-use — most are. If it was already consumed, get a fresh code from the carrier’s app or support chat.
- Check the carrier side — confirm the plan is active and assigned to the right line in the carrier’s app; it may sit in “pending” over an unpaid balance.
- Last resort: remove and reinstall with a fresh code. Do NOT do this if the code was single-use and you can’t get a new one — call the carrier first.
Done all seven and still stuck? It’s carrier-side provisioning — no phone fiddling will fix it. Call and ask them to check whether the eSIM profile is provisioned on their network. That phrase gets you past the script.
Dual-SIM Life: Running Two Lines After Activation
Most phones run the eSIM alongside your physical SIM: main number for calls and texts, whichever line has the better data deal — often a local travel eSIM abroad.
My travel setup: home SIM for calls and texts, travel eSIM for data, roaming off on the home line. Two signal clusters in the status bar is completely normal.
Mistakes Worth Avoiding
Three I’ve watched people make: scanning a travel eSIM days before departure (some plans start validity at activation, not landing), deleting their only eSIM profile when the QR code was single-use (confirm you can get a replacement first), and confusing “installed” with “activated”.
The Short Version
Activation is five minutes of menus once the checklist is handled. When it gets stuck, it’s almost never the phone — it’s the network or the carrier side.
Usually 2 to 5 minutes: the profile downloads over Wi-Fi, then the carrier registers your line. If it’s still “activating” after 10 minutes, restart the phone first, then work through the troubleshooting steps above.
Yes, in almost all cases. The profile must download from your carrier’s server — connect to stable Wi-Fi first, and complete any captive-portal logins (hotel sign-in pages), or the download silently fails.
Yes — choose the manual option on the “add eSIM” screen and type in the SM-DP+ address and activation code. Same data as the QR code, typed by hand. Double-check each character — codes are case-sensitive.
The most common causes: Wi-Fi that isn’t actually working, an already-used QR code (most are single-use), or the plan not being provisioned on the carrier’s side. Restart, confirm Wi-Fi loads pages, check the carrier’s app — then ask them to confirm the profile is provisioned.
Almost never — carrier QR codes are typically single-use. To move the eSIM, use the carrier’s transfer option or ask for a fresh QR code — most issue them free through their app or support chat.
No. Adding an eSIM doesn’t touch your physical SIM, photos, apps, or data — it just adds a digital line alongside what you have. Only explicitly deleting the eSIM profile removes the line, and even that doesn’t delete personal data.