How to Check Brake Pads Without Removing the Wheel

Learning how to check brake pads is one of the most valuable ten-minute skills a car owner can have. Your brakes are the single most important safety system on your vehicle — more important than the engine, the tires, or any fancy driver-assist feature — and the pads are the part that wears out. I have been turning wrenches for fifteen years, and I can tell you that most brake jobs I see fall into two categories: caught early and cheap, or caught late and expensive. Knowing how to check your pads is what keeps you in the first category.
The good news: you do not need to be a mechanic, and in many cases you do not even need to remove the wheel. Let me show you both methods — the quick visual check and the thorough wheel-off inspection — plus how to read the warning signs your car is already giving you.
How to Check Brake Pads Without Removing the Wheel
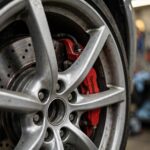
On many cars, you can see the brake pads right through the spokes of the wheel. This is the fastest check and the one I recommend doing every few months.
- Park on level ground, turn the engine off, and engage the parking brake. Let the brakes cool if you have been driving — brake components get extremely hot.
- Turn the steering wheel fully to one side so you can see the front brakes clearly through the wheel spokes. The front pads wear fastest since they do most of the braking.
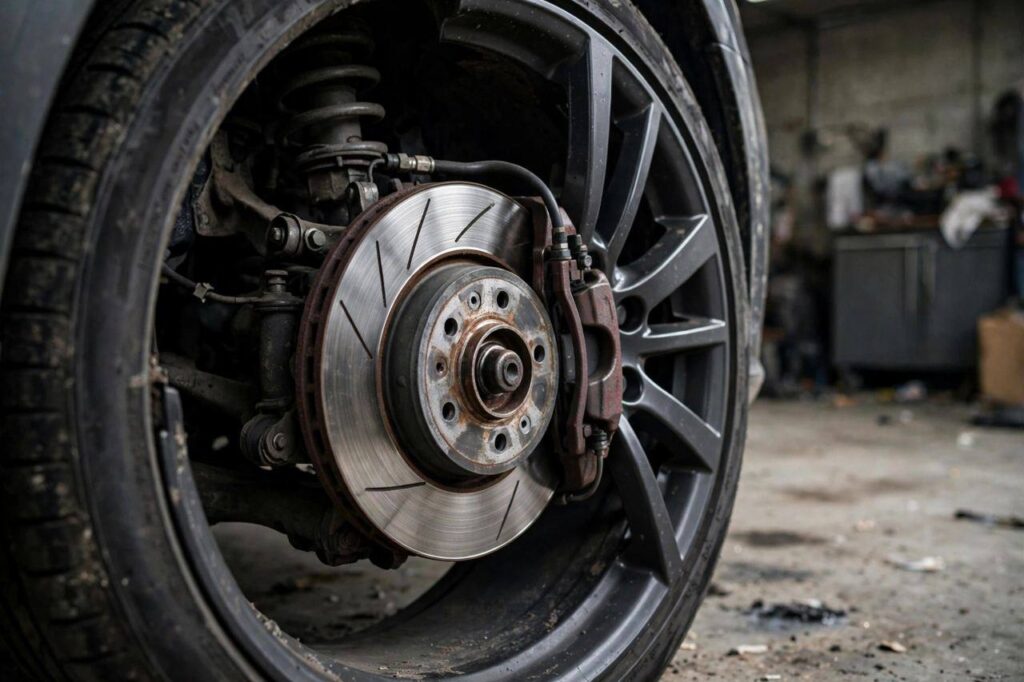
- Shine a flashlight through the wheel at the brake caliper — the clamp-like component gripping the shiny disc (the rotor).
- Look at the pad material pressed against the rotor. You are looking at the friction material, not the metal backing plate. New pads have roughly half an inch (about 12mm) of friction material. If you see less than a quarter inch (about 3mm), replacement time is near.
- Check both sides — turn the wheel the other way and inspect the other front brake, then check the rears as best you can.
If your wheels have a solid design with no visible spokes, this method will not work and you will need the wheel-off approach below. Tinted or dirty wheels can also make the visual check unreliable — when in doubt, take the wheel off.
How to Check Brake Pads With the Wheel Off (The Thorough Way)
For a proper inspection — or if you could not see through your wheels — remove the wheel. This takes about ten extra minutes and gives you a complete picture.
- Loosen the lug nuts slightly while the car is still on the ground.
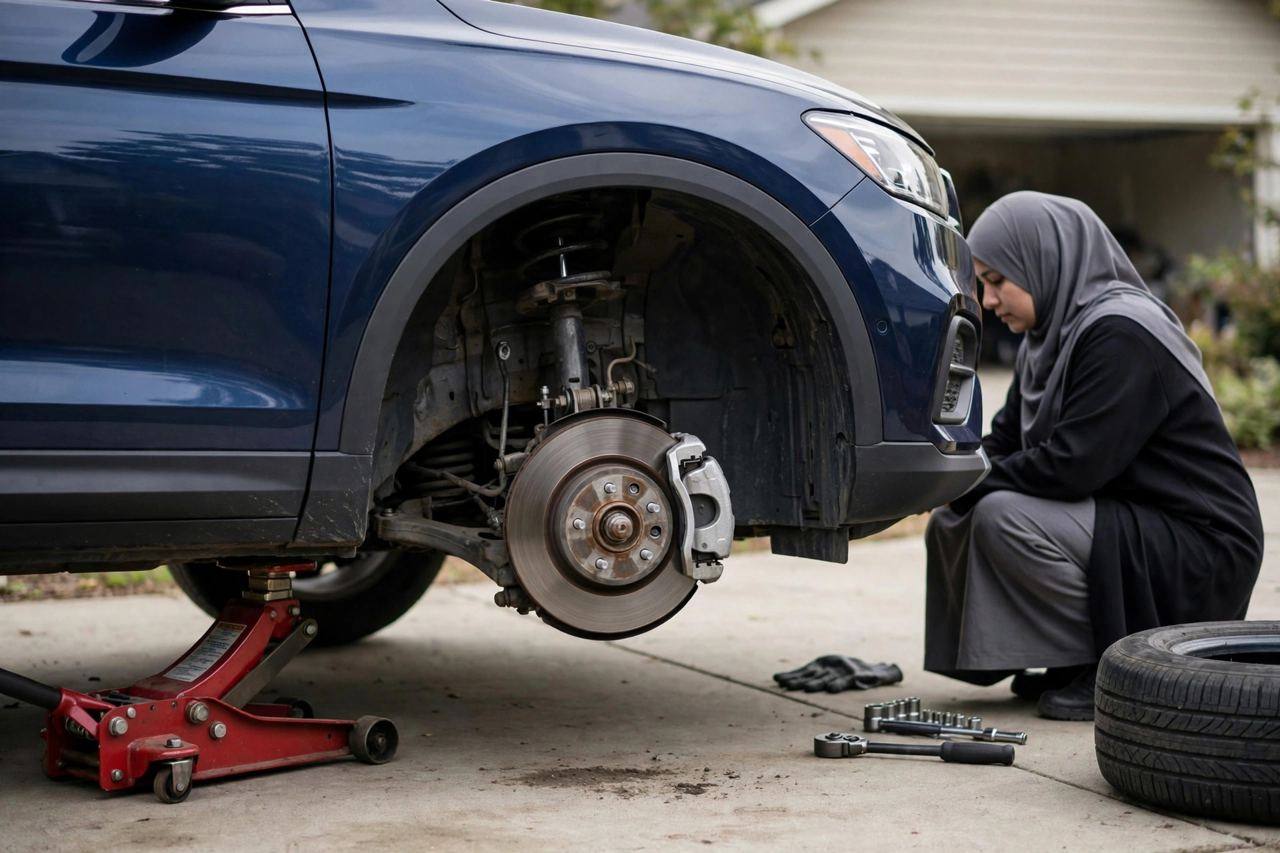
- Jack up the car using the manufacturer-recommended jack point (check your owner’s manual), and secure it on a jack stand. Never work under a car supported only by a jack.
- Remove the lug nuts and the wheel. Set the wheel flat under the car as a backup safety measure — old habit, good habit.
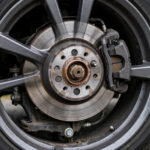
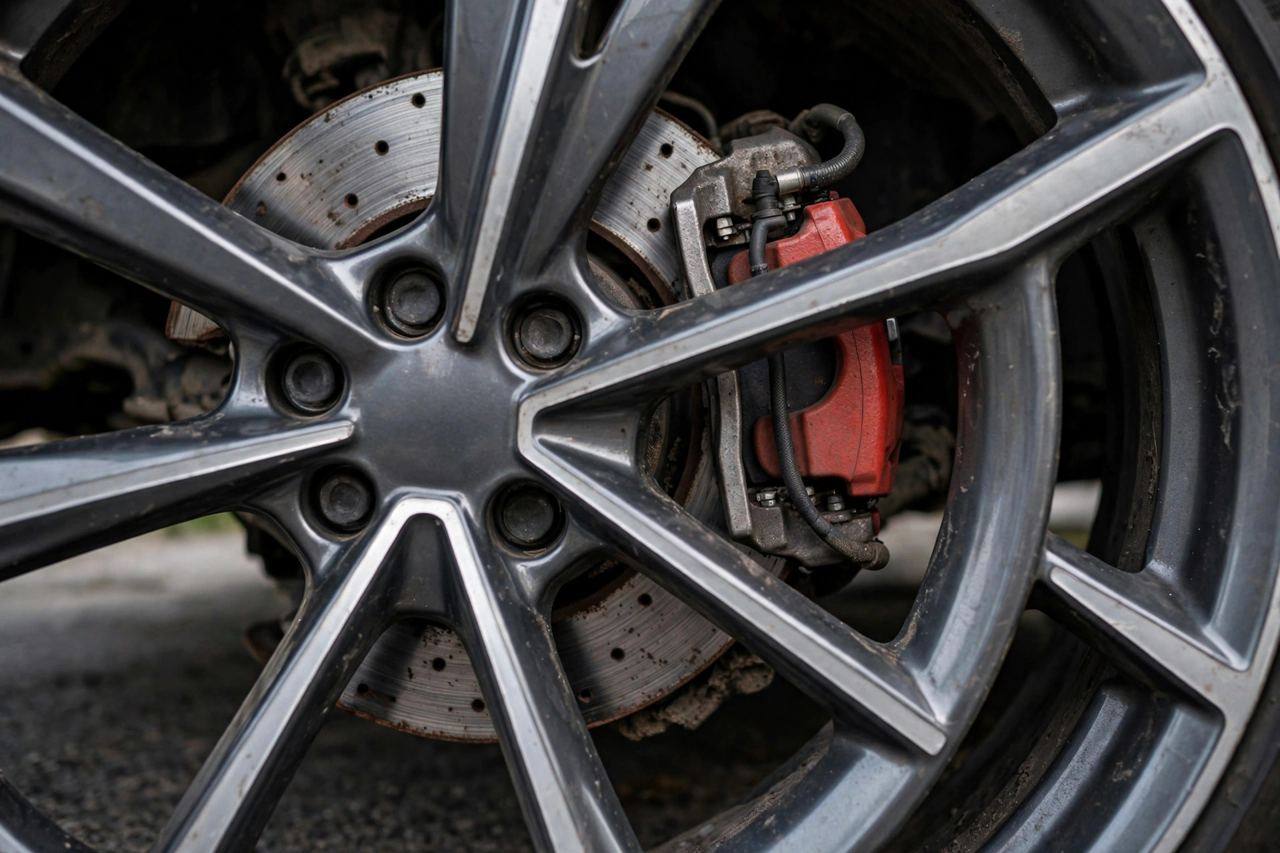
- Inspect the pads. You will see the caliper straddling the rotor. The pads sit inside the caliper on either side of the rotor. Look at the thickness of the friction material on both the inner and outer pads.
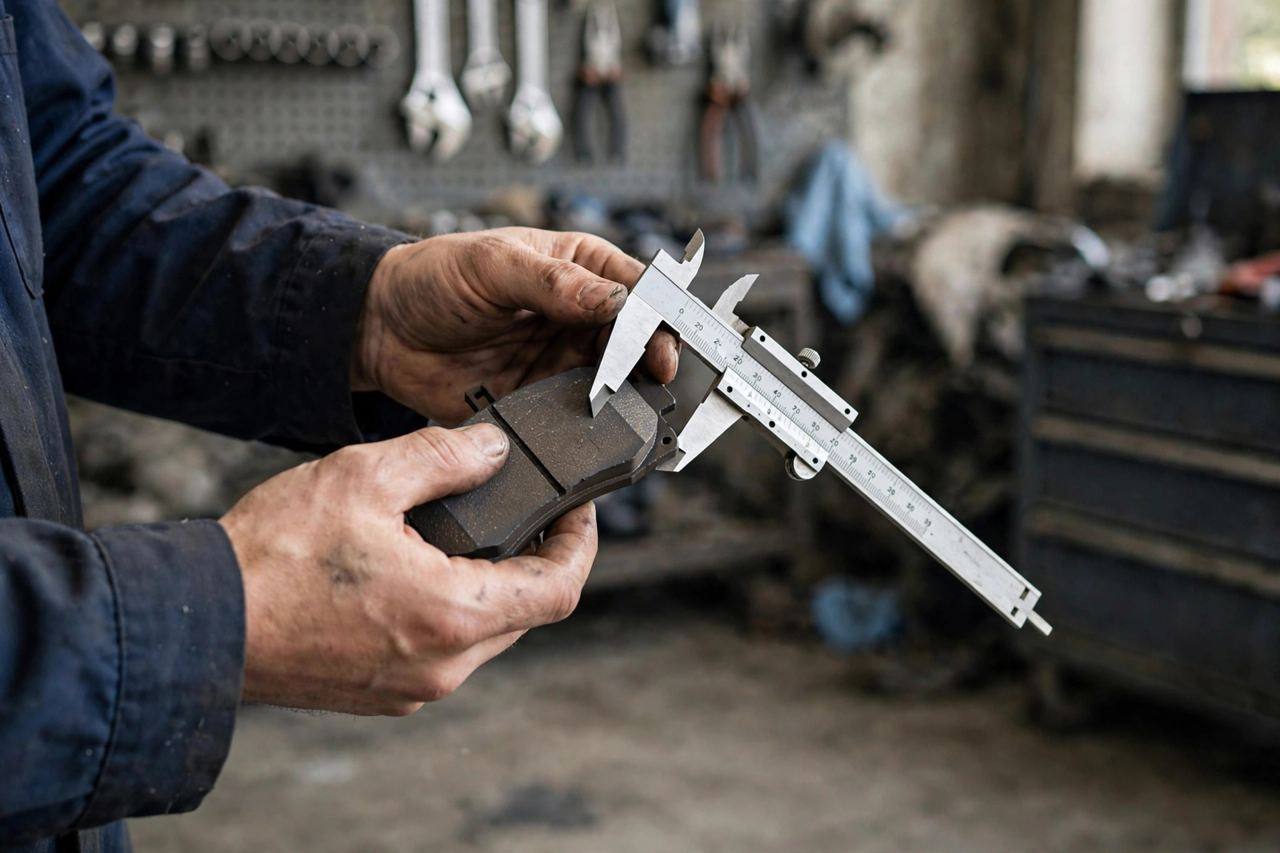
- Measure if you are unsure. A cheap brake pad gauge or even a ruler works. Anything at or below 3mm of friction material means replace soon. At 2mm or less, replace now.
- Look at the rotor too. Deep grooves, a pronounced lip on the edge, or a bluish discoloration (a sign of overheating) mean the rotors need attention as well.
While the wheel is off, glance at the brake lines and the caliper for leaks — any wet, oily residue around the caliper is brake fluid, and that is a do-not-drive situation until it is fixed. If you want to understand the full system you are looking at, our guide on how car brakes work breaks down every component.
Warning Signs Your Brake Pads Are Worn
Your car will usually tell you the pads are going before you ever look at them. Here are the signs I tell every customer to watch for:
Squealing or squeaking when braking
Most brake pads have a built-in metal wear indicator — a small tab that contacts the rotor when the pad material gets thin, producing a high-pitched squeal. If you hear a consistent squeal every time you brake, that is the tab doing its job. Get the pads checked within the next few hundred miles.
Grinding noise
Grinding means the friction material is gone and metal is scraping on metal. This is no longer a pad replacement — the rotors are being damaged with every stop. This one cannot wait. Drive gently to a shop and get it fixed immediately.
Longer stopping distances
If the car feels like it needs more room to stop than it used to, worn pads are a prime suspect. Do not rationalize this one away. Test it carefully in a safe area and get the brakes inspected.
Vibration or pulsing in the pedal
A pulsing brake pedal usually points to warped rotors rather than worn pads, but the two often go together — worn pads run hotter, and heat warps rotors. Either way, it needs professional attention.
Brake warning light
Some cars have a dedicated brake pad wear sensor that triggers a dashboard light. Others just have the general brake warning light. Either way, a brake light on the dash means stop driving and investigate, not keep driving and hope.
The car pulls to one side when braking
Uneven pad wear — or a sticking caliper causing uneven wear — can make the car pull left or right under braking. This needs a proper inspection, since it can also be a tire or alignment issue. If you are already comfortable with wheel-off work, our guide to changing a tire covers the jacking and lug nut basics you will use here too.
How Long Do Brake Pads Last?
The honest answer: it depends enormously on how and where you drive. As a rough range, most brake pads last between 30,000 and 70,000 miles. City drivers who brake constantly wear pads much faster than highway drivers who barely touch the pedal. Aggressive braking, heavy loads, towing, and mountain driving all shorten pad life. Gentle, anticipatory braking extends it dramatically — I have seen highway commuters get 80,000 miles out of a set.
Pad material matters too. Ceramic pads tend to last longer and run quieter with less dust. Semi-metallic pads handle heat better and are common on trucks and performance cars, but they wear rotors slightly faster. Organic pads are the cheapest and quietest but wear fastest. When replacing, match what your car came with unless you have a reason to change.
Front vs. Rear: What Wears Faster
Front pads almost always wear faster than rears — typically twice as fast — because weight transfers forward under braking and the front brakes do roughly 70 percent of the stopping work. This is completely normal. It is also why you should always check all four corners: I have seen cars with new-looking rear pads and metal-on-metal fronts because the owner only glanced at the easy-to-see wheels.
Replace pads in axle sets — both fronts together, both rears together. Replacing just one side creates uneven braking that pulls the car and wears the new pad faster. Pads are cheap; do the pair.
Safety Notes Before You Start
Brakes are the wrong system to learn carelessness on. A few non-negotiable rules:
- Always use jack stands. A jack alone can fail. Jack stands are cheap and they save lives.
- Let brakes cool. After driving, rotors can be hot enough to burn you badly. Wait at least 30 minutes.
- Do not open the brake fluid reservoir casually or press the brake pedal with the caliper removed — you can push the piston out and create a real problem.
- Brake dust may contain hazardous material. Do not blow it off with compressed air and breathe it in. Wipe components with a damp cloth instead.
- Know your limit. Checking pads is a beginner-friendly job. Replacing them is a moderate DIY job. If anything looks wrong beyond worn pads — leaks, damaged lines, seized calipers — that is shop territory.
When to Replace vs. When to Just Monitor
Here is my shop-floor rule of thumb. More than 5mm of pad material: you are fine, check again in a few months. Between 3 and 5mm: start planning the replacement and check monthly. At 3mm or below: replace soon. At 2mm or below, or any grinding: replace now, and budget for possible rotor work too.
Also replace pads if they are contaminated — soaked in brake fluid or gear oil — even if they look thick. Contaminated pads cannot be cleaned reliably. And if your pads are wearing unevenly (one side much thinner than the other, or tapered), have the calipers checked — something is sticking, and new pads will just wear the same crooked way.
Frequently Asked Questions
How do I know if my brake pads are bad without taking the wheel off?
Look through the wheel spokes with a flashlight at the pad material against the rotor. If the friction material looks thinner than a quarter inch (about 3mm), or you hear squealing when braking, the pads need attention. If you cannot see through your wheels, the wheel-off check is the reliable method.
How many miles do brake pads typically last?
Most last 30,000 to 70,000 miles depending on driving style, vehicle weight, and pad material. City driving wears them fastest; gentle highway driving extends their life significantly. Check them visually rather than going by mileage alone.
Can I drive with worn brake pads?
Briefly and carefully to reach a repair shop, yes — if they are just squealing. If they are grinding, every mile damages the rotors and lengthens stopping distances. Get grinding brakes fixed immediately and drive gently on the way there.
Should I replace brake pads myself?
Checking them is easy and safe for any car owner. Replacing them is a moderate DIY job requiring basic tools, jack stands, and careful attention to procedure. If you are comfortable with hands-on car work and follow a proper guide for your specific vehicle, it is very doable. If you have any doubt, a shop charges relatively little for a pad replacement.
Do I need to replace rotors with the pads?
Not always. If the rotors are smooth, thick enough (above minimum thickness stamped on the rotor), and not warped, new pads alone are fine. If rotors are grooved, warped, or below minimum thickness, replace or resurface them. A shop can measure rotor thickness in seconds.
Why do my new brake pads squeak?
Light squeaking from new pads is common during the break-in period and usually fades within a few hundred miles of normal driving. Persistent loud squealing can mean the pads were not bedded in properly, the hardware clips were reused when they should have been replaced, or a shim is missing.
Ten minutes with a flashlight every few months — that is all it takes to stay ahead of brake problems. Your brakes will never surprise you if you are looking at them, and in my experience, the drivers who check are the drivers who never end up with a scary grinding noise on a rainy highway at midnight. Be one of those drivers.