Ten years around cars — first with my hands under them in a repair shop, now writing about them — and I can tell you this: changing a tire is the single most useful car skill a person can have. Not because it’s hard. Because the one time you need it, you’re on the shoulder of a highway, it’s raining, and there’s no YouTube signal.
I’ve changed hundreds of tires. I’ve also seen what happens when people do it wrong — cars slipping off jacks, lug nuts coming loose at speed, wheels ruined by driving on a flat “just a little farther.” This guide is everything I’d tell you if you were standing next to me in the shop.
Contents
- What You’ll Need
- Before You Touch Anything: Safety First
- Step 1: Get Off the Road
- Step 2: Find Your Jack Point
- Step 3: Loosen the Lug Nuts (Before Jacking)
- Step 4: Jack Up the Car
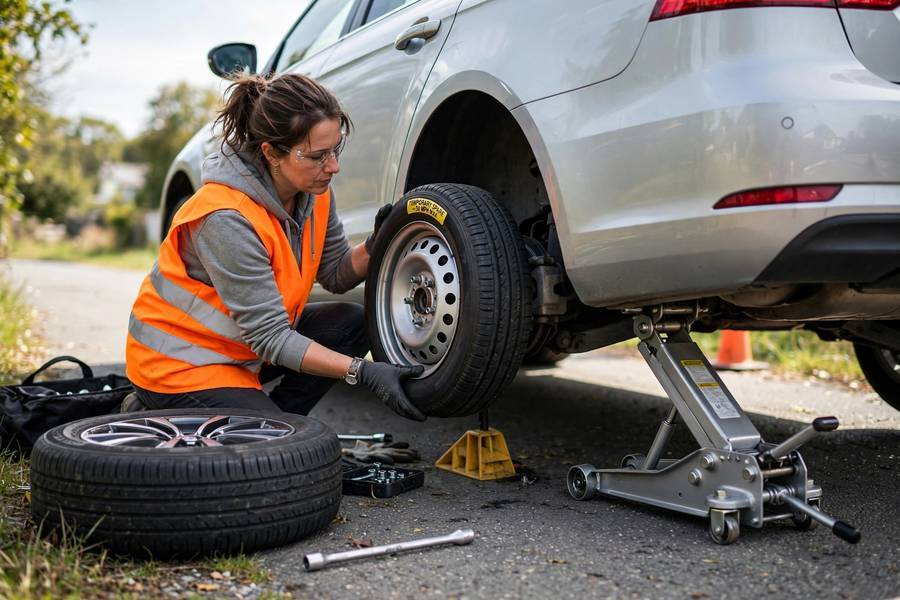
- Step 5: Remove the Flat, Mount the Spare
- Step 6: Tighten in a Star Pattern
- Step 7: Lower and Final-Tighten
- After: What to Do Next
- Mistakes That Get People Hurt
What You’ll Need
Your car probably came with most of this. Check before you’re stranded:
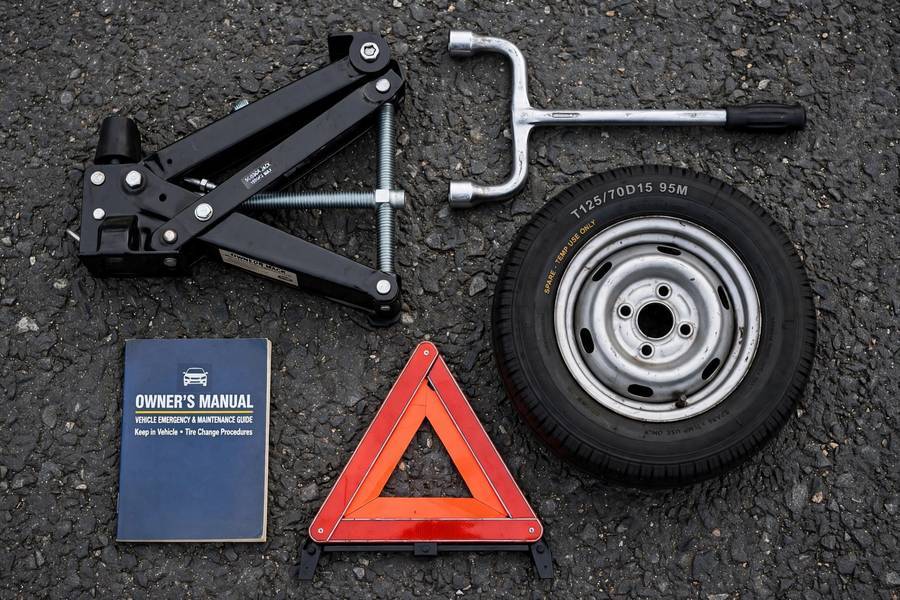
- Spare tire — full-size or donut (temporary). Check its pressure twice a year; a flat spare is a cruel joke.
- Jack — the scissor jack in your trunk works, but it’s slow and sketchy. A small hydraulic floor jack ($40–60) is one of the best investments a car owner can make. Would I spend my own money on it? Already did, twice.
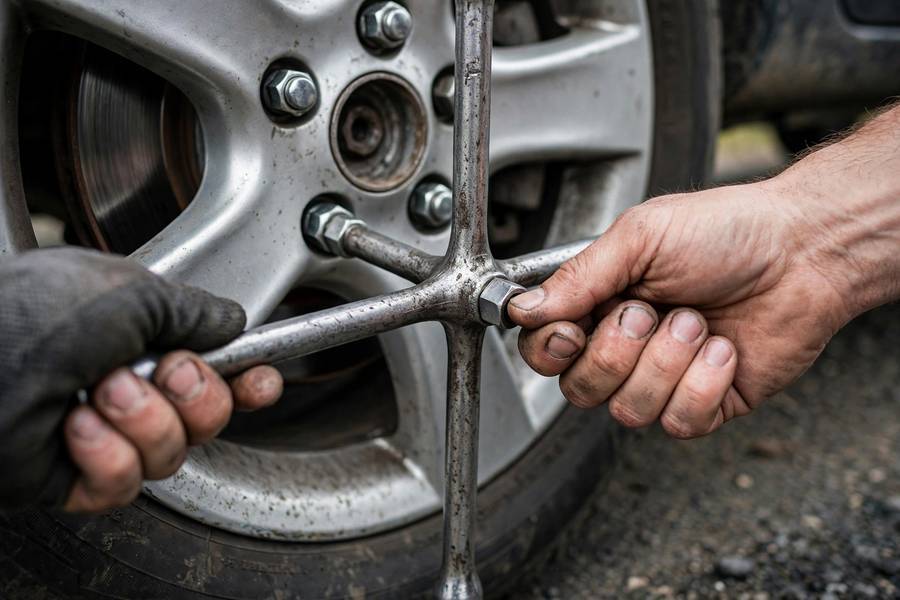
- Lug wrench — the one in your trunk, or better, a cross wrench (more leverage, less knuckle-busting).
- Owner’s manual — for jack points and lug nut torque specs.
- Extras worth having: reflective triangle or flares, flashlight, gloves, a piece of 2×4 wood (for soft ground under the jack), and your phone.
Before You Touch Anything: Safety First
I’m serious about this part. A car falling off a jack can kill you. Every year it happens to people who skipped the basics:
- Never get under a car supported only by a jack. The jack is for lifting, not holding. For a tire change you’re not going under anyway — keep it that way.
- Flat, solid ground only. Asphalt or concrete. Never on a slope, never on soft dirt if you can avoid it.
- Parking brake ON, car in Park (or in gear for manuals). Chock the opposite wheel with a rock or that 2×4 if you have one.
Step 1: Get Off the Road
Pull as far off the road as physically possible. A parking lot beats a shoulder; a shoulder beats a lane. Turn on your hazard lights immediately — before you even stop, ideally.
If you have a reflective triangle, place it 50–100 feet behind the car. At night, this isn’t optional in my book. Drivers are half-blind and half-distracted; make yourself impossible to miss.
Step 2: Find Your Jack Point
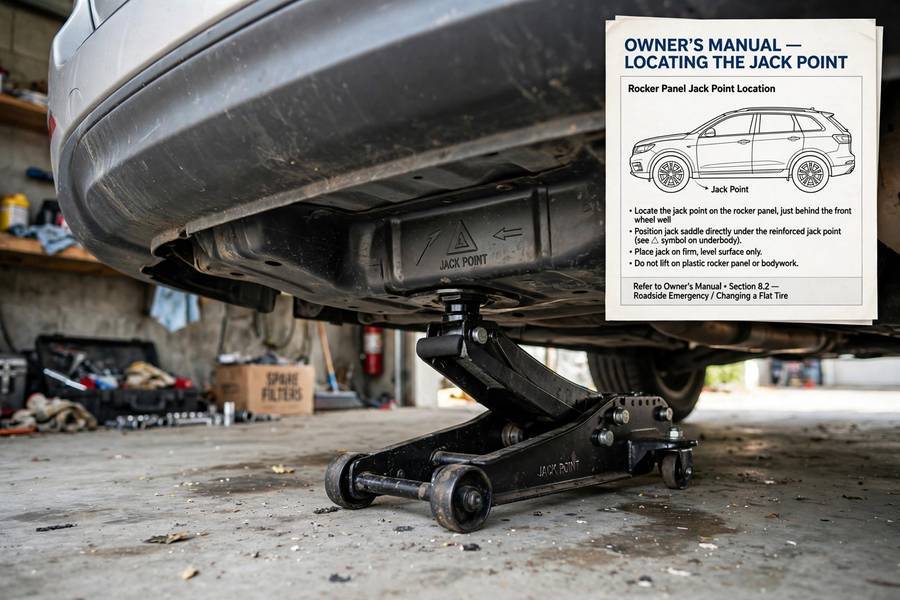
This is where people damage their cars. The jack doesn’t go “somewhere under there” — it goes on the reinforced jack point, and your owner’s manual shows exactly where.
On most cars, it’s on the pinch weld — the reinforced seam running along the bottom edge behind the front wheel or ahead of the rear wheel. There’s usually a notch or mark. Put the jack anywhere else — on plastic trim, on the oil pan, on a suspension arm — and you’ll crack, dent, or puncture something expensive.
When in doubt, check the manual. Ten seconds of reading beats a $500 repair.
Step 3: Loosen the Lug Nuts (Before Jacking)
Critical order of operations: loosen while the wheel is still on the ground. The car’s weight keeps the wheel from spinning while you break the nuts loose.
- Fit the wrench on a lug nut and turn counterclockwise.
- Just break them loose — a quarter to half turn. Don’t remove them yet.
- If a nut won’t budge: stand on the wrench (carefully), or slip a pipe over the handle for leverage. Never hit it with a hammer — you’ll damage the stud.
If your wheels have a locking lug nut (anti-theft), you’ll need the special key — usually in the glove box or with the spare. No key, no tire change. Check that you have it now, not on the highway.
Step 4: Jack Up the Car
Position the jack on the jack point and raise slowly. You’re lifting just enough for the flat tire to clear the ground — usually 2–3 inches of clearance under the tire. Higher isn’t better; it’s just more unstable.
Give the car a gentle shove once it’s up. If it rocks on the jack, lower it and reposition. A stable lift doesn’t move. This thirty-second check has saved more people than any other single habit I know.
Step 5: Remove the Flat, Mount the Spare
Now remove the lug nuts the rest of the way (counterclockwise) and pull the flat tire straight off. Wheels can stick — if it won’t budge, sit down and kick the sidewall firmly (not the rim). It’ll pop.
Mount the spare by lining up the holes with the studs and pushing it on flush. Thread the lug nuts on by hand first — clockwise — until they’re snug. If a nut won’t thread by hand, it’s cross-threaded: back it off and try again. Forcing it with the wrench strips the threads, and that’s a shop visit.
Step 6: Tighten in a Star Pattern
This is the step most guides mention and few explain why. Tighten lug nuts in a star (crisscross) pattern, not around in a circle. On a 5-lug wheel: tighten one, skip one, tighten the next — working across the wheel.
Why? Tightening in a circle pulls the wheel on crooked, warping the brake rotor and leaving the wheel seated unevenly. The star pattern pulls it on flat and even. Snug them firmly with the wrench while the car’s still in the air — you’ll do the final tightening on the ground.
Step 7: Lower and Final-Tighten
Lower the jack until the tire just touches the ground with some weight on it — enough that the wheel won’t spin. Now do your final tightening, star pattern again, putting real muscle into it. Then lower fully and remove the jack.
How tight? Your manual lists a torque spec (usually 80–100 ft-lbs for cars). Without a torque wrench, “as tight as you can get it with the lug wrench using your body weight” is close enough for a spare. A shop should verify with a torque wrench when you get the flat fixed.
After: What to Do Next
- Donut spares are temporary. 50 mph max, 70 miles max — they’re not real tires. Get to a shop promptly.
- Check the pressure of the spare and your other tires. The flat may have been slow-leaking for weeks.
- Get the flat repaired or replaced within a day or two. A nail in the tread is often a $20 plug repair; sidewall damage means a new tire.
- Re-torque the lug nuts after driving 50–100 miles. They can settle. Most shops do this free.
Mistakes That Get People Hurt
From a decade of seeing the aftermath:
- Jacking on soft ground or a slope. The car shifts, the jack tips. Flat solid ground, always.
- Removing lug nuts before loosening on the ground. Then the wheel spins freely and you’re stuck.
- Wrong jack point. Cracked rocker panels and punctured oil pans are expensive lessons.
- Driving on the flat “just to the next exit.” Every rotation destroys the tire further and can ruin the wheel. Stop immediately.
- Forgetting the parking brake. The car rolls off the jack. I’ve seen it. It’s terrifying.
- Over-tightening with an impact gun later — stretched studs snap. If a shop uses an impact wrench on your wheels, ask them to finish with a torque wrench.
Changing a tire takes fifteen minutes once you’ve done it twice. Practice in your driveway on a Saturday — I mean it. The best time to learn is not on a dark highway shoulder. Understand your car instead of fearing it, and a flat tire becomes an inconvenience instead of a crisis.
While you’re building that basic car confidence, two more skills worth having: how to jump start a car (dead batteries strand more drivers than flats do), and what cruise control is and how it works so you actually use the features your car already has.
Frequently Asked Questions
Pull off the road safely, engage the parking brake, loosen lug nuts while the car is on the ground, jack up at the correct jack point, remove the flat, mount the spare, tighten lug nuts in a star pattern, lower the car, and do a final tightening. Then drive to a shop promptly.
On most cars it’s on the reinforced pinch weld along the bottom edge, just behind the front wheel or ahead of the rear wheel — look for a notch or mark. Always confirm in your owner’s manual; jacking elsewhere can crack trim or puncture components.
The star (crisscross) pattern pulls the wheel onto the hub evenly. Tightening in a circle seats the wheel crooked, which can warp brake rotors and leave the wheel unevenly secured.
Temporary donut spares are rated for about 50 mph maximum and 70 miles maximum. They’re narrower, lighter-duty tires meant only to get you to a repair shop — get the flat fixed or replaced as soon as possible.
Before — while the tire is still on the ground. The car’s weight keeps the wheel from spinning while you break the nuts loose. Loosen them a quarter to half turn, jack up, then remove fully.