
Everyone thinks they know how to do a push-up. Almost nobody does it right. I’ve coached hundreds of people through their first real push-up, and the pattern never changes: flared elbows, sagging hips, half reps, head bobbing like a chicken. Then they wonder why their shoulders ache and their chest never grows.
A push-up done right is one of the best exercises on earth. A push-up done wrong is just… floor time. Let’s make sure yours count. This is the exact progression and form system I use with clients, from zero to twenty clean reps.
Why the Push-Up Matters More Than You Think
The push-up is the foundation of upper-body training. It works your chest, shoulders, triceps, and core in one movement — no equipment, no gym, no excuses. Every pressing exercise you’ll ever do is built on this pattern.
It’s also the most honest exercise you own. There’s no machine helping you, no spotter, no cheating the weight. You either move your body through space with control, or you don’t. That’s why I use it as a benchmark with every new client: show me ten clean push-ups and I know exactly where your upper body stands.
What a Push-Up Actually Trains
Plain language, no anatomy lecture:
- Chest (pectorals): the main driver. They do most of the pushing.
- Shoulders (front deltoids): assist the chest, especially at the top of the rep.
- Triceps: straighten your arms. The closer your hands, the more they work.
- Core and glutes: keep your body rigid. A push-up is a moving plank — your midsection works the entire time to stop your hips from sagging.
One movement, four muscle groups, zero equipment. That’s the deal.
The Perfect Push-Up: Step by Step
Follow this exactly. Don’t skip steps.
- Hands on the floor. Place them slightly wider than shoulder-width, fingers spread wide, middle fingers pointing forward. Your weight should press through your whole palm, not just your wrists.
- Set your feet. Step back into a high plank — feet together or hip-width apart. Squeeze your glutes and brace your core. Your body forms one straight line from head to heels.
- Tuck your elbows. This is the big one. As you lower, your elbows should angle back at roughly 45 degrees from your body — not flared out to 90 degrees like a T. Think “arrow,” not “T.”
- Lower with control. Bend your elbows and lower your chest toward the floor. Take 2–3 seconds on the way down. Touch your chest lightly to the floor — or get as close as you can with control.
- Push back up. Press the floor away from you, extending your arms fully without locking your elbows hard. That’s one rep.
Tempo matters: 2–3 seconds down, a brief pause, 1 second up. Slow and controlled beats fast and sloppy every time.
The Form Checklist
Run this before every set. Five points, ten seconds:
- Hands: slightly wider than shoulders, fingers spread, weight through the whole palm.
- Elbows: 45 degrees, tucked — arrow shape, not T shape.
- Hips: in line with shoulders and heels. No sagging, no piking up.
- Head: neutral. Look at the floor a few inches ahead of your hands.
- Tempo: controlled lowering, full range, no bouncing off the floor.
If any checkpoint fails, fix it before the next rep. Form is a practice, not a one-time setup.
The 5 Mistakes I Correct Every Single Week
Mistake 1: Flared elbows. Elbows out at 90 degrees puts your shoulders in a weak position and shifts the work away from your chest. Fix: tuck to 45 degrees. Imagine squeezing a tennis ball in each armpit.
Mistake 2: Sagging hips. Your lower back arches and your hips nearly touch the floor while your chest is still high. Fix: squeeze your glutes like your life depends on it, and brace your core. If you can’t hold the line, do fewer reps or switch to an easier variation.
Mistake 3: Half reps. Lowering three inches and calling it a push-up. Fix: chest to the floor, or as close as your strength allows with control. Full range or it doesn’t count. I don’t negotiate on this one.
Mistake 4: Head drop. Your chin juts forward and your head hangs toward the floor. Fix: pick a spot on the floor ahead of your hands and stare at it. Keep your neck long.
Mistake 5: Bouncing. Dropping fast and rebounding off the floor uses momentum instead of muscle. Fix: pause for a half-second at the bottom of every rep. No bounce, no stretch reflex — just you and gravity.

Can’t Do One Yet? Start Here.
Zero shame. Most beginners can’t do a full push-up on day one — and the ones who “can” are usually doing the five mistakes above. Here’s the progression, in order. Master each stage before moving on:
Stage 1: Wall push-ups. Stand arm’s length from a wall, hands on the wall, and push. Do 3 sets of 15 with perfect form. This teaches the movement pattern with minimal load.
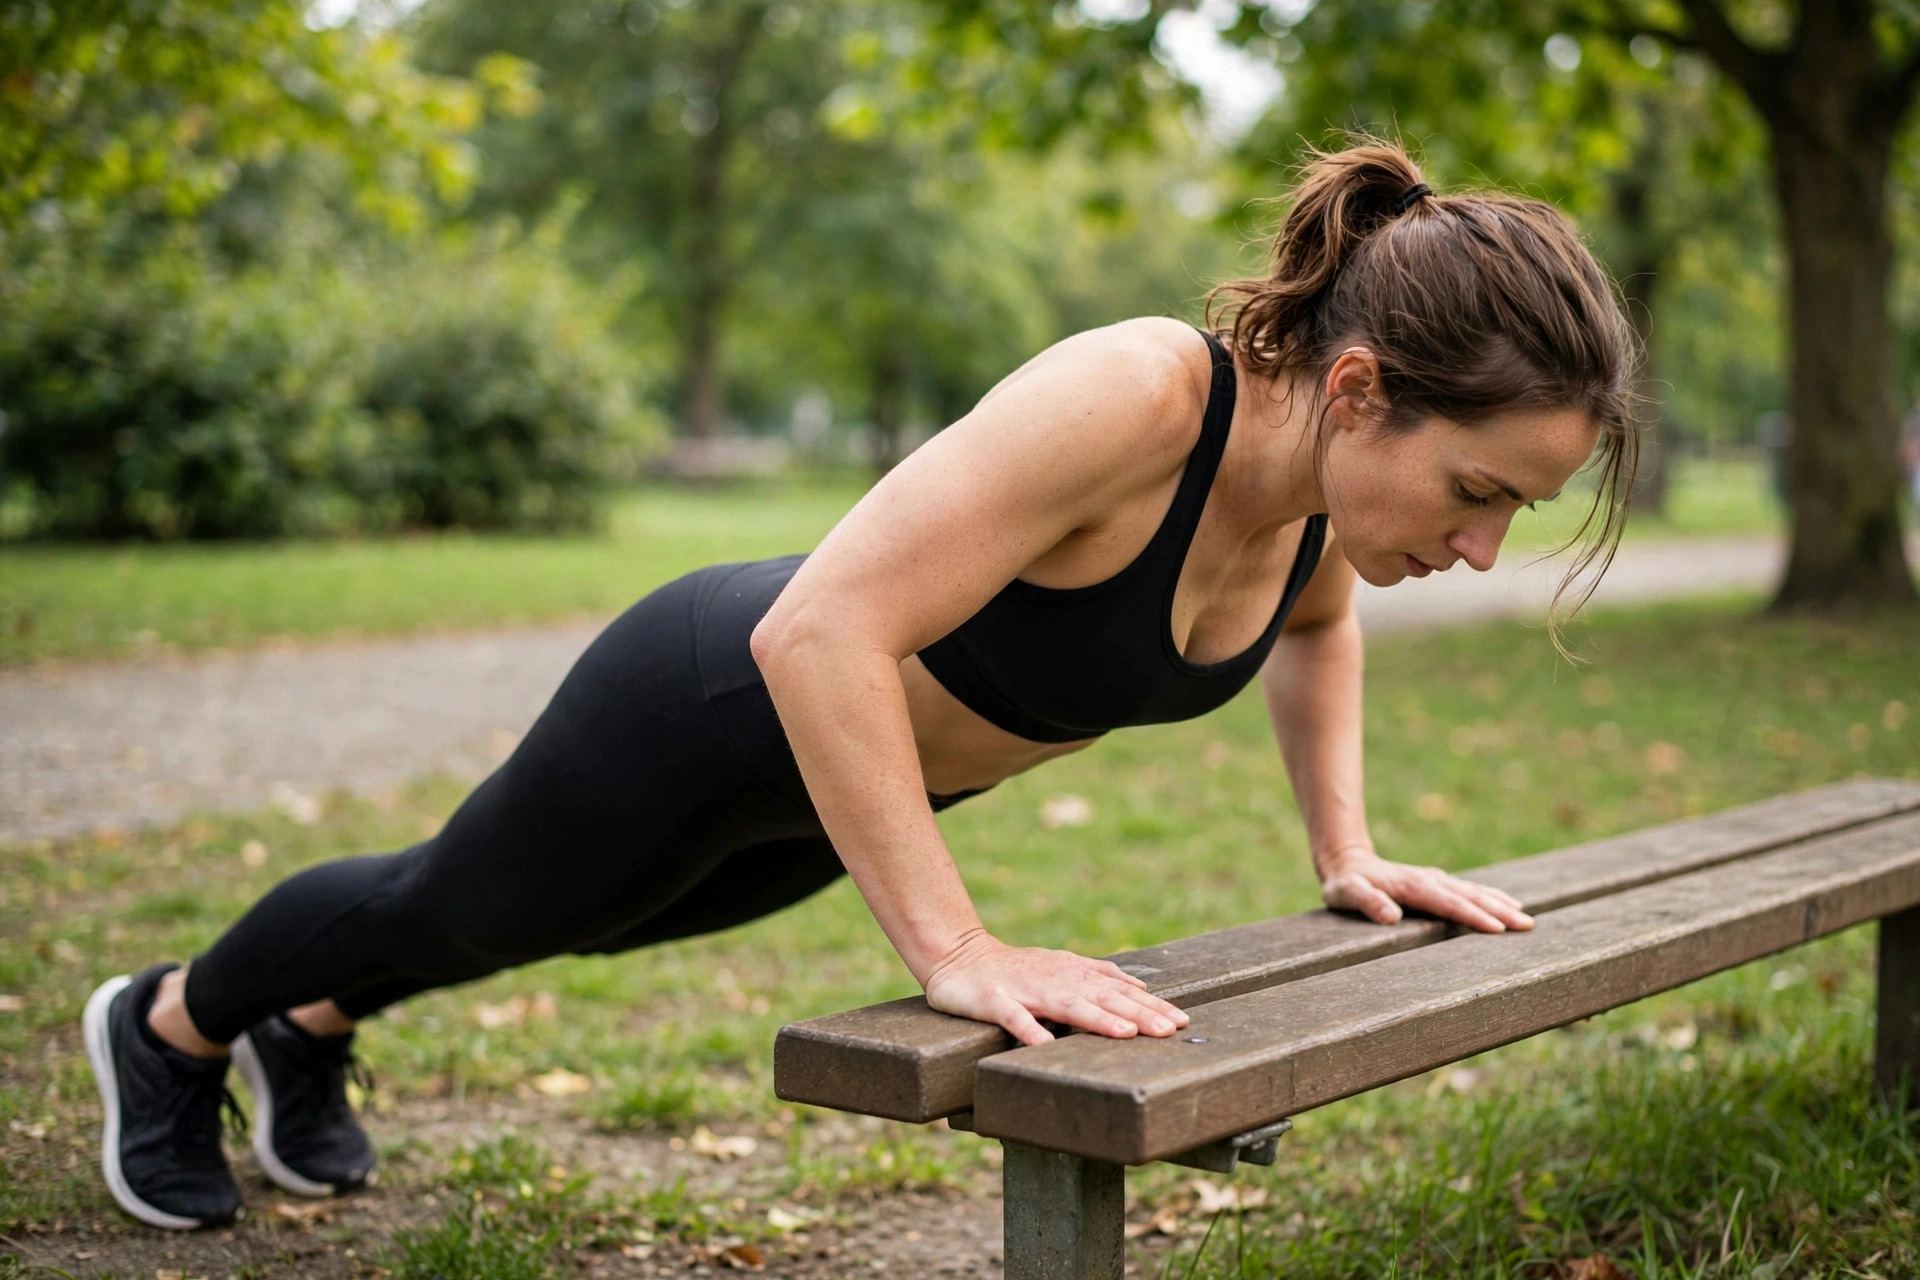
Stage 2: Incline push-ups. Hands on a sturdy elevated surface — a bench, a couch, stairs. The lower the surface, the harder it gets. Work from waist height down to knee height over a few weeks.
Stage 3: Knee push-ups. On the floor, knees down. Keep your body straight from knees to head — no folding at the hips. This is still a real push-up, and 3 sets of 12 clean knee push-ups is a genuine achievement.
Stage 4: Full push-ups. Toes on the floor, full body line. Start with sets of 3–5 perfect reps. Add one rep per set each week.
The rule: never sacrifice form to reach the next stage. Own the stage you’re on.
Too Easy? Level Up.
When 3 sets of 20 full push-ups feel comfortable, the basic version has done its job. Progress:
Diamond push-ups. Hands close together under your chest, thumbs and index fingers forming a diamond. Triceps take over. Humbling.
Decline push-ups. Feet elevated on a bench or couch. Shifts more load to your upper chest and shoulders.
Tempo push-ups. 4 seconds down, 2-second pause at the bottom, 1 second up. Same movement, twice the difficulty.
Archer push-ups. Wide hand position; lower toward one hand while the other arm stays nearly straight. Alternate sides. A stepping stone toward one-arm push-ups.
Plyometric push-ups. Explode up so your hands leave the floor. Land soft with bent elbows. Only after you own the basics — this one punishes bad form.
Programming: Sets, Reps, and Frequency
Keep it simple:
- Beginners: 3 sets, as many clean reps as you can (even if that’s 3), 3 days per week.
- Intermediate: 3–4 sets of 10–15, 3–4 days per week.
- Advanced: 4–5 sets mixing variations, 3–4 days per week.
Rest 60–90 seconds between sets. Train push-ups on non-consecutive days when starting out — your muscles adapt during recovery. When to train is less important than training consistently, but if you’re optimizing, there’s a solid look at the best time to exercise — the short version: whenever you’ll actually show up.
For a complete home program that slots push-ups into full-body training, here’s my guide on how to build muscle at home.
The 4-Week Plan: Zero to 20 Clean Push-Ups
Follow this exactly, 3 days per week (e.g., Monday, Wednesday, Friday):
Week 1: Incline push-ups (waist-high surface), 3×10. Focus: elbow tuck and full range.
Week 2: Incline push-ups (knee-high surface), 3×12. Focus: tempo — 3 seconds down.
Week 3: Knee push-ups, 3×10. Focus: straight body line, no hip fold.
Week 4: Full push-ups, 5×4. Add one rep per set each session. By week’s end: 5×6–8.
After week 4, keep adding one rep per set per week. When you hit 3×20, start the harder variations above. Simple. Boring. Works.

Frequently Asked Questions
Start with wall push-ups or incline push-ups on a sturdy elevated surface. Place hands slightly wider than shoulders, keep your body in a straight line, lower with control, and push back up. Master 3 sets of 12-15 with perfect form at each stage — wall, incline, knee — before moving to full push-ups.
Slightly wider than shoulder-width apart, fingers spread wide, middle fingers pointing forward. Press your weight through your whole palm. Hands too wide strains the shoulders; hands too narrow turns it into a triceps-dominant movement. Slightly wider than shoulders is the standard position.
You don’t need daily push-ups. Three to four sets, 3 days per week, is plenty for most people — muscles adapt during rest days. Beginners can start with 3 sets of as many clean reps as possible. Focus on adding reps week over week rather than doing random daily max-outs.
Usually it’s one of three things: insufficient pushing strength yet (totally normal), poor form making it harder than it needs to be (flared elbows, sagging hips), or trying the full version too soon. Work the progression — wall, incline, knee, full — and most people reach their first clean full push-up within 4-8 weeks of consistent training.
Yes. Push-ups load the chest through a full range of motion with your bodyweight as resistance, and progressive overload — more reps, harder variations, slower tempo — drives continued adaptation. For most people, push-up variations alone can build a strong, well-developed chest without any equipment.
Slow. A controlled 2-3 second lowering phase with a brief pause at the bottom keeps tension on the muscles and builds real strength. Fast, bouncy reps use momentum to cheat through the hardest part of the movement. Speed is for testing; slow is for building.
The Bottom Line
The push-up is simple, honest, and brutally effective — if you do it right. Set your hands, tuck your elbows, hold the line, control the tempo. Start at the stage you can do perfectly, and earn the next one. Twenty clean push-ups is a real achievement. Go get it.
For more no-excuses training guides, they’re all in the fitness section.