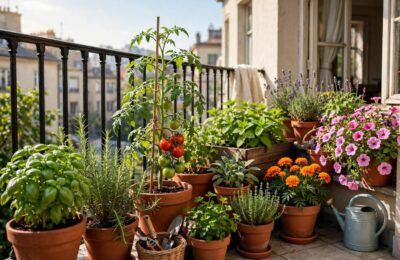

The thing that stopped me from composting for years was a single vivid image: a slimy, stinking bucket of rot in the corner of my kitchen, fruit flies staging aerial invasions. If that’s your mental picture too, I have good news — that’s not composting. That’s just letting food rot in a bucket. Real composting smells like a forest floor, takes minutes a week, and works even if you live in an apartment with no yard.
I started with a tiny countertop bin and a healthy dose of skepticism. Two years later, I produce a fraction of the trash I used to, my houseplants have never been happier, and I genuinely enjoy the small ritual of it. Here’s everything you need to start — the simple version, without the overwhelm.
Table of Contents
- What Composting Actually Is (in Plain English)
- What You Can and Can’t Compost
- Choose Your Method: 4 Ways to Compost at Home
- The Greens-and-Browns Balance
- Setting Up Your First Bin
- How to Compost at Home: The Weekly Routine
- Troubleshooting: Smells, Flies, and Other Worries
- Harvesting and Using Your Compost
- Frequently Asked Questions

What Composting Actually Is (in Plain English)
Composting is controlled decomposition. Microorganisms, fungi, and (in outdoor piles) worms and insects break down your food scraps and yard waste into humus — dark, crumbly, sweet-smelling material that’s basically a superfood for soil. You’re not inventing anything; you’re just giving nature’s recycling system a tidy container and the right conditions.
Why bother? Three reasons that convinced me:
- Less trash. Food scraps are roughly a third of household waste. Composting them can cut your garbage dramatically — fewer bags, fewer trips, less guilt on trash day.
- Free soil amendment. Finished compost is the best thing you can add to garden beds and houseplants. People pay good money for what your banana peels become.
- Landfill impact. Food rotting in landfills produces methane, a potent greenhouse gas. Composted food doesn’t. It’s one of the highest-impact small habits a household can adopt — the same spirit as thoughtful choices like the ones in our ecotourism examples: small decisions, real footprint.
You don’t need a yard, special equipment, or a science background. You need a container, scraps, and about ten minutes a week.
What You Can and Can’t Compost
The number one beginner question, answered definitively. Tape this list inside a kitchen cabinet until it’s second nature.
Yes — compost these (greens):
– Fruit and vegetable scraps, peels, cores
– Coffee grounds and paper filters
– Tea bags (remove staples; some “silky” bags are plastic — check)
– Eggshells (crushed)
– Fresh grass clippings and green plant trimmings
Yes — compost these (browns):
– Dry leaves
– Shredded newspaper and cardboard (no glossy coatings)
– Paper towels and napkins (unbleached is best)
– Straw and hay
– Wood chips and sawdust (untreated wood only)
– Cotton and wool scraps
No — keep these out (backyard bins):
– Meat, fish, and bones (attract pests; okay in sealed tumblers or Bokashi, but skip as a beginner)
– Dairy products and oils (slow to break down, cause odors)
– Pet waste from cats and dogs (pathogen risk)
– Diseased plants
– Charcoal ash and coal ash
– Glossy magazines, stickers, and anything plastic-coated
When in doubt, leave it out. One wrong item won’t ruin a pile, but the “no” list exists because those items cause the exact problems — smells, pests, slow breakdown — that make beginners quit.
Choose Your Method: 4 Ways to Compost at Home
Pick the method that fits your space, not the one that looks most impressive online:
1. Countertop collection + outdoor bin or pile. The classic. A small sealed bin (with a charcoal filter in the lid) lives in your kitchen for daily scraps; every few days you empty it into an outdoor bin, tumbler, or pile. Best for: houses with any outdoor space at all, even a patio.
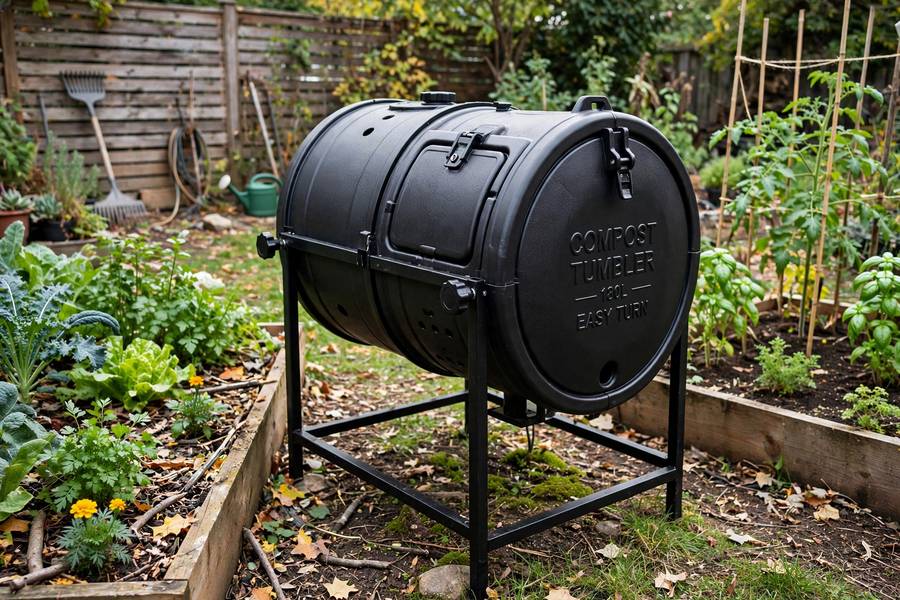
2. Compost tumbler. A sealed drum on a stand that you spin every few days. Faster than a static pile, pest-proof, tidy-looking, and it keeps everything contained — great for small yards or HOA situations. Best for: beginners who want the easiest outdoor option.
3. Worm bin (vermicomposting). A ventilated bin of bedding and red wiggler worms that live under your sink or in a closet and convert scraps into premium compost. No smell when done right, works year-round indoors, and weirdly delightful once you get over the worm part. Best for: apartments and anyone without outdoor space.
4. Bokashi. A Japanese method using an airtight bucket and inoculated bran to ferment scraps (including meat and dairy, unlike other methods). The fermented pre-compost then gets buried in soil or added to a bin to finish. Best for: small spaces and people who want to compost everything.
My honest recommendation for most beginners: start with option 1 or 2. They’re forgiving, fast to learn, and easy to upgrade later. I started with a countertop bin and a simple outdoor tumbler, and I still use both.
The Greens-and-Browns Balance
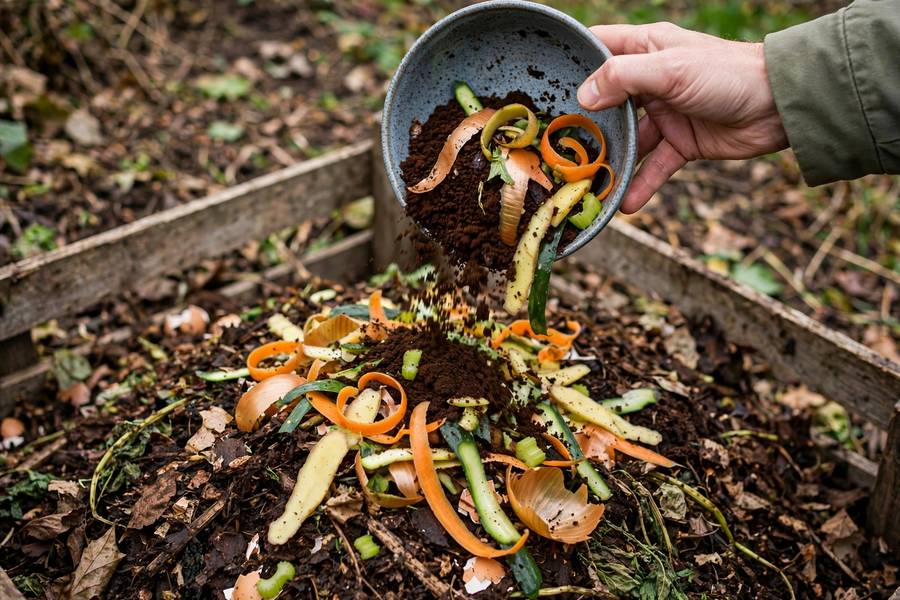
Here’s the only “science” you need: compost needs a balance of nitrogen-rich greens (food scraps, fresh clippings) and carbon-rich browns (dry leaves, shredded paper, cardboard). Think of it as a recipe — roughly one part greens to two or three parts browns by volume.
Why it matters: too many greens and your pile goes slimy, smelly, and anaerobic (the dreaded rot-bucket scenario). Too many browns and decomposition slows to a crawl. Most beginner problems are just “too many greens.”
The practical habit: every time you add kitchen scraps, cover them with a generous handful of browns — shredded newspaper, dry leaves, a scoop of wood chips. Keep a bag or bin of browns right next to your compost bin so it’s effortless. This single habit prevents most odor and pest issues.
Two more conditions the microbes need:
- Moisture: The pile should feel like a wrung-out sponge — damp, not dripping. In dry climates, sprinkle water occasionally. In wet climates, a lid or cover keeps it from getting soggy.
- Air: Microbes need oxygen. Turn or mix the pile every week or two with a fork (or spin your tumbler). No turning = slow, smelly compost. Turning = fast, sweet-smelling compost.
That’s it. Browns, moisture, air. Everything else is refinement.
Setting Up Your First Bin
Let’s get concrete. Here’s the simplest possible start — a countertop-to-outdoor-tumbler setup, under $100 total:
- Get a countertop bin (1–2 gallons) with a charcoal filter lid. Keep it where you prep food — if it’s across the kitchen, you won’t use it.
- Get an outdoor tumbler or bin. Place it on level ground with good drainage, ideally in partial shade (full sun cooks it; full shade slows it).
- Start with a browns base. Add 4–6 inches of shredded cardboard, dry leaves, or straw to the outdoor bin. This gives microbes a home and absorbs moisture from day one.
- Stock your browns supply. A paper grocery bag of shredded newspaper or a bin of dry leaves next to the outdoor bin. You’ll reach for it constantly.
- Start adding scraps. Chop larger pieces (they break down faster), empty the countertop bin every 2–3 days, and cover each addition with browns.
- Give it a spin or turn once or twice a week. That’s the whole maintenance program.
For a worm bin instead: layer damp shredded newspaper bedding, add a pound of red wigglers, feed them fruit and veggie scraps (no citrus or onions at first), and keep the bin in a 55–77°F spot. They’ll eat roughly their weight in scraps per week.
How to Compost at Home: The Weekly Routine
Here’s my actual weekly composting time investment, so you can see how undramatic this is:
- Daily (30 seconds): Toss prep scraps in the countertop bin instead of the trash. Eggshells get crushed; coffee grounds go in with the filter.
- Every 2–3 days (2 minutes): Carry the countertop bin outside, empty it, cover with browns, rinse the bin.
- Weekly (5 minutes): Spin the tumbler or turn the pile. Check moisture — grab a handful; it should feel like a wrung-out sponge. Add water or browns as needed.
- Monthly (10 minutes): Check overall progress, break up any matted clumps, make sure the browns supply is stocked.
Total: under 20 minutes a week. Less time than I used to spend taking out the trash — because there’s so much less trash now.
One lifestyle note: composting pairs beautifully with a general simplifying habit. The same afternoon you set up your bin is a great time to declutter your closet — natural fibers and old cotton clothes can even go in the compost (cut into strips), which feels wonderfully circular.
Troubleshooting: Smells, Flies, and Other Worries
Every beginner hits one of these. All are fixable in minutes:
It smells bad (ammonia or rot). Cause: too many greens, not enough air. Fix: add a big layer of browns, turn the pile thoroughly. Smell should fade within a day. A healthy pile smells earthy, like a forest floor — if yours doesn’t, it’s a browns-and-air problem, not a composting problem.
Fruit flies around the bin. Cause: exposed food scraps. Fix: always bury scraps under browns — never leave them sitting on top. For the countertop bin, empty it more often and keep the lid’s charcoal filter fresh.
It’s slimy. Cause: too wet, too many greens. Fix: add dry browns, turn to introduce air, and check drainage.
Nothing is happening. Cause: too many browns, too dry, or too cold. Fix: add greens (nitrogen kick-starts activity), moisten to wrung-out-sponge level, and be patient in winter — decomposition slows in the cold but resumes in spring.
Rodents or raccoons. Cause: usually meat/dairy scraps or an open pile. Fix: stick to the “no” list, use a sealed tumbler or bin with a locking lid, and bury fresh scraps deep. I’ve never had a pest problem in two years with a sealed tumbler.
It’s taking forever. Normal timelines: a well-managed tumbler produces finished compost in 2–3 months; a passive pile takes 6–12 months. If you’re past that with no results, the pile is probably too dry or too brown-heavy — add greens and water, then turn.
Harvesting and Using Your Compost
You’ll know it’s ready when it looks and smells like dark, crumbly soil — no recognizable food scraps, earthy smell, uniform texture. (Unfinished bits go back in for another round.)
How to harvest: For a tumbler, open the door and scoop from the finished end. For a pile, fork aside the unfinished top layer and take from the bottom. Sift through a coarse screen if you want it fine; for most uses, unsifted is fine.
How to use it:
– Garden beds: Spread 1–3 inches on top and let the worms pull it down, or mix into the top few inches of soil.
– Houseplants: Mix a handful into potting soil when repotting, or top-dress existing plants.
– Lawn: A thin top-dressing in spring feeds grass gently.
– New plantings: A scoop in each planting hole gives transplants a strong start.
And then the loop closes: your scraps fed the pile, the pile feeds your plants, your plants feed you. There’s something deeply satisfying about it — a small, daily participation in how things actually work. It won’t change your life. But it might change your kitchen, your garden, and — in the quiet way that lasting habits do — a little bit of how you move through the world. Like choosing slow travel over rushing, composting is a vote for paying attention.
Frequently Asked Questions
Yes — vermicomposting (a worm bin under the sink or in a closet) and Bokashi buckets both work entirely indoors with no smell when managed properly. Some cities also offer curbside compost collection.
A well-managed tumbler produces finished compost in 2–3 months; a passive pile takes 6–12 months. Turning regularly, balancing greens and browns, and keeping proper moisture all speed things up.
Properly managed compost smells earthy, like a forest floor. Bad odors mean too many greens or too little air — adding browns and turning the pile fixes it within a day.
Keep out meat, fish, bones, dairy, oils, cat and dog waste, diseased plants, and glossy or plastic-coated paper. These cause odors, attract pests, or introduce pathogens.
Roughly one part greens (food scraps, fresh clippings) to two or three parts browns (dry leaves, shredded paper, cardboard) by volume. Covering each scrap addition with browns prevents most odor and pest problems.
Finished compost is dark, crumbly, and uniform with an earthy smell — no recognizable food scraps. Unfinished bits go back into the bin for another round.