How to Do the Turkish Get-Up: Step-by-Step Form Guide

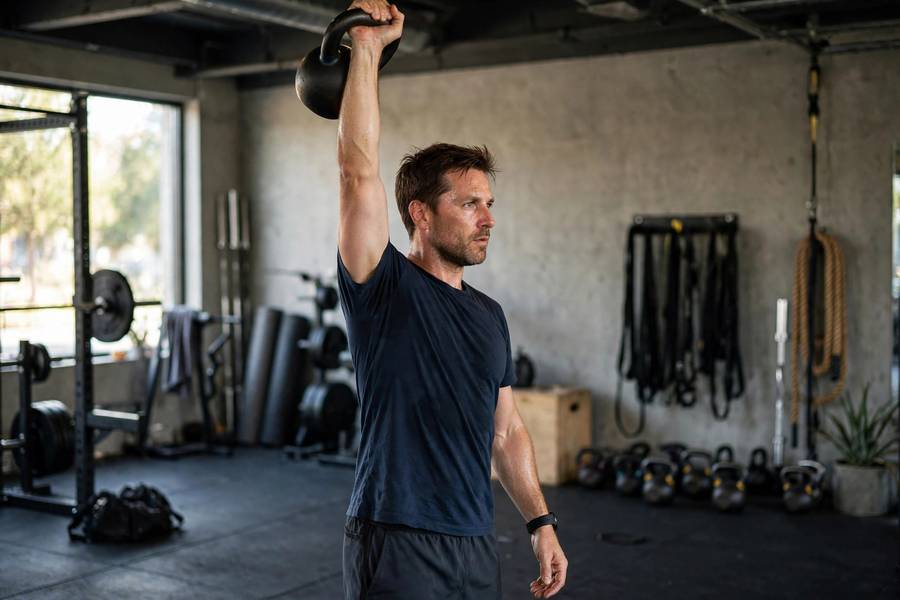
The first time I taught the Turkish get-up to a new client, it took forty minutes to get through three reps per side. He was a strong guy — deadlifted double bodyweight — and he looked at me like I’d asked him to solve a math problem. By week four he was doing get-ups with a 24kg bell and his shoulder pain from years of bench pressing had quietly disappeared. That’s the thing about this lift: it doesn’t care how strong you are until you learn how to move.
I’ve coached the Turkish get-up to everyone from 19-year-old athletes to a 61-year-old retiree with two knee replacements, and I’m going to teach it to you the way I teach it in person: one phase at a time, no skipping ahead, no ego weight. By the end of this guide you’ll know the full seven-phase sequence, how to breathe through it, the mistakes that waste everyone’s first month, and exactly how to program it so it actually makes you stronger instead of just making you tired.
What the Turkish Get-Up Actually Is
Strip away the exotic name and the Turkish get-up is simple: you lie on the floor holding a weight overhead, and you stand up without letting go of it. Then you lie back down the same way. That’s it. One rep can take 30 to 45 seconds, and in that time you move through seven distinct positions — a floor press, a sit-up, a bridge, a lunge, and a stand — all while keeping a loaded weight locked out overhead.
It looks like a circus trick. In practice it’s a moving screen for everything: shoulder stability, thoracic rotation, hip mobility, core bracing, and leg strength, all chained into one continuous effort. I use it as a diagnostic tool as much as a strength exercise. When a new client does their first get-up, I can see in about ninety seconds where their shoulder is unstable, which hip won’t open up, and where they lose their brace. No questionnaire gives me that.
The lift comes from old-time strongman training and got popularized in modern gyms through kettlebell coaching. Don’t let the heritage fool you into thinking it’s a novelty. Done with a real weight and real intent, it’s one of the highest-value movements you can put in a program. If you’re new to this style of training, start with my weight lifting for beginners guide to get your basic positions down first — the get-up assumes you already know how to brace and hinge.
Why I Program It (And Why You Should Too)
I’ll be straight with you: the get-up is not the fastest way to build any single quality. It won’t build your press like pressing will, and it won’t build your squat like squatting will. What it does is connect qualities. The shoulder that stays packed while your torso rotates underneath it is a shoulder that stays healthy when you bench, press, and do pull-ups. The half-kneeling position with weight overhead is one of the best anti-rotation core challenges I’ve found that doesn’t need a cable machine.
Three specific reasons it earns a slot in my clients’ programs:
First, loaded shoulder stability. Your rotator cuff and scapular stabilizers have to hold position for the entire rep — 30-plus seconds of time under tension with the joint in a vulnerable overhead position. Nothing else in the gym asks for this combination. My shoulder exercise guide covers the direct strength work; the get-up is the stability counterpart.
Second, it exposes asymmetries. Almost everyone has a “good side” and a “bad side” on the get-up, and the difference is usually bigger than they expect. I program it partly because that feedback is honest. You can’t hide a weak link when the weight is over your head.
Third, it’s strength you can use. Getting off the floor under load, stabilizing while you move through space — that’s what picking up a kid, carrying groceries up stairs, and not falling on ice actually require. I don’t say that to be cute. I say it because clients over forty tell me the get-up is the exercise they notice in daily life.
What You Need: Equipment and Setup
You need a kettlebell (or dumbbell), enough floor space to lie down with arms spread, and that’s genuinely it. A few specifics matter more than people think:
Kettlebell weight: Start lighter than your ego wants. Men who lift regularly should start with 12kg to 16kg; women with 8kg to 12kg. Complete beginners: start with no weight at all — a shoe balanced on your closed fist is the classic drill, and it’s humbling. Your first month of get-ups is a skill practice, not a strength workout. The weight goes up only when every phase looks clean.
Dumbbell vs. kettlebell: Kettlebells are better for this. The offset handle keeps the bell resting on the back of your forearm, which gives you feedback about wrist position. A dumbbell works fine, but it lets you cheat wrist alignment. Use what you have; don’t let equipment be the excuse.
Footwear and surface: Train barefoot or in flat shoes on a non-slip surface. Your feet need to grip through the lunge phases. I do mine on rubber gym flooring. Avoid slick wood floors unless you want an unplanned slide.
Space: You need a clear rectangle about 6 feet by 3 feet. Check overhead too — ceiling fans and low light fixtures have ended more than one get-up session abruptly.
The 7 Phases, Step by Step
Here’s how I teach it. Learn the sequence in order, and don’t add the next phase until the current one is solid. I’ll describe the right side (bell in right hand); mirror everything for the left.
Phase 1: The Safe Start
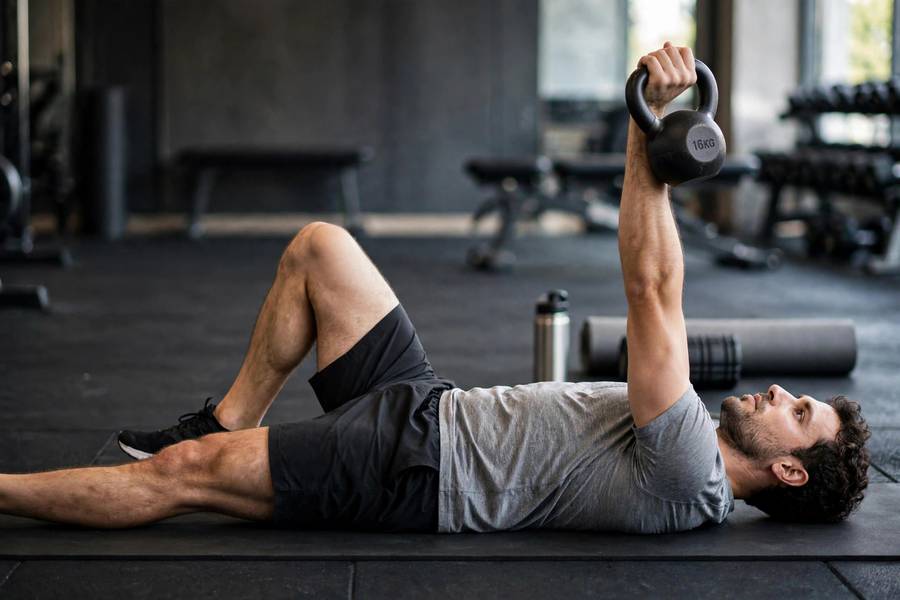
Lie on your back with the bell on the floor beside your right shoulder. Roll onto your right side, grip the bell with both hands, and roll onto your back, “punching” the bell to the ceiling with your right arm as you do. Your right arm is now vertical, wrist straight, knuckles to the ceiling. Right knee bent with foot flat; left leg straight and angled about 45 degrees out; left arm resting on the floor about 45 degrees from your body. Eyes on the bell — they stay there for the entire way up.
The two-hand roll matters. I see people try to muscle the bell up with one arm from a dead start on the floor, which is how wrists get folded back. Roll to press, every time, no exceptions. This is a non-negotiable I drill from day one.
Phase 2: To the Elbow
Drive through your right heel, brace your abs hard, and roll up onto your left elbow. Think “chest to the ceiling, not chin to chest.” Your right arm stays vertical the whole time — imagine it’s a pillar and your body moves around it. The most common fault here is the bell drifting toward your head as you sit up. Fix it by actively reaching the bell toward the ceiling as you roll; that cue keeps the shoulder packed.
Phase 3: To the Hand (Tall Sit)
From your elbow, straighten the left arm and post up onto your left hand. You’re now in a tall seated position with your right arm still vertical. Squeeze your right glute — this fires the whole right side and takes slack out of the system. Chest stays proud. If your left wrist complains here, spread your fingers wide on the floor; it distributes the load.
Phase 4: The Hip Bridge and Leg Sweep
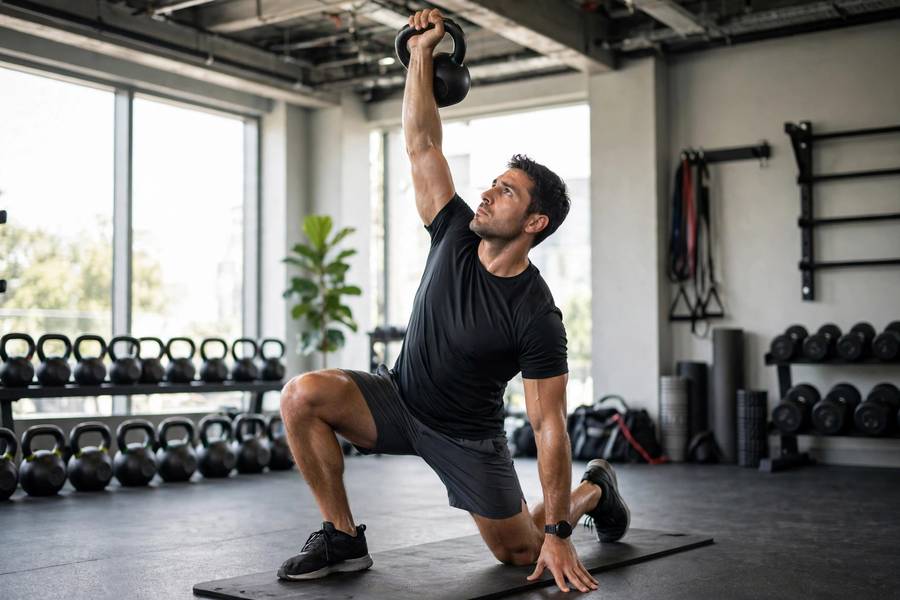
This is where people get lost, so read carefully. Lift your hips off the floor into a bridge by driving through your right heel and left hand. Your body should form a straight line from right knee to left shoulder. Now — keeping the hips high — sweep your left leg back and thread it under your body until your left knee lands on the floor behind you, roughly under your left hip. Straighten your right leg out in front as you do this.
The cue I use: “hips high, knee finds the floor.” If your hips sag during the sweep, the shoulder takes the load badly. Practice this phase slowly. Speed here is the enemy of good positions.
Phase 5: Half-Kneeling (The Lunge Position)
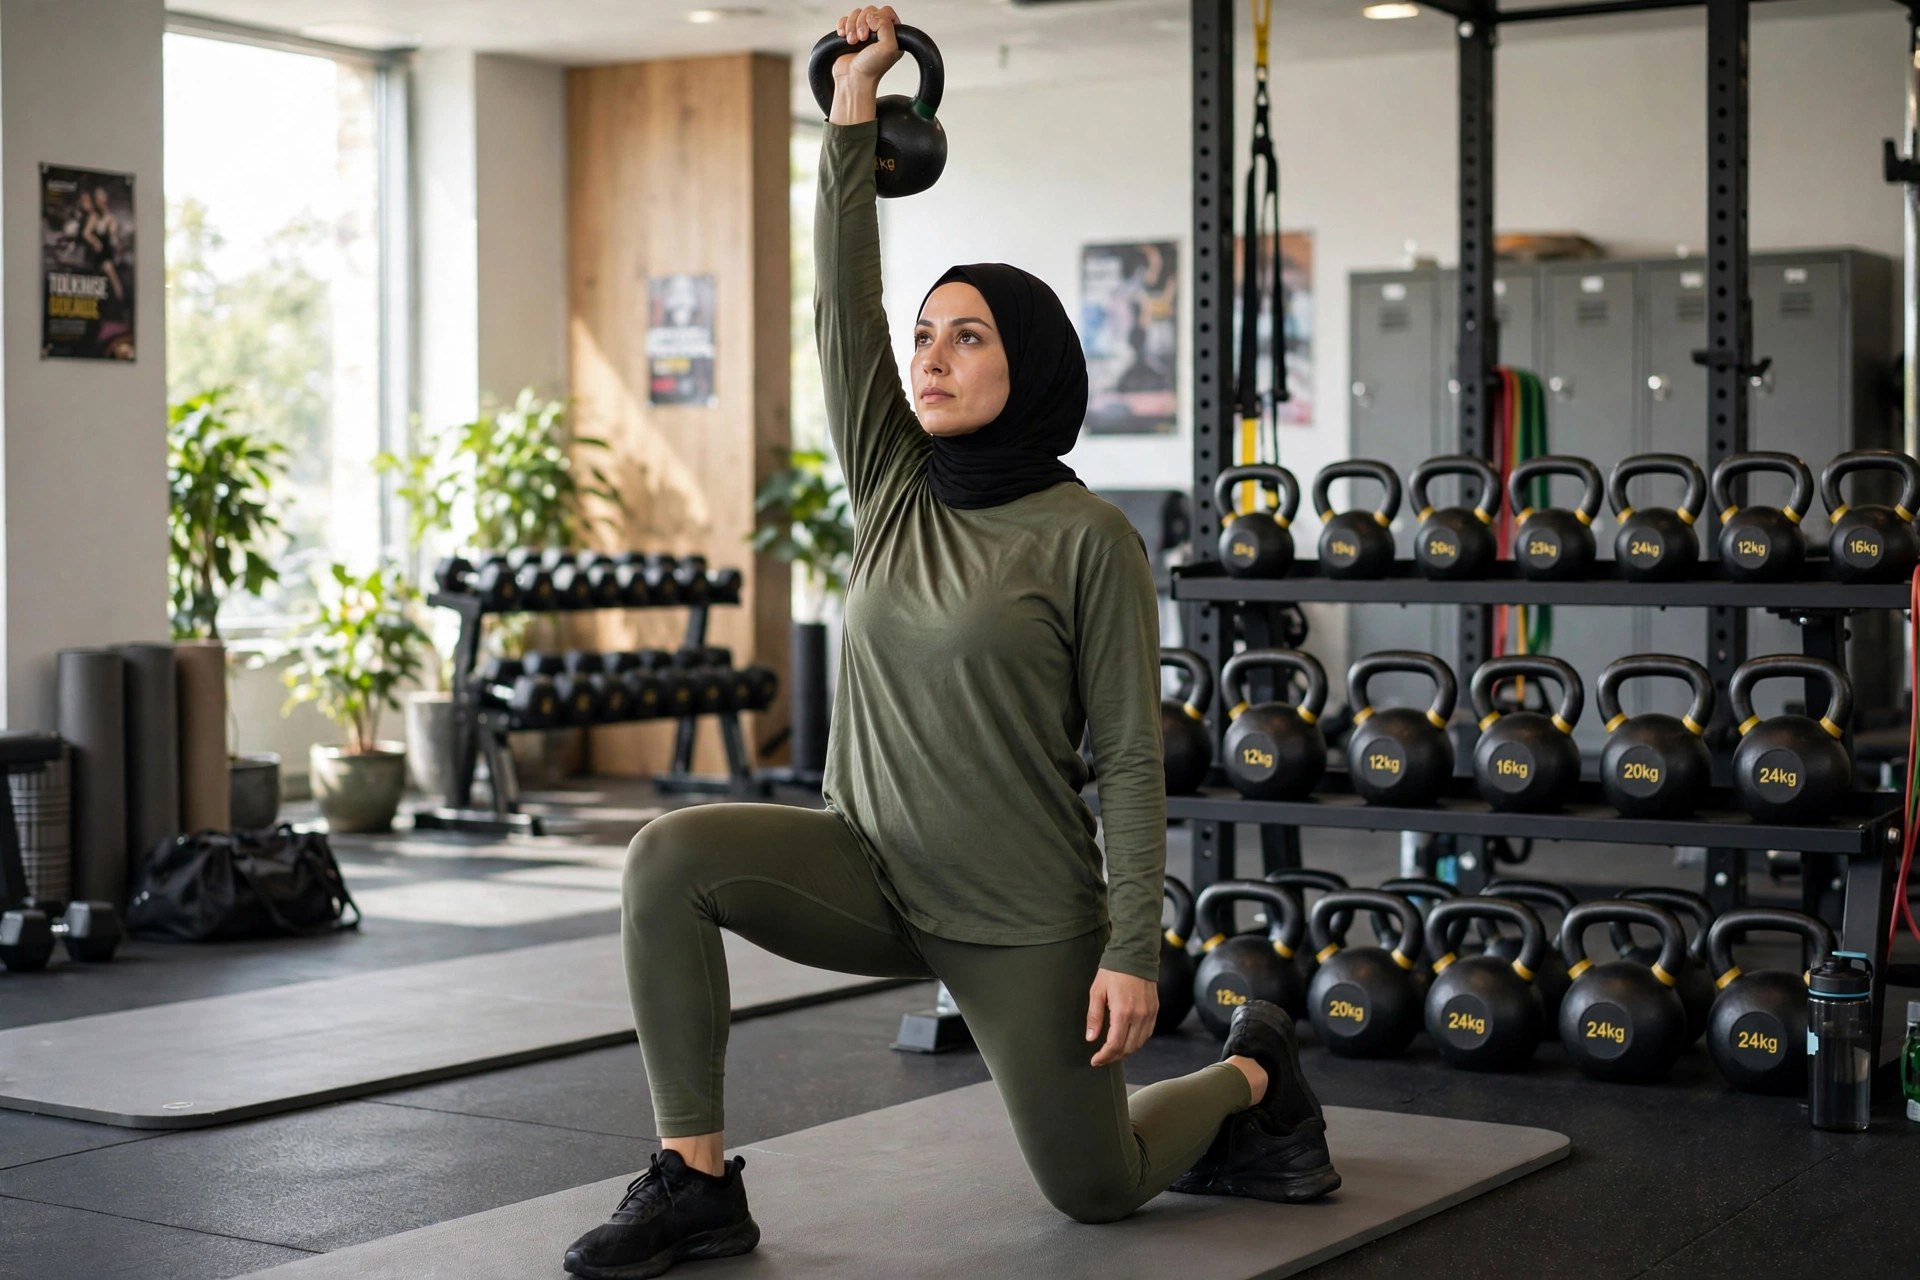
You’re now in a half-kneeling lunge: left knee down, right foot forward, torso tall, bell still locked out overhead. Before you stand, check three things: right knee tracking over the right foot (not caving in), ribs down (not flared), and eyes still on the bell. This is the “windmill guard” moment — your midsection is resisting rotation under load, which is the entire point of the exercise. Take a breath here. Own the position for a full second.
Phase 6: Stand Up
Drive through both legs and stand. Keep the bell locked out — don’t press it higher or let it drift. Stand tall, feet together, bell overhead. That’s the top of the rep. Pause, breathe, and appreciate that you just did the hardest part.
Phase 7: Reverse Everything
Now go back down exactly the way you came: step back into the lunge, lower the knee to the floor, windshield-wiper the front leg back through, sit the hips down, post to the hand, drop to the elbow, and roll to the floor. The way down is where most injuries-in-waiting happen, because people relax. Don’t. The descent is half the training value. Control every inch, eyes on the bell until it’s parked on the floor beside you.
How to Breathe During the Get-Up
Nobody teaches this and everyone needs it. A get-up rep lasts 30 to 45 seconds, and you cannot hold your breath the whole time. The rule: exhale on transitions, inhale in stable positions. Breathe out as you roll to your elbow. Take a breath in the tall sit. Exhale through the bridge and sweep. Inhale in the half-kneel. Exhale to stand.
Never exhale completely and go soft under the bell — that’s how shoulders get cranky. Keep about 70 percent of your brace on every breath. Think of it as breathing behind a shield: air moves, but the midsection never fully releases. Practice this with a light bell until it’s automatic. When the weight gets serious, your breathing pattern is what keeps you safe.
5 Mistakes That Ruin Everyone’s First Month
1. Bent wrist under the bell
If your wrist bends back, the weight sits behind your forearm instead of stacked over it, and every phase becomes a wrist endurance test you will lose. Fix: make a fist like you’re punching the ceiling and keep the knuckles pointing straight up. The bell handle should sit diagonally across your palm, not in your fingers.
2. Looking away from the bell
Eyes on the bell the entire way up and the entire way down. The moment you look away, your neck rotates, your shoulder follows, and the packed position falls apart. I tell clients: the bell is the sun, and you’re a sunflower. Cheesy, but nobody forgets it.
3. Rushing the sweep (Phase 4)
The leg sweep is the technical crux, and rushing it is how knees get torqued and shoulders get yanked. If this phase feels chaotic, go back to practicing it with a shoe on your fist or no weight at all until it’s boring. Boring is the goal. Boring means owned.
4. Starting too heavy
I said it before and I’ll say it again because nobody listens the first time: your first month is skill practice. A 16kg bell done badly teaches your nervous system bad patterns that take months to unlearn. A 12kg bell done perfectly builds the positions that let you own the 24kg later. Check your ego at the door — it’s the cheapest coaching you’ll ever get.
5. Skipping the way down
Half the benefit lives in the descent. The reverse sequence loads the shoulder stabilizers eccentrically and demands just as much control. People who “finish” at the top and flop back down are leaving 50 percent of the exercise on the table. Every phase down gets the same attention as every phase up.
How to Program the Turkish Get-Up
Here’s exactly how I slot it into training. The get-up works best as a warm-up skill or as a standalone practice, not as a fatigued finisher — doing these tired is how form breaks down under load overhead, which is the one place you don’t want that.
As a warm-up (my default): 3 sets of 1 rep per side with a light-to-moderate bell, done before your main lifts. Takes about 8 minutes and primes shoulders, hips, and brace better than any band routine I’ve used. Pair it with your main strength work — it fits naturally into a push-pull-legs routine on any training day.
As a practice session: 5 sets of 1 rep per side, resting 60 to 90 seconds between sets, with a challenging-but-clean bell. Total of 10 reps. Do this 2 to 3 times per week on non-consecutive days. Add weight only when all 10 reps look identical — same speed, same positions, no wobble.
The classic standard: The well-known “Simple” standard is 10 get-ups (5 per side) in 10 minutes with 32kg for men and 24kg for women. That’s an advanced goal — treat it as a year-two target, not a month-two target. Most of my clients take 6 to 12 months to get there, and there’s zero shame in that timeline.
Where it fits conceptually: The get-up is the definition of a compound movement — it just takes the concept to its logical extreme. And because the half-kneel phase is essentially a moving plank, your plank form directly carries over; if your planks are sloppy, your get-ups will be too.
Regressions and Progressions
Can’t do it yet? Regress: Start with the “shoe get-up” — balance a shoe on your closed fist and do the full sequence with zero added weight. Then do half get-ups: just phases 1 through 3 (up to the tall sit) and back down, which builds the pattern without the complex sweep. Then add a light bell to the full sequence.
Owning it and want more? Progress: First, slow it down — try 60-second reps with your current bell; time under tension goes through the roof. Then go heavier. Then add a press at the top of each phase (the “get-up with press” variation). Advanced trainees can try bottoms-up get-ups, holding the bell upside down — your grip and shoulder stability either rise to the occasion immediately or the bell tells you you’re not ready. It doesn’t negotiate.
One more progression nobody talks about: do your get-ups after a shoulder-focused session when the stabilizers are pre-fatigued, with a light bell. It teaches the small muscles to work when they’re tired, which is exactly when you need them most.
Frequently Asked Questions
Most people learn the basic sequence in 2 to 3 sessions, but doing it well takes 4 to 8 weeks of consistent practice. Plan on 2 to 3 short practice sessions per week. The phases feel awkward at first — that’s normal. It clicks suddenly, usually around week three, and then progress speeds up.
Start with no weight — a shoe balanced on your fist — until you can do the full sequence smoothly. Then move to 8kg to 12kg for most women and 12kg to 16kg for most men. Add weight only when every rep looks identical. This is a skill lift first; the strength comes from owning the positions.
Done correctly, it’s one of the best things you can do for shoulder health — it builds loaded stability through a full range of motion. Done with a bent wrist, rushed phases, or too much weight, it can irritate the shoulder. The exercise isn’t dangerous; sloppy execution under load is. Learn it light and keep your eyes on the bell.
Light get-ups as a daily warm-up are fine — many coaches do 1 to 2 reps per side with an easy bell every training day. Heavy get-up practice should be 2 to 3 times per week with rest days between, because the shoulder stabilizers need recovery like any other muscle. Listen to your joints; achy shoulders mean back off.
Kettlebell is better. The offset handle rests the bell on your forearm and gives instant feedback on wrist position — if your wrist bends, you feel it immediately. A dumbbell works and is fine if it’s what you have, but it lets you get away with sloppy wrist alignment. Technique matters more than the implement.
Learn this lift properly and it’ll pay you back for years — healthier shoulders, a stronger midsection, and a party trick that actually means something. Start light, own every phase, and don’t rush the sweep. Your future self, the one pressing heavy weight overhead without pain, will thank you.