
Here’s the thing about the Turkish get-up: it looks complicated, and at first, it kind of is. But it’s the single most useful exercise I teach beginners. A move you learn once and use forever beats any fancy program.
The Turkish get-up takes you from lying flat on your back to standing tall, holding a weight straight overhead the whole way. It trains shoulder stability, core bracing under load, and your whole body moving as one unit — the way it has to in real life.
Most people can learn the basic version in one session. Mastering it takes far longer, and that’s exactly why it’s worth your time.
Table of Contents
- Why the Turkish Get-Up Is Worth Learning
- Muscles Worked by the Turkish Get-Up
- What You Need to Get Started
- How to Do a Turkish Get-Up: The 7 Steps
- Common Turkish Get-Up Mistakes
- How to Program Turkish Get-Ups
- Regressions and Progressions
- Frequently Asked Questions

Why the Turkish Get-Up Is Worth Learning
I don’t sell magic. No exercise is magic. But the Turkish get-up is about as close as it gets to a “one move that does a lot” — because it forces everything to work together.
Think about your day. You get off the floor. You carry things. You stabilize when something shifts. You brace your midsection without thinking. The get-up trains all of that in one sequence.
Here’s what you’re actually getting:Shoulder stability. Holding a weight locked overhead while you move underneath it trains the small stabilizers around your shoulder — the stuff that keeps shoulders healthy long-term.
Real core strength. Not crunch-style abs — your core’s actual job is keeping your spine safe while your limbs move. The get-up makes it do exactly that.
Coordination and body awareness. The sequence has distinct steps you can’t rush. You learn where your body is in space — something most of us lost sitting at desks.
A built-in warm-up. Five minutes of light get-ups before training warms everything: shoulders, hips, core, glutes.
None of this requires heavy weight. The get-up is a skill first and a strength exercise second. Learn it light, then load it.
Muscles Worked by the Turkish Get-Up
Ask me “what muscles does the Turkish get-up work?” and the honest answer is: pretty much all of them. Here’s the breakdown by phase:
- Shoulders and rotator cuff — stabilizing the weight overhead the entire time
- Core and obliques — bracing as you move through every transition
- Glutes — driving hips up in the bridge and stabilizing in the lunge
- Quads — standing up from the lunge and controlling the descent
- Lats — packing the shoulder and pulling yourself into position
- Hip flexors and adductors — sweeping the leg through
- Forearms and grip — holding the weight steady for 30–60 seconds per rep
You’re under tension for a long time, and nothing gets to check out. That’s genuine full-body work.
If you’re already doing bodyweight exercises at home, the get-up is the natural next skill — it builds on the same coordination and control.
What You Need to Get Started
Good news: almost nothing.
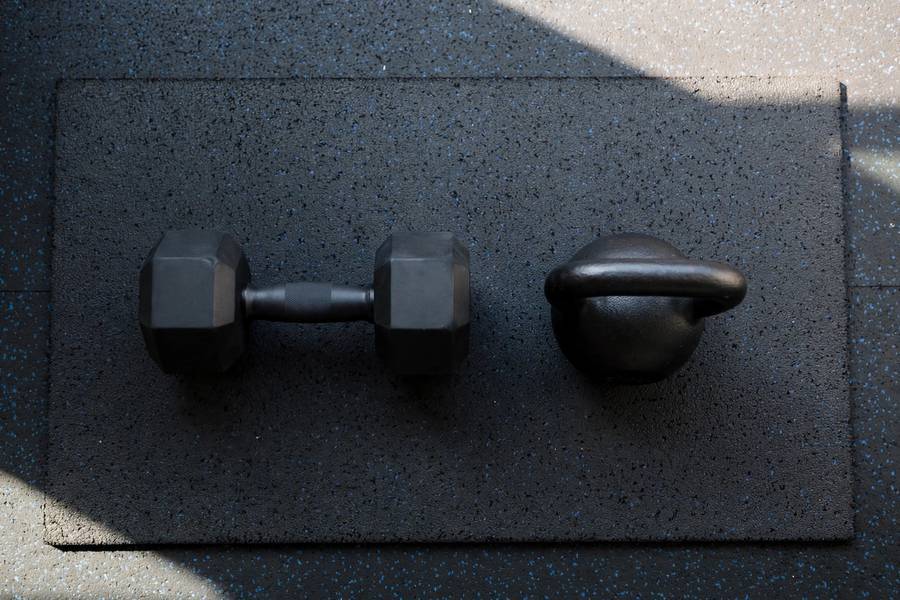
A kettlebell is ideal. The offset handle lets the weight sit on the back of your wrist, keeping it stable overhead. A dumbbell works too — slightly more awkward, but fine for learning.
Weight selection matters more than you think. Start lighter than your ego wants. For most men, that’s 8–12 kg (18–26 lbs). For most women, 6–8 kg (14–18 lbs). Your first session should use a weight you could hold overhead while having a conversation.
Space. About a yoga mat’s worth of floor, clear of anything you could knock over. In a busy house, practice when you won’t be interrupted — a wandering dog is a real hazard with weight overhead.
Optional: a shoe. The old-school drill: balance a shoe on your closed fist and do the get-up without dropping it. Great first step before touching a weight, and it costs nothing.
You don’t need a gym membership. I’ve taught get-ups in living rooms, parks, and garage gyms. Flat ground and a little space is enough.
How to Do a Turkish Get-Up: The 7 Steps
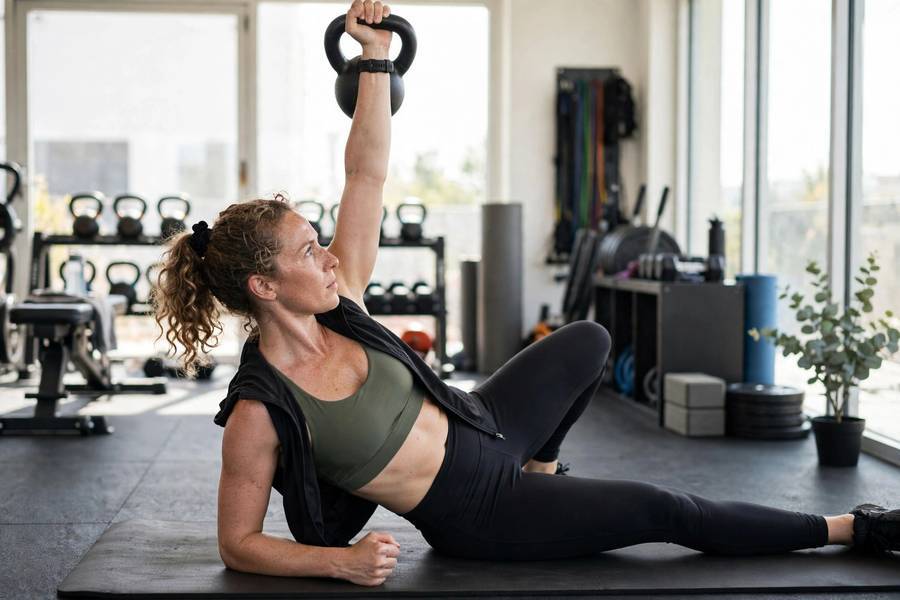
Learn this one step at a time. Read through the whole sequence first, then practice each transition separately before linking them. The description below is for your right side — always train both sides equally.
Step 1: Set Up on the Floor
Lie on your back. Roll to your right side, press the kettlebell up with both hands, then roll back down with your right arm locked straight overhead. Right leg straight, left leg bent with foot flat. Your right eye stays on the weight — that’s your safety cue for the whole movement. Left arm rests on the floor at about 45 degrees. Breathe. Settle in.
Step 2: Roll to the Elbow
Push through your left heel and roll up onto your left elbow — a roll, not a sit-up. Your right arm stays locked overhead, eyes on the weight. Pause here the first few sessions. This position should feel solid, not rushed.
Step 3: Press to the Hand
From your elbow, press your left hand flat into the floor so you’re sitting tall. Chest open, eyes on the weight, right arm still a straight pillar.
Step 4: Lift the Hips (The Bridge)
Squeeze your glutes and drive your hips up. Your body forms a straight line from right shoulder to right knee; the weight doesn’t move — your hips move under it. This is where people wobble. Squeeze hard: a strong bridge makes everything after it easier.
Step 5: Sweep the Leg
Lower your hips slightly and sweep your left leg back underneath you, planting the knee on the floor — a half-kneeling position. Eyes still on the weight, right arm still locked. Place the leg with control; don’t drag or kick it.
Step 6: Stand Up
Shift your weight forward, bring your left hand off the floor, and stand up — lunge-style — squeezing your glutes at the top. That’s the get-up complete.
To come back down, reverse every step in order. Most people rush the descent. Don’t — half the benefit is in the controlled way down.
Step 7: Lock In the Finish
At the bottom, pause with the weight still overhead for a breath, then lower the kettlebell to your chest and set it down. That’s one rep — 30–60 seconds of continuous tension per side. That’s not slow; that’s the point.
For more on building a stable midsection to support moves like this, see my guide on how to do a plank correctly — the bracing pattern is the same.
Common Turkish Get-Up Mistakes
I’ve watched hundreds of people learn this. The mistakes that show up every time:
Bending the overhead arm. The working arm stays straight. If it’s bending, the weight is too heavy — drop down.
Looking away from the weight. Eyes stay on the kettlebell from floor to standing. The moment you look down, your balance shifts. The one rule I never let slide.
Rushing the transitions. Every step gets a small pause while you’re learning. Slow get-ups with good form are the whole point.
Starting too heavy. People grab their swing weight and immediately lose the overhead position. The get-up weight is always lighter than your other lifts. No shame in it.
Skipping the non-dominant side. Do both sides, every session. An unbalanced practice builds the imbalances you’re trying to fix.
Holding your breath. Breathe behind the brace — short, controlled breaths. Holding your breath through a 45-second rep is a fast track to dizziness.
How to Program Turkish Get-Ups
You don’t need a complicated plan:
Beginners (first 4–6 weeks): 3–5 reps per side, 2–3 times per week, light weight. Focus on the skill — as a warm-up or a short session of its own.
Intermediate: 5 reps per side with a moderate weight, or timed sets — 5 minutes per side, resting as needed.
As a warm-up: 2–3 light get-ups per side before your main training. Shoulders, hips, and core all wake up in about ten minutes.
As a workout: 5 get-ups per side, then a set of push-ups or presses, 3–4 rounds. Simple and effective.
When it comes to timing, the best time to exercise is whenever you’ll actually show up — but I find get-ups pair well with morning training, when you’re fresh and focused.
Add weight only when every step feels smooth and controlled at your current weight. If one phase wobbles, stay put — the get-up rewards patience.
Regressions and Progressions
Not everyone starts at the same place:
Regression 1 — The shoe drill. Balance a shoe on your fist and do the sequence. Shoe stays on, your movement is smooth. Master this before touching weight.
Regression 2 — Half get-up. Only go as far as the tall sit (Step 3), then reverse. Good for cranky knees or limited mobility.
Standard — Full get-up. The seven steps, kettlebell overhead, both sides.
Progression 1 — Heavier bell. Add weight gradually — 2–4 kg jumps.
Progression 2 — Press at each step. Add an overhead press at the tall sit and at standing. Turns a skill drill into serious strength work.
Progression 3 — Double get-up. One kettlebell per arm. Not for beginners — build up over months.
Spend at least a month at each level before moving up. Rushing the progression is how you get hurt; respecting it is how you get strong.
The Turkish get-up won’t give you a six-pack in six weeks, and anyone who says one exercise will is selling something. What it will give you is a body that moves well and shoulders that stay healthy. That’s worth more.
Frequently Asked Questions
Most people can perform a basic full get-up with light weight in a single 20-30 minute session. Getting every step smooth and controlled usually takes 2-4 weeks of regular practice. True mastery — heavy weight, flawless transitions — takes months, but you get useful training benefits from day one.
Start with 6-8 kg (14-18 lbs) for most women and 8-12 kg (18-26 lbs) for most men. The right weight is one you can hold locked overhead with a straight arm through every step without wobbling. When in doubt, go lighter — the get-up is a skill exercise first, and form matters far more than load.
Effectively, yes. A single rep trains the shoulders and rotator cuff (stabilizing the weight overhead), the entire core, glutes, quads, lats, and grip. One rep takes 30-60 seconds of continuous tension, so a few sets per side add up to substantial full-body work without needing any other exercises.
Yes, a dumbbell works fine for learning. The kettlebell’s handle shape lets the weight rest on the back of your wrist, which feels more stable overhead, but a dumbbell is perfectly serviceable. The movement pattern and benefits are identical either way.
Beginners should do 3-5 reps per side, 2-3 times per week, focusing on technique. Intermediate trainees can work up to 5 reps per side with moderate weight, or do timed sets of about 5 minutes per side with rest as needed. Quality always beats quantity — a slow, controlled rep is worth more than three rushed ones.
Turkish get-ups are often used to build shoulder stability, but if you have an existing shoulder injury or pain, get clearance from a qualified professional before trying them. Start with the no-weight shoe drill to test the movement pain-free, and stop immediately if any step causes sharp or pinching pain.