Replace Ceiling Fan With Light Fixture: The Full DIY Guide


Swapping a dated or wobbly ceiling fan for a clean light fixture is one of those upgrades that changes how a whole room feels. If you plan to replace ceiling fan with light fixture hardware, the good news is that the electrical work is straightforward: fans and lights use the same basic wiring. The things that trip people up are the mounting (fans hang from heavy-duty boxes) and dealing with extra wires from the fan’s separate controls. Here’s the full process, done safely.
Safety First: Electricity Demands Respect
Turn off the breaker controlling the fan at your electrical panel, then verify with a non-contact voltage tester at the fan itself. Flip the wall switch on and confirm the fan doesn’t run, then test the wires with the tester before touching anything. Tape the breaker in the off position with a note. If the wiring in the box looks damaged, scorched, or confusing, or if there’s aluminum wiring (dull silver instead of copper color), call an electrician. This guide assumes standard modern copper wiring.
Check the Ceiling Box
Ceiling fans must be mounted to fan-rated boxes, which are sturdier than standard light boxes because they handle vibration and weight. Here’s the thing: a fan-rated box is more than strong enough for a light fixture, so you’re usually fine. What you need to check is the box’s condition. Wiggle it; it should be rock solid, anchored to a joist or a brace bar. If it’s loose, tighten or replace it before hanging anything. Also check the box depth and that it’s rated for the fixture weight; most are, but heavy chandeliers have their own requirements.
One more consideration: fan boxes often sit lower or have a different profile than what your new fixture’s canopy expects. Hold the new fixture’s mounting bracket up to the box before you start to confirm the screw spacing lines up. Universal crossbar brackets solve most mismatches.
What You’ll Need
- New light fixture with mounting hardware
- Non-contact voltage tester
- Screwdrivers and wire strippers
- Wire nuts (usually included with the fixture)
- Electrical tape
- Ladder
- Helper to hold the fixture while you wire it (strongly recommended)
Remove the Old Ceiling Fan
Step 1: With the breaker off and verified, remove the fan’s light kit and bulbs first to reduce weight. Then detach the fan blades; most unscrew from the motor housing with two or three screws each.
Step 2: Lower the motor housing. Fans typically hang from a downrod hooked into a mounting bracket. Support the motor’s weight, unhook it, and let it hang from the bracket while you disconnect the wires.
Step 3: Disconnect the wiring. You’ll typically see the fan’s black (and possibly blue) wire nutted to the ceiling’s black wire, white to white, and green or bare copper to the box’s ground. Unscrew the wire nuts, separate the wires, and set the fan aside. Take a photo of the ceiling box wiring before you disconnect anything.
Replace Ceiling Fan With Light Fixture: Wiring the New Light
Step 1: Sort out the wires. In the ceiling box you’ll usually find black (hot), white (neutral), and green or bare copper (ground). Some fan installations have an extra red wire, which was the second hot for separate fan/light switch control. If you’re not using a separate switch for the new light, cap the red wire with a wire nut and tuck it safely into the box.
Step 2: Mount the bracket. Attach the new fixture’s mounting bracket or crossbar to the ceiling box with the provided screws. Make sure it’s level and secure.
Step 3: Connect ground first. Join the fixture’s green or bare ground wire to the box’s ground wire (and to the box itself if it’s metal) with a wire nut.
Step 4: Connect neutral, then hot. White fixture wire to white ceiling wire, black fixture wire to black ceiling wire, each with a wire nut twisted on firmly. Give each wire nut a gentle tug to confirm it’s tight, then wrap a turn of electrical tape around the base of each nut for security.
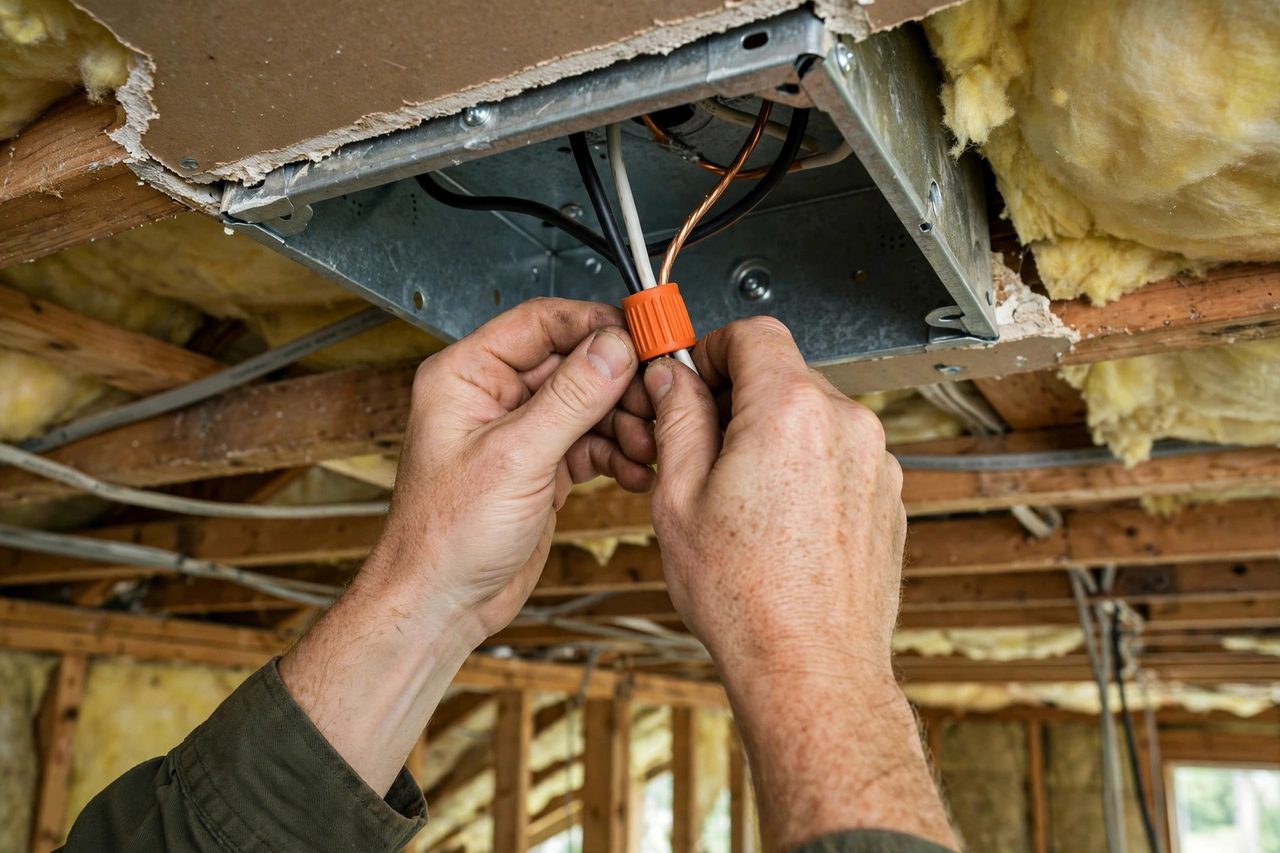
Step 5: Tuck and mount. Carefully fold the wires up into the box, then lift the fixture into place and secure it to the bracket. Don’t pinch wires between the fixture and the ceiling.
Step 6: Restore power and test. Install bulbs, remove your breaker tape, flip the breaker on, and test the wall switch. If you had a separate fan/light switch setup, decide which switch controls the new light; you may want to replace the double switch with a single or a dimmer rated for your bulb type.
Dealing With the Extras Fans Leave Behind
Remote controls: many modern fans are remote-controlled with a receiver tucked in the canopy. Remove the receiver module entirely; don’t leave it wired in the box powering nothing.
Pull chains and extra switches: if the fan had its own wall control, you can replace it with a standard switch or a dimmer. Make sure any dimmer is rated for LED bulbs if that’s what you’re using.
Patch and paint: fan canopies are often wider than light fixture canopies. If the old canopy covered a larger area, you may need to touch up paint around the new fixture’s smaller base.
Common Mistakes to Avoid
The classics: skipping the voltage tester (switches can be miswired), leaving the red wire uncapped and live in the box, overloading wire nuts with too many wires, and hanging the fixture before confirming the bracket is solid. Also, don’t exceed the fixture’s maximum wattage per socket, especially with incandescent bulbs; LEDs make this a non-issue in most cases.
Choosing the Right Replacement Light
With the fan gone, the room is a blank canvas, so choose deliberately. Flush-mount and semi-flush fixtures are the safe default for standard 8-foot ceilings; anything hanging lower in a walking path is a head injury waiting to happen. Pendants work beautifully over dining tables and kitchen islands, where the table defines the clearance zone. Chandeliers suit dining rooms and entries with higher ceilings, but check the weight rating of your box first.
On brightness and color, a little planning goes a long way. Aim for roughly the same total lumens the room had before, or a bit more; a dim replacement in a room you read or cook in will annoy you daily. For color temperature, 2700K gives warm, cozy light suited to bedrooms and living rooms, while 3000K to 4000K feels cleaner in kitchens and bathrooms. Mixing temperatures in one room looks unintentional, so match the new fixture to the room’s existing bulbs. If the fixture uses integrated LEDs rather than replaceable bulbs, check the rated lifespan and whether the whole unit is replaceable; integrated looks sleek, but a dead driver in ten years means replacing the fixture, not a bulb.
Think about light quality, not just looks. A room that had a fan with a light kit was getting diffuse, general illumination; a single small fixture may leave it dimmer than you remember. Check the fixture’s lumen output and consider one with multiple bulbs or an integrated LED array. Dimmable fixtures with LED-compatible dimmers give you flexibility the old fan never had. And match the finish to the room’s other hardware, mixed metals are fashionable, but a random chrome fixture in a brushed-nickel room looks like an afterthought.
What to Do With the Old Fan
Don’t just trash a working ceiling fan; someone will take it. List it for free online and it’ll usually disappear within days, especially in warm climates. If it’s genuinely dead, separate the materials: the motor housing often contains recyclable metal, and many municipalities accept fans at e-waste or scrap drop-offs. The remote receiver and any CFL bulbs need proper disposal, CFLs contain mercury and go to hazardous-waste collection, not the trash.
If you’re replacing multiple fans across the house, consider doing them as a batch: the tools are already out, your process gets faster each time, and buying fixtures together often saves money. Just don’t work tired around electrical; the fourth fixture deserves the same breaker-off, tester-verified routine as the first. And keep the old mounting brackets and downrods for a week in case anything about the new installation needs revisiting. Future you will appreciate the spare parts.
Swapping a ceiling fan for a light fixture is straightforward electrical work wrapped in careful preparation: breaker off and verified, solid box confirmed, wires labeled and photographed, ground-neutral-hot connected in order, and everything tested before the ladder comes down. The extras, capping the red wire, removing the remote receiver, patching paint around a smaller canopy, are what separate a clean job from a sloppy one. Choose a fixture suited to the room’s height and light needs, and you’ll wonder why you lived with that wobbling fan for so long.
Frequently Asked Questions About Replacing a Ceiling Fan With a Light
Can I replace a ceiling fan with a regular light fixture?
Yes. Fans and lights use the same basic household wiring. The fan’s mounting box is heavier-duty than a light needs, so the box is fine as long as it’s solid and undamaged.
What do I do with the extra red wire?
The red wire was likely the second switched hot for separate fan and light control. If your new light doesn’t need it, cap it with a wire nut and tuck it safely into the box.
Do I need an electrician to replace a ceiling fan with a light?
Most homeowners can do this themselves if the wiring is standard and the box is solid. Call an electrician if you find aluminum wiring, damaged wires, a loose box, or anything that doesn’t match this guide.
Can I install a dimmer switch with the new light?
Yes, as long as the dimmer is rated for your bulb type. LEDs need LED-compatible dimmers; old incandescent dimmers often cause LED flicker.
The new fixture’s canopy is smaller than the old fan’s. What now?
Touch up the paint around the new canopy. If the difference is large, a decorative ceiling medallion covers the gap and looks intentional.
Can I reuse the fan’s wall switch for the new light?
Yes, if it’s a standard on/off switch. If it’s a fan speed control or a remote-receiver switch, replace it with a standard switch or an LED-compatible dimmer, since fan controls can cause lights to buzz, flicker, or behave erratically.