The first time I used Midjourney, I typed “a cool dragon” and got four images that looked like they’d been painted by someone having a fever dream. The tenth time, I typed a careful, detailed prompt and got something I actually wanted to frame. The difference wasn’t luck — it was learning how the tool wants to be spoken to.
Midjourney is an AI image generator: you describe what you want in words, and it creates images from your description. This guide is the practical one — getting started, writing prompts that work, the parameters that matter, and the mistakes that waste your time and credits. Curious about the technology itself — diffusion, training, how your words become pixels? That’s our companion guide, how Midjourney works.
In This Guide
- What Midjourney Is (and Isn’t)
- Getting Started: Signup and Plans
- Your First Images: The /imagine Command
- How to Write Prompts That Work
- Key Parameters Worth Learning
- Iterating: Variations and Upscaling
- Practical Tips for Better Results
- Common Beginner Mistakes
- Frequently Asked Questions
What Midjourney Is (and Isn’t)
Midjourney is one of the leading AI image models — software trained on millions of image-text pairs that learned the relationship between words and visuals. When you describe “a lighthouse at sunset,” it doesn’t search for a lighthouse photo. It generates a new image from the patterns it learned. Under the hood it’s a diffusion model: it sculpts images out of visual noise, guided by your words. The full story — diffusion, training, and how a prompt becomes an image — is in our companion guide, how Midjourney works.
What it isn’t: a precise design tool. You can’t specify exact layouts, accurate text in images, or consistent characters across images without effort and workarounds. It’s a creativity engine, not a CAD program. People who love it embrace the surprise; people who need pixel control usually pair it with traditional editing tools.
Getting Started: Signup and Plans
As of 2026, Midjourney operates through its website (midjourney.com) — earlier versions ran through Discord, and some community features still live there. The basic flow:
- Create an account on the Midjourney website with a Google or Discord account.
- Choose a plan. Midjourney is subscription-only — there’s no permanent free tier, though they occasionally offer trial generations. Plans are tiered by monthly GPU time (roughly: how many images you can generate). The basic plan suits casual experimentation; heavy users need higher tiers.
- Start generating in the web interface’s creation area.
One honest note: since there’s no free tier, try the cheapest plan for one month first. You’ll know within a week whether AI image generation is something you’ll actually use or a novelty that wears off.
Your First Images: The /imagine Command
Everything starts with a prompt. In the create bar, you type your description — in older Discord-based flows this was the /imagine command followed by your prompt; the web interface now uses a plain text bar, but the principle is identical.
Your first prompt should be simple. Try:
a cozy mountain cabin at dusk, warm light in windows, snow falling, pine forest
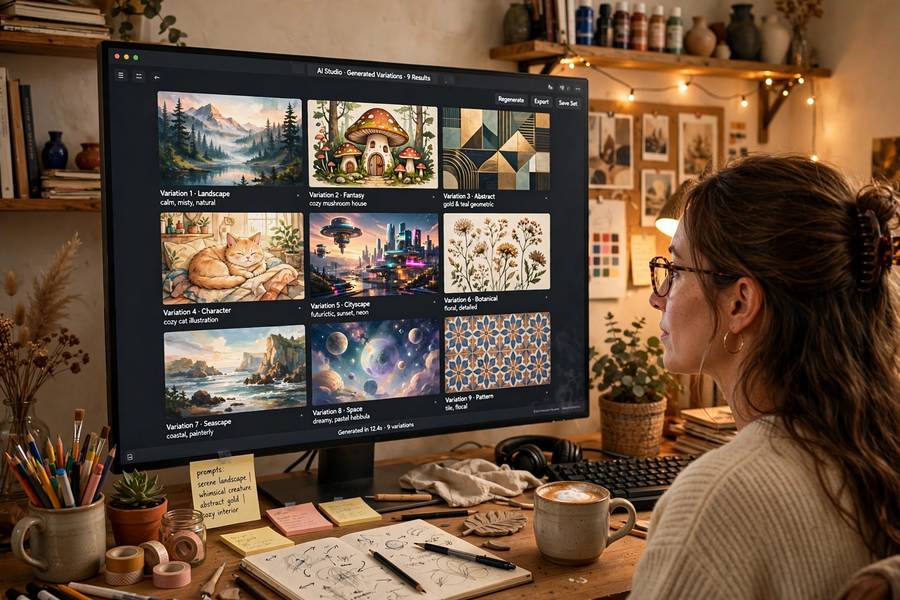
Midjourney generates four variations in a grid. This takes under a minute. You’ll immediately see the tool’s personality: painterly, atmospheric, inclined toward the dramatic. That house style is part of what people love about it — and part of what you learn to steer.
How to Write Prompts That Work
Prompting is the core skill. After generating hundreds of images, here’s what actually moves the needle:
Be specific about the subject, then the scene. “A lighthouse” is weak. “A red-and-white striped lighthouse on rocky cliffs at sunset, waves crashing, dramatic clouds” gives the model concrete visual anchors.
Name the style. Midjourney defaults to a cinematic-painterly look. If you want something else, say so: “watercolor illustration,” “1980s film photograph,” “minimalist vector logo,” “ukiyo-e woodblock print.” Style words are the highest-leverage words in a prompt.
Describe light and mood. “Golden hour lighting,” “moody fog,” “bright studio lighting” — lighting descriptions dramatically change results because the model learned strong associations between lighting words and visual qualities.
Specify composition when it matters. “Wide-angle landscape,” “close-up portrait,” “aerial view” — these steer framing.
What to avoid: long rambling sentences (the model weighs early words more heavily, so front-load what matters), contradictory instructions (“photorealistic cartoon”), and hyper-specific details the model can’t honor (“the third window from the left slightly open”). Also: Midjourney is famously bad at rendering text inside images — avoid asking for signs, labels, or quotes in the scene.
A useful formula: [subject], [key details], [environment], [lighting/mood], [style].
Key Parameters Worth Learning
Parameters are settings you append to prompts to control generation. The essential ones:
–ar (aspect ratio). --ar 16:9 for widescreen, --ar 9:16 for vertical phone wallpapers, --ar 1:1 for square. Default is square; set this deliberately for your use case.
–v (version). Selects the model version, e.g. --v 6. Newer versions generally produce more realistic, more prompt-faithful images. Use the latest unless you prefer an older version’s aesthetic.
–stylize. Controls how strongly Midjourney applies its own artistic interpretation versus following your prompt literally. Low values = more literal; high values = more beautiful but less faithful. Default is fine for most uses.
–chaos. Adds randomness and variety between the four images. Useful when you want surprising options rather than four similar takes.
You don’t need to memorize these — but knowing aspect ratio and version will solve 80% of “why doesn’t this look right” problems.
Iterating: Variations and Upscaling
Your first grid is a starting point, not a result. The workflow:
- Generate four variations from your prompt.
- Pick the best one and create variations of it (V buttons) — this explores nearby possibilities.
- Repeat 2–3 times, tweaking the prompt as you see what the model latches onto.
- Upscale (U buttons) your favorite to full resolution when satisfied.
Professionals routinely generate 20–50 images to get one keeper. This isn’t failure — it’s the medium. Photography has contact sheets; AI art has variation grids. Budget your subscription time accordingly.
Practical Tips for Better Results
Build a prompt library. Save prompts that produced great results, with notes on what worked. Over months this becomes a personal style guide.
Use reference images. Midjourney accepts image URLs in prompts — it will use them for composition, style, or character reference. This is the closest thing to precise control the tool offers.
Generate at off-peak hours if you’re on a plan with limited fast GPU time — queues are shorter.
Mind the commercial terms. Read the current terms of service regarding commercial use of generated images; they vary by plan tier and have changed over time. If you’re generating images for client work or products, verify your plan covers it.
Keep expectations honest about faces and hands. Image models have improved enormously, but unusual hands, strange teeth, and subtly “off” faces still appear, especially in complex poses. Zoom in before using an image professionally.
Common Beginner Mistakes
Prompting like a search engine. “Pictures of cats” gets you generic results. Describe the specific image you want to see.
Changing everything at once. When iterating, change one element per generation — otherwise you can’t tell what improved things.
Ignoring aspect ratio. Generating square and cropping later wastes quality. Set --ar for your target format from the start.
Expecting text to work. Asking for a poster with a specific slogan will produce beautiful gibberish lettering. Add text yourself in an editor afterward.
Quitting after five minutes. The learning curve is real but short — most people go from “fever dream” to “framed on my wall” within a week of regular play.
Midjourney rewards the same thing every creative tool rewards: clear intention plus willingness to iterate. Learn the prompt formula, learn aspect ratio, embrace the variation grid — and within a week you’ll be generating images that surprise you in the good way.
Frequently Asked Questions
No — Midjourney is subscription-only with no permanent free tier, though trial generations are occasionally offered. Plans are tiered by monthly GPU generation time. Start with the cheapest plan for a month to see if the tool fits your workflow before committing to a higher tier.
Use the formula: subject, key details, environment, lighting/mood, style. Be specific (“red-and-white striped lighthouse on rocky cliffs at sunset” beats “a lighthouse”), name the artistic style you want, describe the lighting, and put the most important words first since the model weighs early words more heavily.
Image models learn visual patterns, not typography — they reproduce the look of text without understanding letters as symbols, producing plausible-looking gibberish. Avoid requesting signs, labels, or quotes inside generated images, and add any text afterward in an image editor.
Commercial use rights depend on your subscription tier and Midjourney’s current terms of service, which have changed over time. Always check the latest terms for your specific plan before using generated images in client work, products, or advertising.
Set it with the –ar parameter for your target format from the start: 16:9 for widescreen wallpapers and video thumbnails, 9:16 for phone wallpapers and stories, 1:1 for social profile images. Generating in the right ratio preserves quality versus cropping later.