How to Play Squash for Beginners: Grip, Stance and Your First Rallies

I still remember my first proper squash lesson. The coach watched me flail at the ball for about three minutes, then said the sentence that changed everything: “Stop trying to hit it hard. Just hit the front wall.” Twenty minutes later I was rallying. Squash has a brutally steep first hour and then clicks fast — if someone shows you the fundamentals in the right order.
That’s what this guide does. We’ll cover the grip, the ready position, the three strokes you need, how to move on court, and a 45-minute first-session plan you can follow with any hitting partner. You won’t be good after reading this — but you’ll walk onto court knowing exactly what to practice, which puts you ahead of most beginners. For the rules themselves, pair this with our basic squash rules for beginners.
In this guide:
- What You Need to Start
- The Grip: Your First Five Minutes
- The Ready Position and the T
- The Three Basic Strokes
- Movement: The Part Nobody Teaches
- Your First Session: A 45-Minute Plan
- Where Beginners Go Wrong
What You Need to Start
The barrier to entry is gloriously low: a racket, a ball, non-marking court shoes, and ideally protective eyewear. Borrow a racket from the club for your first few sessions — don’t buy anything until you know you like the sport. The one thing worth choosing deliberately is the ball: beginners should use a blue-dot (or red-dot) ball, which bounces higher and stays warm longer. A standard double-yellow-dot ball is designed for advanced players; it barely bounces when cold and will make your first session miserable. If you’re curious about the exact court layout you’ll be playing on, our guide to squash court dimensions maps it all out.
The Grip: Your First Five Minutes
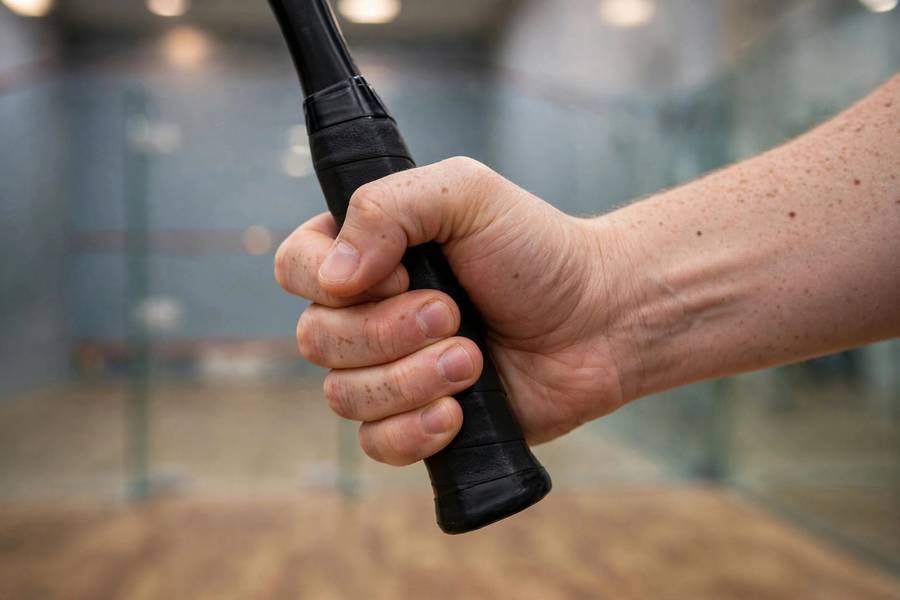
Hold the racket like you’re shaking hands with it — the “handshake grip.” The V between your thumb and index finger sits on top of the handle, fingers wrapped naturally, thumb resting along the side. Not a death grip: on a scale of 1–10, hold it at about a 4. A tight grip locks your wrist and kills both power and touch.
The most common beginner error is the “frying pan” grip — holding the racket face flat like you’re serving breakfast. It feels natural and it’s completely wrong: it closes the racket face and sends every shot into the tin. Check your grip before every session until the handshake becomes automatic. Coaches check grips constantly because even intermediate players drift back to bad habits under pressure.
The Ready Position and the T
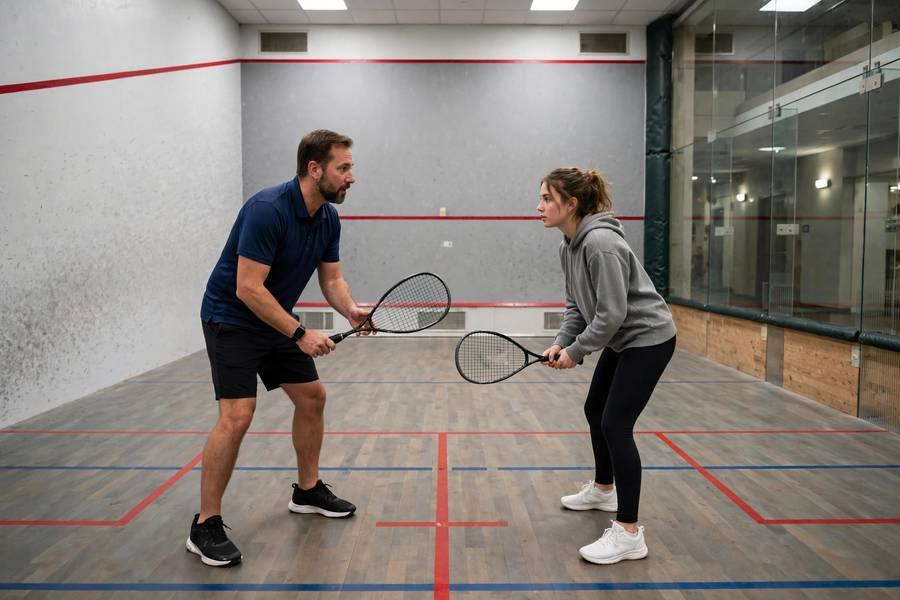
The T is the intersection of the court lines near the middle — it’s home base. After every shot, you return toward the T, because from there you can reach every corner with roughly equal effort. Beginners camp wherever their last shot landed, usually a corner, and then can’t reach the next ball. Hit, recover to the T, repeat. This single habit separates players who look competent from players who look lost.
Your ready position at the T: feet shoulder-width apart, knees soft and slightly bent, weight on the balls of your feet, racket up and in front of your chest. You should look like a coiled spring, not a statue. Bounce lightly — static feet are slow feet.
The Three Basic Strokes
You need three shots to play real squash. Everything else is decoration for now.
1. The straight drive
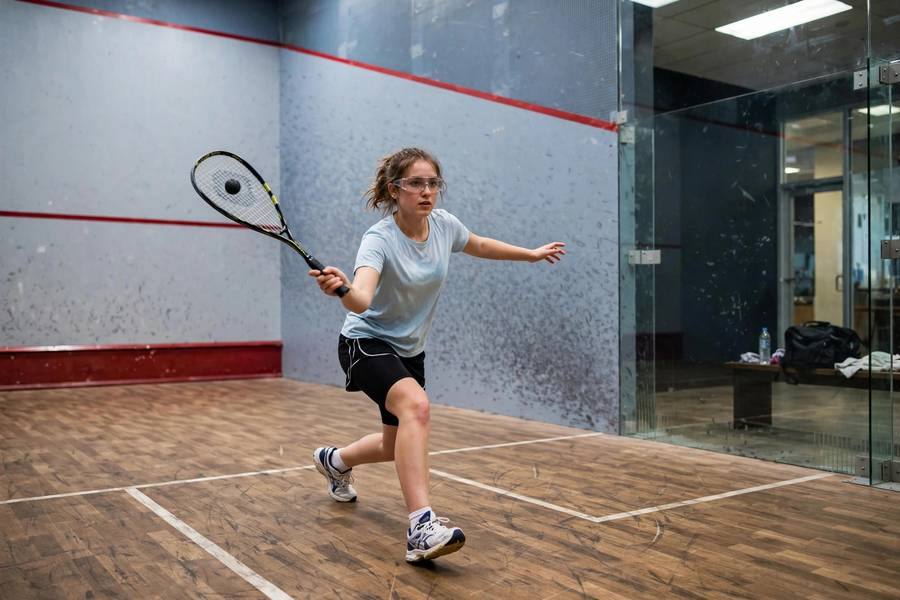
Your bread and butter. Hit the ball firmly to a spot high on the front wall so it comes back tight along the side wall to the back corner. Aim for length — deep shots push your opponent back and buy you time. The swing is compact: shoulder turn, short backswing, hit through the ball with your weight moving forward. Think “firm and straight” rather than “hard.”
2. The cross-court
Same swing, different target: aim for the opposite back corner so the ball crosses the court diagonally. Cross-courts are slightly safer than straight drives for beginners because the ball travels further and the angles are more forgiving. Alternate straight and cross-court to move your opponent around — that’s tactics, and you’re already doing it.
3. The boast
Hit the ball into the side wall first so it ricochets onto the front wall and dies in the opposite front corner. It’s the beginner’s attacking shot — use it when your opponent is stuck at the back and you want to drag them forward. Don’t overuse it; a boast from a bad position just gives your opponent an easy winner.
For all three: watch the ball onto your strings. Beginners look at where they want the ball to go; good players watch the ball itself. Your body already knows where the front wall is.
Movement: The Part Nobody Teaches
Squash movement is lunges, not running. You push off from the T, lunge into the shot with your racket-side leg, play the ball, and push back. The lunge does two jobs: it gets you low (low is stable and powerful) and it keeps your momentum controlled so you can recover. Practice ghosting — moving around the court without a ball, lunging into each corner and returning to the T — for five minutes as a warm-up. It’s boring and it’s the fastest way to look like you know what you’re doing.
Two movement rules that save beginners: never cross your feet when moving laterally (shuffle instead), and split-step — a tiny hop — as your opponent hits, so you’re loaded and ready to explode in any direction. These feel fussy until they become reflexes, usually within a few weeks.
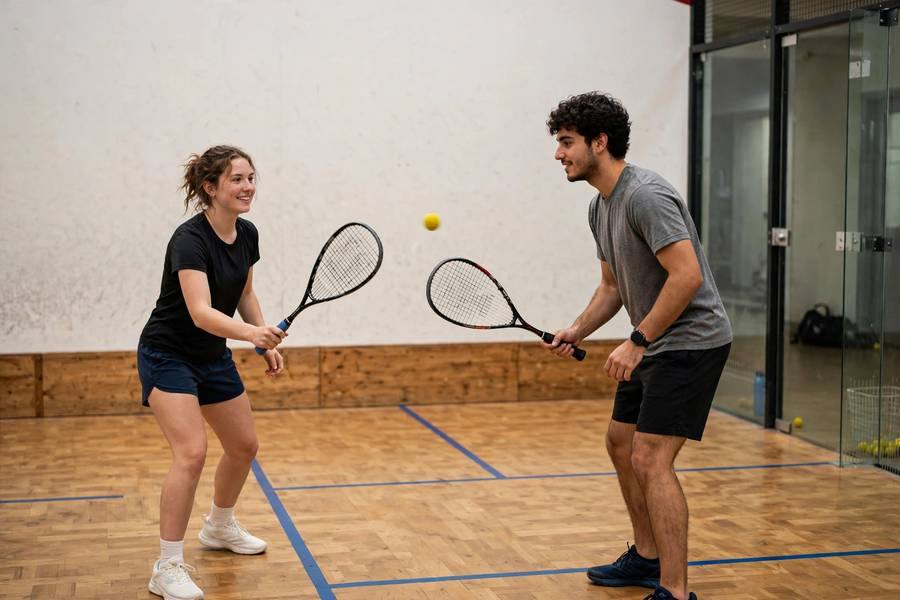
Your First Session: A 45-Minute Plan
- 0–5 min: solo hitting. Stand at the T and hit the ball to yourself off the front wall — forehand, then backhand. Goal: 10 in a row each side. This calibrates your eye and warms up the ball.
- 5–15 min: straight drives with a partner. Take turns hitting straight drives down the same wall. Don’t rally competitively yet; cooperate. Count how many you can string together.
- 15–25 min: cross-courts. Same drill, diagonal. Then one player hits straight, the other cross-court — now you’re moving.
- 25–30 min: boast practice. Each player hits 10 boasts from the back, aiming for the front corners.
- 30–45 min: play points. Real games to 11, but with a cooperative spirit. Don’t smash; rally. The winner is whoever keeps the ball alive longest.
End with a proper cool-down and stretch your calves, quads, and shoulders — squash soreness the day after your first session is legendary, and a good cool-down routine takes the edge off.
Where Beginners Go Wrong
- Swinging too big. A compact swing with good timing beats a huge swing with bad timing every single time. Shorten it.
- Standing still between shots. If your feet stop, you’re done. Keep bouncing, keep recovering to the T.
- Hitting everything hard. Pace without placement just feeds your opponent easy balls. Aim first, add pace later.
- Playing the ball too late. Take it early, on the rise or at the top of the bounce. Late contact means weak, defensive shots.
- Forgetting the backhand. Beginners run around their backhand for months. Don’t — practice it from day one or it becomes a permanent hole.
- Skipping the knock-up. Five minutes of cooperative hitting before a match isn’t optional. Cold ball, cold muscles, cold timing — warm all three up.
Build your engine off the court too — squash movement punishes weak legs, so the strength training for runners program is worth its weight in lunges.
Give it six sessions. By then the grip feels natural, you’re finding the T without thinking, and rallies last long enough to be genuinely fun. That’s when squash gets its hooks in — and speaking as someone still hooked years later, I consider that a public service warning.Start with the handshake grip, learn the ready position at the T, and practice three basic strokes: the straight drive, the cross-court, and the boast. Use a bouncy blue-dot ball, rally cooperatively with a partner before playing points, and always recover to the T after each shot.
The T is the intersection of the court’s center lines, roughly in the middle of the court. It’s the base position players return to after every shot because it offers equal access to all four corners.
Beginners should use a blue-dot (or red-dot) ball, which bounces higher and stays lively longer than the standard double-yellow-dot ball used by advanced players. The extra bounce makes rallies possible while you’re learning.
Most beginners can rally comfortably within 4–6 sessions and play enjoyable games within a couple of months. The fundamentals click fast; mastery, as with any sport, takes years — which is part of the appeal.
A few lessons early on are the best money in squash. A coach fixes your grip, stance, and swing before bad habits harden — corrections that take five minutes in week one take five months to undo in year two.