I’ll be straight with you: the pistol squat humbled me. I was a certified trainer, reasonably strong, could squat a respectable barbell — and the first time I tried a full pistol squat, I fell on my backside in front of a client. It was not my finest moment.
That’s the thing about pistol squats. They don’t care how much you can leg press — they demand strength, balance, mobility, and coordination all at once, on one leg, through full range. Most strong people fail their first try. That’s exactly why they’re worth learning.
A pistol squat — a full single-leg squat, all the way down and back up, other leg extended in front — is one of the purest tests of lower-body function that exists. No equipment. No excuses. Just you and gravity. This guide gives you the honest, step-by-step progression I use with clients to get them from zero to their first clean pistol. It takes weeks, sometimes months. Anyone who tells you different is selling something.
Table of Contents
- What Is a Pistol Squat, Exactly?
- What It Takes: Strength, Balance, Mobility
- Assess Yourself Before You Start
- The Pistol Squat Progression Plan
- Step-by-Step: The Full Pistol Squat
- Mobility Work That Actually Helps
- Common Problems and Fixes
- Programming Pistols Into Your Training
- Frequently Asked Questions
What Is a Pistol Squat, Exactly?
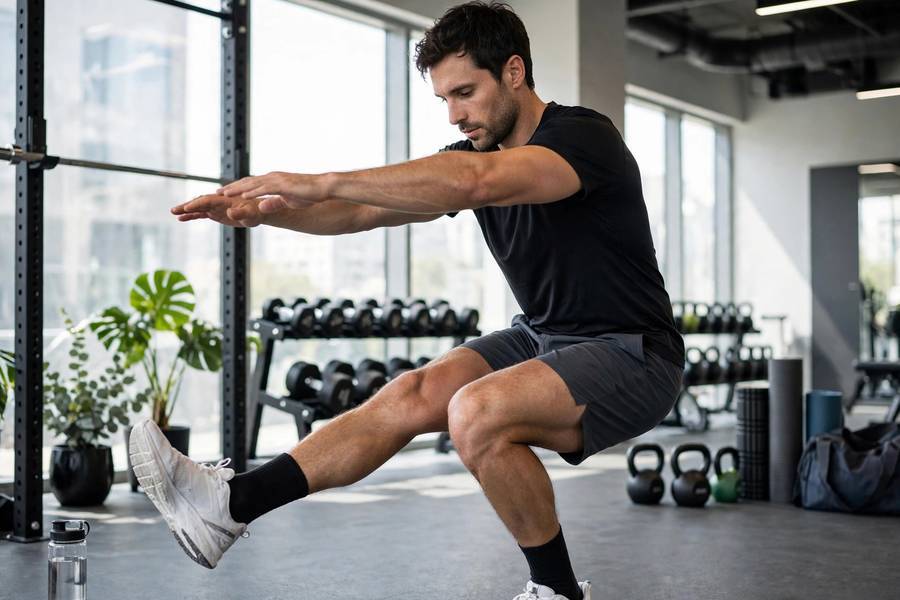
A pistol squat is a single-leg squat through full range of motion: lower until your hamstring covers your calf — butt to heel — non-working leg extended straight out front, then stand back up on that one leg.
The name comes from the shape at the bottom: extended leg and torso form a rough pistol. The resistance is fixed (your bodyweight); the difficulty is that one leg does the work of two while keeping you balanced. That’s why someone who squats double bodyweight with a barbell can still fail at pistols — different skill, not just a heavier squat.
What It Takes: Strength, Balance, Mobility
Pistols fail for three reasons:
Strength. Your quads, glutes, and core handle full bodyweight on one leg through deep range. But raw leg strength is rarely the actual limiter.
Balance. Where most people fall apart — literally. One leg, deep squat, full movement: foot, ankle, and stabilizers work overtime.
Mobility. The silent killer. You need deep ankle dorsiflexion (knees past toes), hip flexion, and enough hamstring length to keep the extended leg up. Desk workers with stiff ankles hit a wall here regardless of leg strength.
All three are trainable — but you have to train all three. Skipping mobility work and just hammering assisted reps is the most common reason people stall.
Assess Yourself Before You Start
Three quick tests reveal your weak link:
Test 1: Bodyweight squat depth. Can you squat ass-to-grass — hamstrings on calves — heels down, feet flat? If not, ankle and hip mobility come first.
Test 2: Single-leg balance. Stand on one leg 30 seconds, eyes open, then 10 seconds eyes closed. Wobbling with eyes open? Balance is the priority.
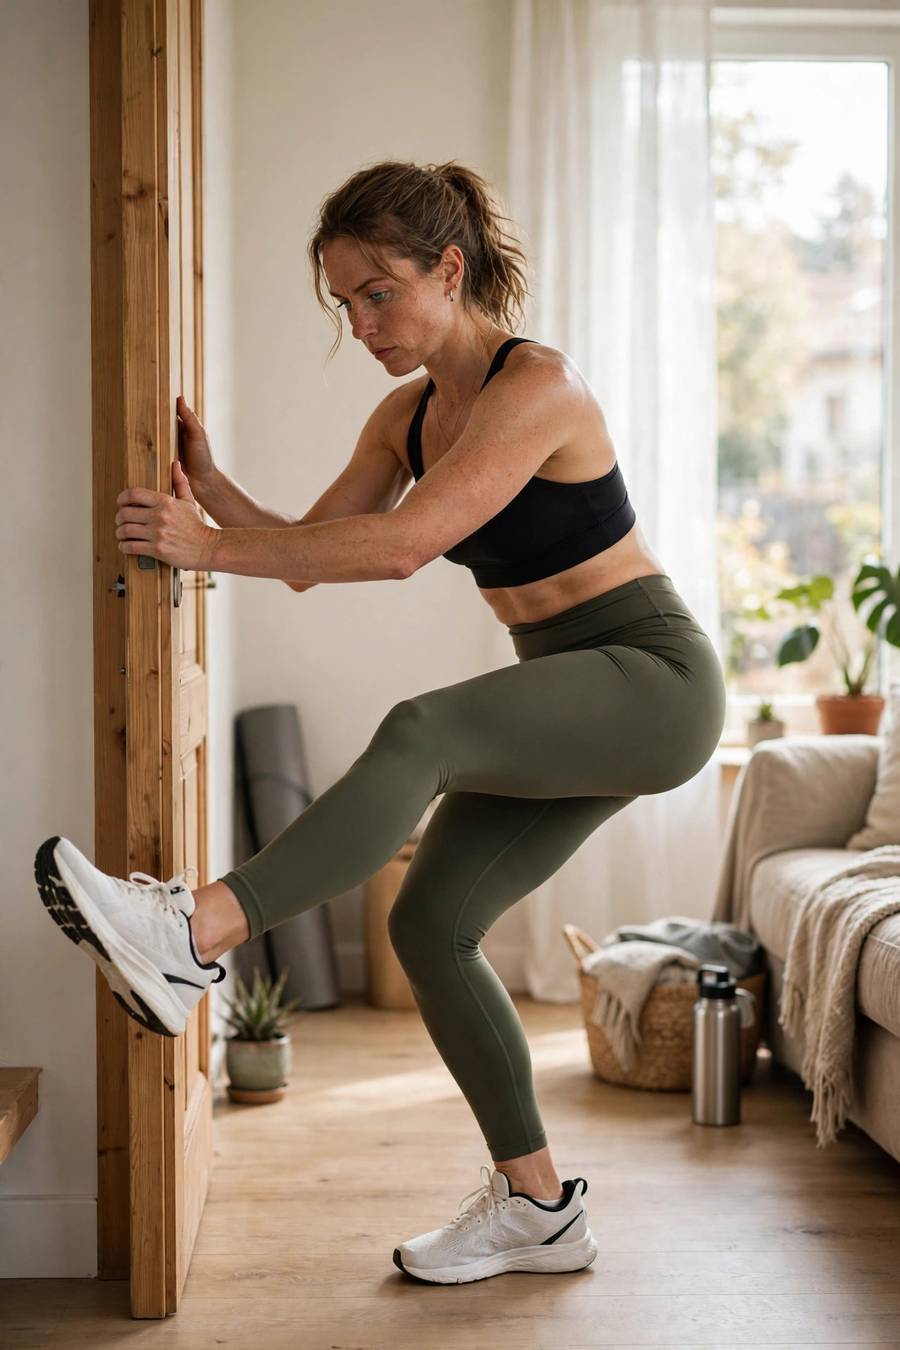
Test 3: Assisted single-leg squat. Hold a doorframe, lower on one leg as deep as you can. Where you get stuck reveals the limiter.
The Pistol Squat Progression Plan
This is the exact ladder I use with clients. Don’t skip steps. Each one builds the qualities the next one demands.
Stage 1: Box Squats to Depth (Weeks 1-2)
Master the deep bilateral squat first. Squat to a box or bench, sit briefly, stand without rocking. Lower the box over time until you hit full depth — hamstrings on calves — heels flat. If heels lift, elevate them on a small plate while you work ankle mobility separately.
Target: 3×12 deep box squats, heels down.
Stage 2: Assisted Pistol Squats (Weeks 2-4)
Hold a doorframe, pole, or suspension straps. Lower on one leg as deep as you can, hands for balance only — not to pull yourself up. Gradually use less assistance. Fingertips, not fists: if you’re hauling up with your arms, you’re doing a weird pull-up.
Target: 3×8 per leg with fingertip assistance only.
Stage 3: Box Pistol Squats (Weeks 3-6)
Stand on one leg facing a box. Lower until you sit, stand back up on that leg. Start at knee height, lower the box a couple inches at a time. Can’t stand up? The box is too low — no prize for grinding ugly reps.
Target: 3×5 per leg from a 12-inch box.
Stage 4: Eccentric-Only Pistols (Weeks 5-8)
Lower on one leg with full control — 4-5 seconds down — then stand with both legs or your hands. Eccentrics build serious strength and teach the bottom position.
Target: 3×5 slow eccentrics per leg.
Stage 5: Counterbalance Pistols (Weeks 6-10)
Hold 5-10 pounds extended in front of you. The counterweight shifts your center of mass forward, making balance dramatically easier while your legs do full work. Most people are shocked how much a 10-pound plate helps.
Target: 3×5 per leg with a 10-pound counterweight.
Stage 6: The Full Pistol (Weeks 8-12+)
No assistance, no counterweight. Lower all the way, brief pause at the bottom, drive up. Eight weeks or six months — both are fine. The only failed pistol program is the one you quit.
For building the base strength that feeds this progression, my guide to bodyweight exercises you can do anywhere and how to build muscle at home cover the foundational work.

Step-by-Step: The Full Pistol Squat
When you’re ready to attempt the real thing, here’s the technique:
Step 1: Stand on one leg, the other leg extended straight in front of you, foot flexed (toes pulled toward you). Arms extended forward for counterbalance.
Step 2: Initiate by pushing your hips back slightly and bending the standing knee. Think “sit back and down,” not “drop straight down.”
Step 3: Keep your torso as upright as possible — you’ll lean forward some, that’s normal and necessary, but don’t fold in half. Chest up, eyes forward.
Step 4: Descend with control all the way until your hamstring meets your calf. Your heel stays glued to the floor. This is non-negotiable — heel lifting means you’re not ready or your ankle mobility isn’t there yet.
Step 5: Pause for a beat at the bottom. No bouncing. Bouncing out of the bottom of a pistol is how knees get angry.
Step 6: Drive through your whole foot — big toe to heel — and stand up. Keep the non-working leg extended and off the floor the entire time. Squeeze your glute at the top.
Breathing: inhale on the way down, exhale hard driving up, core braced throughout.
Mobility Work That Actually Helps
If ankle mobility is your limiter — for most people it is — do these 3-4 times a week, 5 minutes total:
Wall knee-to-wall drill. Half-kneel facing a wall, front foot 4 inches out. Drive your knee to touch the wall without the heel lifting. Move the foot back as it gets easy. Test and fix in one.
Deep squat hold. Sit in your deepest heels-down squat 60-90 seconds daily (hold something for balance). Highest-return pistol drill there is.
Calf stretch on a step. Heel off a step, drop below step level, hold 30 seconds per leg. Tight calves often hide behind poor ankle mobility.
Hip flexor couch stretch. Half-kneel, back foot on a couch, squeeze the glute of the kneeling leg. 60 seconds per side. Tight hip flexors pull your torso forward in the pistol.
Five minutes daily beats one heroic 30-minute session a week.
Common Problems and Fixes
“I fall backward.” Center of mass is behind your foot. Reach arms further forward or use a counterweight — and check ankle mobility, since stiff ankles force the torso back.
“My heel lifts.” Ankle mobility. Raise the heel on a plate as a temporary workaround while you do the drills above. Don’t accept heel-lifting as technique — it’s compensation.
“I can get down but can’t get up.” Strength deficit in the deep range. More eccentrics and box pistols from progressively lower boxes. The bottom third is the hardest — train it specifically.
“My knee caves inward.” Weak glute medius. Add lateral band walks, drive the knee outward over the toes every rep. Still caves? Regress a stage.
“My non-working leg drops.” Hip flexor weakness or tight hamstrings. Practice the extended-leg hold separately: sit, extend one leg, hold it off the ground for time.
Knee pain. Some discomfort from new loading is normal; sharp pain, swelling, or pain that changes how you move is not. Back off and regress.
Programming Pistols Into Your Training
Pistols are a skill as much as a strength exercise. Treat them accordingly:
Skill practice: 2-3 times per week, early in your workout when you’re fresh. 3-5 sets of 3-5 reps per leg at whatever stage you’re on. Quality over quantity — stop when form degrades.
Don’t train to failure. Leave 1-2 clean reps in the tank every set — ugly reps on a balance exercise are asking for trouble.
Pair them smartly. Pistols pair well with upper-body pushing — while your legs recover, do push-ups. A sample session: pistol practice, then how to do push-ups with perfect form for 3 sets, then core work. Full body, no equipment, done in 30 minutes.
Maintain it. A few sets a week keeps the skill — the balance fades faster than the strength.
Frequently Asked Questions
Most people need 8-16 weeks of consistent practice (2-3 sessions per week) to go from zero to a clean unassisted pistol squat. Your starting point matters — if you already have good ankle mobility and single-leg strength, you’ll be faster; if you’re starting stiff and deconditioned, budget more time. There’s no shortcut, but the progression works if you follow it honestly.
Pistol squats aren’t inherently bad for knees, but they do load the knee heavily in deep flexion, so technique and progression matter enormously. Rushing to full pistols without building up through assisted stages, bouncing out of the bottom, or training through sharp pain are what cause problems. Done with proper progression and pain-free form, most healthy knees handle them fine.
The usual culprits are ankle mobility and balance, not leg strength. If your ankles don’t allow your knees to travel forward with heels down, you physically cannot get into the bottom position. Test it: try a deep two-legged squat with heels flat. If you can’t do that, mobility is your limiter, not strength — and barbell squatting won’t fix it. Work the ankle drills in this guide.
Yes. Heel glued to the floor is the standard for a proper pistol squat. If your heel lifts, you’re compensating for limited ankle mobility. Use a small heel elevation as a temporary workaround while you work on ankle mobility separately — but treat the flat-heel pistol as the goal, not the elevated version.
Beginners shouldn’t attempt full pistol squats, but they can absolutely start the progression. Assisted pistols holding a doorframe and box pistol squats from a high box are beginner-appropriate and build the strength, balance, and mobility needed. Start at Stage 1 or 2 of the progression in this guide and advance only when each stage feels solid.
Pistol squats primarily work the quadriceps and glutes of the working leg, with significant contribution from the core, hip flexors, hamstrings, calves, and all the small stabilizer muscles around the ankle and foot. Because it’s a single-leg balance exercise, it also trains proprioception and coordination in a way bilateral squats simply can’t match.