Handstand Against a Wall Tutorial: The 4-Week Position Builder

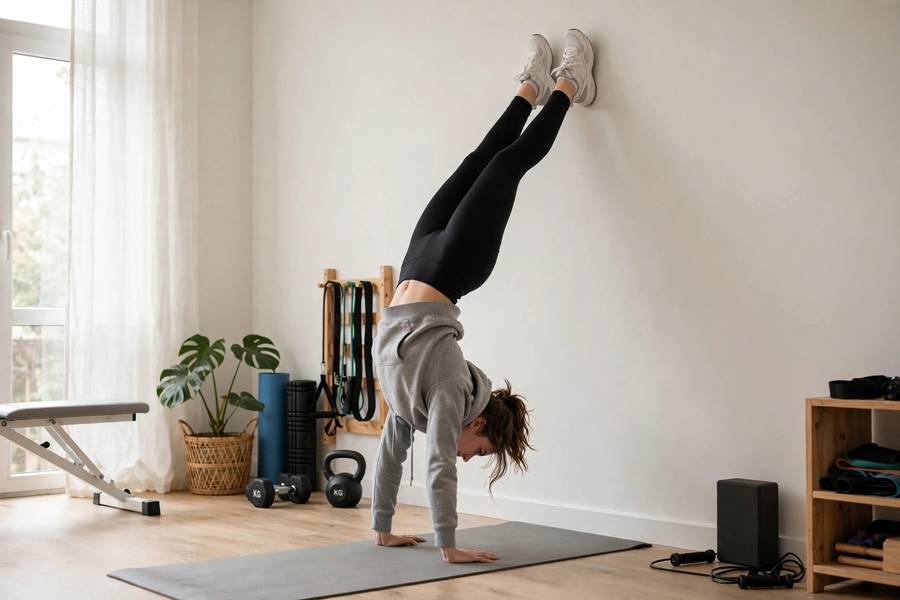
When a new client tells me they want a freestanding handstand, the first thing I do is walk them to a wall. Not because it is the easy option, but because the wall is where the position gets built. I have watched people spend six months kicking up in open space with a banana back and bent elbows, and I have watched people spend four disciplined weeks against a wall and then hold ten clean seconds freestanding. The wall is not training wheels; it is the workshop. This tutorial is the exact four-week wall program I give beginners, and it slots directly into my how-to-do-a-handstand guide as the foundation phase.
Why the Wall Comes First
The wall does three things for you: it removes the fear of falling, it gives you unlimited time to find the straight-line position, and it lets you accumulate volume without a spotter. A beginner who can hold a clean chest-to-wall handstand for 45 seconds has already built about 70 percent of what a freestanding hold requires. The remaining 30 percent is balance, and you cannot practice balance on a crooked base. Every freestanding wobble I see traces back to a position that was never grooved against the wall first.
Setting Up: Hand Placement and Distances
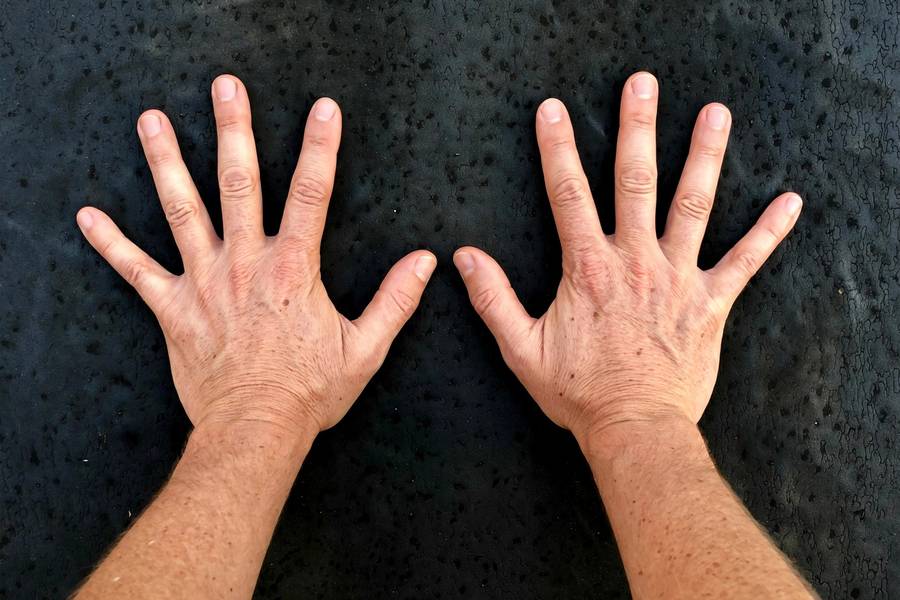
Place your hands 6 to 12 inches from the wall, shoulder-width apart, middle fingers pointing straight ahead. Spread your fingers wide; more contact area means more control, and your fingertips are your emergency brakes later. For back-to-wall work, start with your hands about 12 inches out so you have room to kick up. For chest-to-wall work, walk your hands in until your fingertips are 6 inches from the wall. Clear a space at least 6 feet wide and 8 feet long. Move the coffee table. I have seen a client kick a plant across the room in week one, and the plant did not survive.
The 5-Minute Wrist Prep (Do This Every Session)
Your wrists will carry your entire bodyweight in positions they have never experienced, so they get their own warm-up, every session, no exceptions. Minute one: wrist circles, ten each direction per hand, slow and full range. Minute two: the prayer stretch, palms together in front of your chest, lowering your hands until you feel a deep stretch, 3 sets of 20 seconds. Minute three: reverse prayer, backs of hands together, same dosing. Minute four: fingertip planks, up on your fingertips in a plank, 3 sets of 15 seconds; this builds the exact finger strength your balance corrections will use. Minute five: loaded wrist rocks in a tabletop position, rocking forward over your hands and back, 2 sets of 12. I have never had a client who did this prep consistently complain about wrist pain beyond the first two weeks of conditioning ache. The clients with wrist problems are, without exception, the ones who skipped it.
Week 1: Back-to-Wall Holds
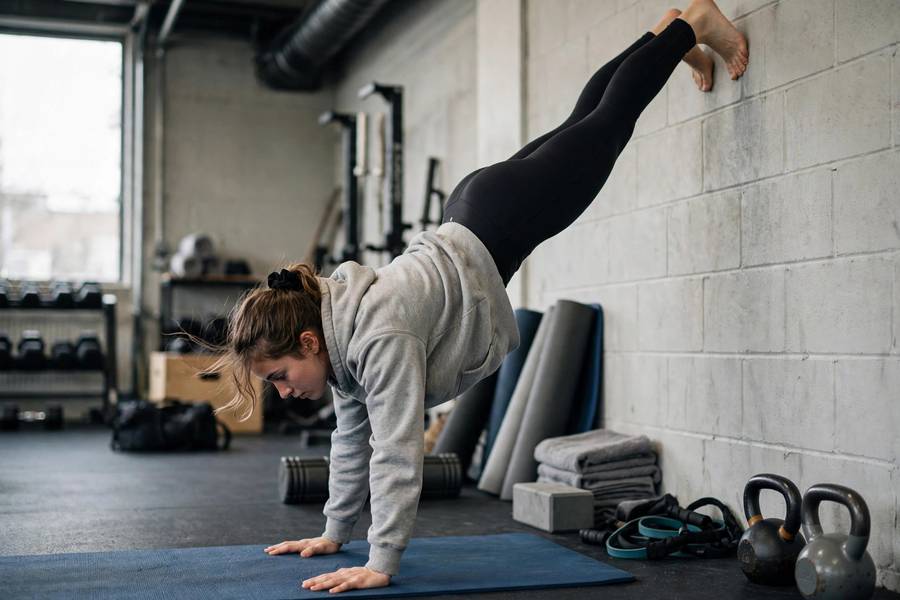
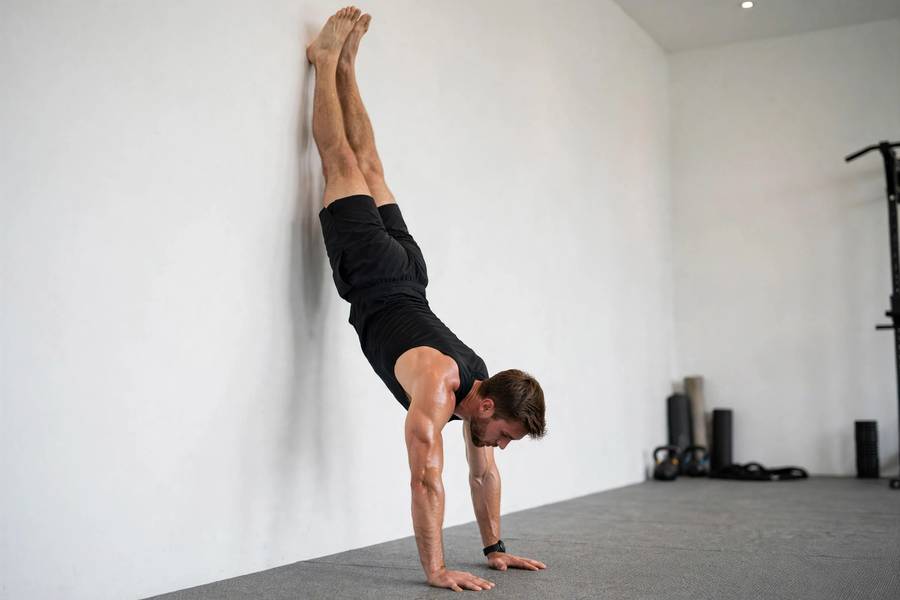
Face away from the wall. Place your hands, shift forward, and kick up gently so your heels tap the wall. Your goal this week is not balance; it is position. Push the floor away until your shoulders touch your ears, squeeze your glutes hard, point your toes, and look at the floor between your hands. Hold 20 seconds, rest 60 seconds, repeat 5 times. Four sessions this week. Pass test for week 2: five 20-second holds with straight elbows and no lower-back arch, verified on video. Film from the side; your body lies to you, the camera does not.
Week 2: Chest-to-Wall Holds
Now face the wall. Place your hands 6 inches out, walk your feet up the wall, then walk your hands toward the wall until your chest nearly touches it. Your heels rest lightly on the wall and your body forms one straight line. This is harder than it looks because there is nowhere to hide a weak position. Start with 5 sets of 15 seconds and build to 3 sets of 30 seconds by week’s end. If your wrists complain, you are dumping weight into them instead of pushing tall; think about growing an inch taller through your shoulders. Support this week with two short sessions from my best shoulder exercises article, especially pike push-ups.
Week 3: Shoulder Taps and Weight Shifts
A static hold is only half the job; you need to move weight around while upside down. In a chest-to-wall hold, shift your weight onto your right hand and tap your left shoulder with your left hand. Alternate sides. Start with 3 sets of 6 taps per side. This teaches single-arm loading, which is the foundation of every bail-out and every balance correction you will ever make. When taps feel solid, try lifting one foot off the wall for two seconds at a time, alternating feet. Your hips will wobble; let them. Wobbling against the wall is how the nervous system learns to self-correct.
Week 4: Heel Pulls and the Wall as Safety Net
Back to facing away from the wall, but now the wall is a backstop, not a target. Kick up and pull your heels away from the wall, floating for one to three seconds before they touch again. Do 5 sets of 8 reps. The drill looks unimpressive and works like nothing else; it is the exact moment wall practice becomes balance practice. Pass test to graduate: ten consecutive heel pulls where you float at least two seconds each time, plus a 45-second chest-to-wall hold with a flat back. Hit those numbers and you are ready for freestanding work, with a base most self-taught handstanders never build.
Breathing Upside Down
Half of my beginners hold their breath from the kick-up to the come-down, then wonder why 20 seconds feels like two minutes. Practice breathing deliberately: in through the nose, out through the mouth, slow and even, during every wall hold. Your core strength work should include breathing drills too, because bracing and breathing at the same time is a skill. If you cannot breathe calmly in a wall handstand, you will never stay calm in a freestanding one.
Common Wall Handstand Mistakes
Kicking too hard. A wall handstand needs a gentle kick, not a launch. If your heels slam the wall, walk your hands closer and use less leg.
Resting on the wall. Your heels should touch lightly, like a finger on a table. If you are leaning your weight into the wall, you are practicing a lean, not a handstand.
Hands too far out. Every inch your hands sit from the wall is an inch of arch your back has to absorb. Six inches for chest-to-wall, twelve max for back-to-wall.
Skipping the video. I make every client film one set per session. What a handstand feels like and what it looks like are two different sports. The Turkish get-up teaches the same lesson under load: position first, always.
When to Add a Second Daily Session
After week two, if your wrists and shoulders feel fresh the morning after practice, you can add a second short session: five minutes of easy wall holds, nothing intense, at least six hours after the first. This is grease-the-groove style frequency, and it accelerates motor learning without adding fatigue. Keep the second session at half intensity; its job is repetitions of the correct pattern, not training stress. If you wake up sore, skip it. Soreness means the tissue is still adapting, and piling on volume is how overuse injuries start. Two easy sessions beat one grinding session every time at this stage.
Frequently Asked Questions
Four to six weeks of consistent wall work is the minimum I coach: a 45-second chest-to-wall hold, ten consecutive two-second heel pulls, and automatic single-arm weight shifts. Rushing this phase is the number one reason beginners plateau at a wobbly five-second freestanding hold.
Do both, in order. Back-to-wall teaches the kick-up and is less intimidating in week one. Chest-to-wall builds the true straight-line position and shoulder endurance. Chest-to-wall is the harder and more valuable of the two, so it gets weeks two through four.
First, check that you are pushing tall through the shoulders instead of sinking into the wrists; most wrist pain is a position problem. Second, warm up with 3 minutes of wrist circles, prayer stretches, and fingertip planks. If sharp pain persists after a week of corrected form, stop and see a professional; dull conditioning ache is normal, sharp pain is not.
Five days a week is the sweet spot for most adults; daily practice works once your wrists and shoulders are conditioned, usually after week three. Keep sessions to 10-15 minutes. The wall lets you accumulate a lot of volume fast, which is exactly why you should cap it before your joints complain.