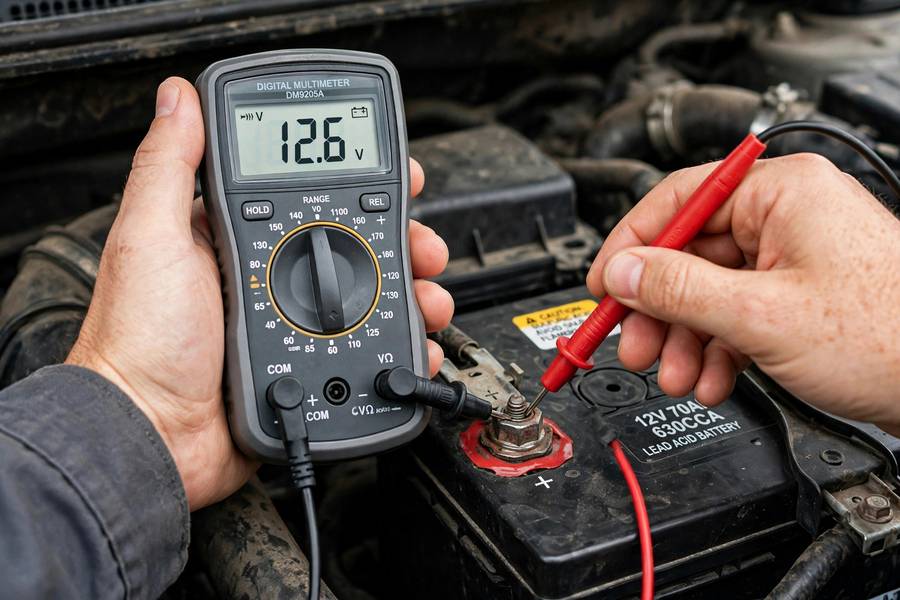
A $20 multimeter is the most underrated tool in car ownership. With it, you can answer the “is it the battery or something else?” question in five minutes, in your driveway, without a tow truck or a shop visit. I’ve watched customers authorize $500 alternator replacements for $150 battery problems (and vice versa) because nobody spent five minutes with a meter. Here’s exactly how to test your battery — the right way, with the numbers that matter and what they mean. For lifespan context, see how long car batteries last.
Table of Contents
- What You’ll Need
- Safety First: 60 Seconds That Matter
- Test 1: Resting Voltage (the Battery’s Report Card)
- Test 2: Cranking Voltage (Under Load)
- Test 3: Charging Voltage (Is the Alternator Working?)
- Reading the Numbers: What They Mean
- When a Multimeter Isn’t Enough: Load Testing
- Common Testing Mistakes
- Frequently Asked Questions
What You’ll Need
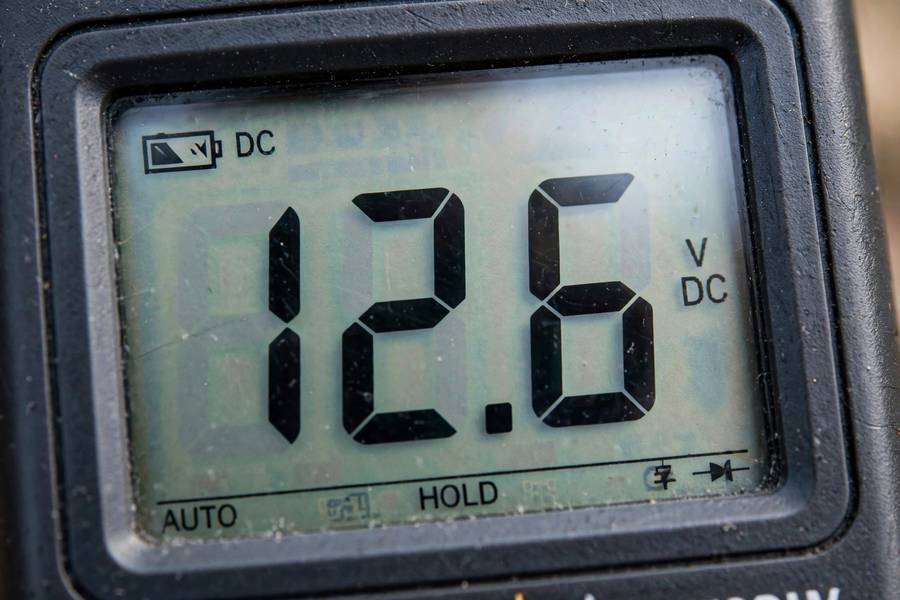
A digital multimeter — the $15-$30 kind from any hardware store is perfect. You don’t need a fancy one; you need one that reads DC voltage to two decimal places. Set it to DC volts (the V with a straight line, not the wavy line — that’s AC, and your car is a DC system). If your meter isn’t auto-ranging, select the 20V DC range.
That’s genuinely it for basic testing. Optional but useful: a wire brush for cleaning terminals (corrosion skews readings), and a helper for the cranking test (someone to turn the key while you watch the meter). If you’re testing regularly, a dedicated battery tester with a load-test function ($40-$60) is a worthwhile upgrade — but the multimeter handles 90 percent of battery diagnosis alone.
One thing you don’t need: the engine running for the first test. In fact, you specifically want it off — and ideally off for a while, which I’ll explain below.
Safety First: 60 Seconds That Matter
Car batteries are safe to test with basic precautions, but “basic” isn’t “none.” Batteries contain sulfuric acid and produce hydrogen gas while charging — so no smoking, no open flames, no sparks near the battery. Wear eye protection; acid in the eyes is the injury I warn every DIYer about, because it’s the one that’s actually common.
When probing: red lead to positive (+), black lead to negative (−). If you reverse them, a digital meter just shows a negative number — no damage, just flip them. Don’t let the metal probe tips touch each other while connected to the battery (that creates a short across the terminals — sparks, heat, bad day). And keep the probes on the lead terminal posts themselves, not on the cable clamps, for the most accurate reading — corrosion between clamp and post is exactly what you’re trying to see past.
Remove metal jewelry from your hands. A wrench or ring bridging the terminals can weld itself in place and deliver a serious burn. This isn’t theoretical — I’ve seen the scars.
Test 1: Resting Voltage (the Battery’s Report Card)
This is the fundamental test. With the engine off — and ideally with the car sitting for at least a few hours (overnight is perfect) so the “surface charge” from recent driving dissipates — touch the red probe to the positive terminal and the black probe to the negative terminal. Read the voltage.
The numbers: 12.6 to 12.8 volts is a fully charged, healthy battery. 12.4 volts is about 75 percent charged. 12.2 volts is about 50 percent — this battery needs charging or is losing capacity. 12.0 volts is about 25 percent — effectively discharged. Below 12.0 volts, the battery is deeply discharged; below about 10.5 volts, it likely has a shorted cell and is done.
The surface-charge trap: right after driving, a battery can read 13+ volts from residual charge, masking a weak battery. That’s why the waiting period matters. If you must test immediately after driving, turn the headlights on for 30 seconds with the engine off to burn off the surface charge, wait two minutes, then test. It’s not as accurate as an overnight rest, but it’s honest.
Test 2: Cranking Voltage (Under Load)
Resting voltage tells you the battery’s charge state; cranking voltage tells you its health under load — and health is what starts your car. Have your helper turn the key (or push the start button) while you watch the meter. The voltage will dip as the starter draws hundreds of amps. What matters is how far it dips.
A healthy battery stays above 9.6 volts during cranking (the industry standard threshold, measured at 70°F). If it dips to 9.6-10.5 volts but the engine starts, the battery is marginal — working, but declining. Below 9.6 volts, the battery is failing the load test: it can’t deliver enough current under demand, even if its resting voltage looked fine. This is the classic “reads 12.4V but won’t start the car” scenario — voltage without amperage is a promise the battery can’t keep.
Watch the recovery too: after cranking stops, voltage should bounce back toward 12+ volts within seconds. Slow recovery (creeping back up over a minute) indicates high internal resistance — sulfated plates, aging chemistry. And if the engine doesn’t start, don’t crank for more than 10-15 seconds at a time; starters overheat, and you’re just draining the battery further while learning nothing new.

Test 3: Charging Voltage (Is the Alternator Working?)
Start the engine and let it idle. With the meter still on the battery terminals, read the voltage. You want 13.7 to 14.7 volts — that’s the alternator charging the battery properly. This single reading splits “battery problem” from “charging system problem” cleanly.
Below 13.5 volts with the engine running: the charging system isn’t keeping up. Suspects are the alternator (worn brushes, failed regulator), a slipping or broken serpentine belt, or corroded cables. The battery may be perfectly fine — it’s just not being recharged. Above 14.8 volts: overcharging, usually a failed voltage regulator. This cooks the battery (shortening its life dramatically) and stresses every electronic module. Don’t ignore high voltage; it’s as damaging as low.
The loaded charging test: with the engine at about 1,500 rpm, switch on headlights, blower on high, and rear defroster. Voltage should stay above 13.0 volts. If it sags below that under load, the alternator is weak — it charges at idle but can’t keep up with demand. This is the test that catches the “battery keeps dying but the alternator tested fine at idle” cases.
Reading the Numbers: What They Mean
Let me put the decision tree together. Resting 12.6V+, cranking above 9.6V, charging 13.7-14.7V: your battery and charging system are healthy. Look elsewhere for your problem (starter, connections, parasitic drain). Resting below 12.4V but charging voltage normal: discharged or declining battery — charge it fully, retest after rest; if resting voltage won’t hold above 12.4V, replace it.
Resting voltage fine but cranking dips below 9.6V: failing battery despite decent resting voltage — the plates can’t deliver current. Replace. Charging voltage low: alternator/belt/cable issue — the battery is a victim, not the culprit. Fix the charging system, then assess whether the battery survived the undercharging (chronic undercharging sulfates plates).
One special case: resting voltage around 10.5V almost always means one shorted cell (a 12V battery is six 2.1V cells; five good cells = ~10.5V). No amount of charging fixes a shorted cell. Replace immediately — a shorted cell can also drag down the charging system and, in rare cases, overheat.
When a Multimeter Isn’t Enough: Load Testing
The multimeter’s limitation: the cranking test is a real load test, but only if the engine actually cranks. For a definitive battery health assessment — especially on a battery that “seems fine” — a carbon-pile load tester is the gold standard. It applies a calibrated load (typically half the battery’s CCA rating for 15 seconds) while measuring voltage drop. Most auto parts stores do this free, and it’s worth doing annually after year 3.
Conductance testers (the handheld electronic kind) are the modern alternative: they measure the battery’s internal conductance and estimate health without the heavy load. They’re quick, safe, and reasonably accurate — good for screening, though I’d trust a carbon-pile test for a final verdict on a marginal battery.
The honest hierarchy: multimeter resting + cranking voltage catches about 90 percent of battery problems. A proper load test catches the remaining 10 percent — the batteries with good voltage but collapsed capacity that strand people who “just tested it and it was fine.” If your multimeter results are borderline, get the load test before deciding.
Common Testing Mistakes
Testing right after driving (surface charge lies — wait, or burn it off with headlights). Probing the cable clamps instead of the terminal posts (corrosion between clamp and post hides in clamp readings; post readings tell the truth). Testing with accessories on (any load skews resting voltage — everything off, doors closed, dome light off).
Misreading the meter range (on manual meters, the 200V range shows 12.6 as “12.6” but the 20V range gives better resolution — use 20V DC). Testing a frozen battery (a discharged battery can freeze; never charge or load-test a battery with a bulging case from ice — let it thaw first, and inspect for cracks). And the classic: condemning the battery when the terminals were just corroded — always clean terminals and retest before buying a replacement. I’ve seen “dead” batteries resurrected by ten minutes with a wire brush.
If your testing confirms the battery is truly dead and you need to get the car running to reach a parts store, do the jump properly — wrong cable order can spike voltage and damage electronics. My walkthrough of how to jump start a car covers the exact safe sequence.

Frequently Asked Questions
A healthy, fully charged battery reads 12.6-12.8 volts with the engine off (after resting a few hours). With the engine running, expect 13.7-14.7 volts at the terminals — that’s the alternator charging. During cranking, voltage shouldn’t drop below 9.6 volts.
12.2 volts is about 50% charged — not OK as a resting state. A healthy battery at rest reads 12.6V+. At 12.2V the battery needs charging, and if it won’t hold above 12.4V after a full charge and rest, its capacity is declining and replacement is near.
Use the cranking voltage test: watch your multimeter while someone starts the engine. If voltage stays above 9.6V during cranking, the battery handles load adequately. This catches most failures — but a proper carbon-pile load test (free at parts stores) is definitive for borderline cases.
Yes — all three tests (resting, cranking, charging voltage) are done with the battery installed. Just make sure everything electrical is off for the resting test, probe the terminal posts (not the cable clamps), and keep probe tips from touching each other.
Resting below 12.0V is deeply discharged; around 10.5V usually means a shorted cell (replace immediately). Cranking voltage below 9.6V means the battery can’t deliver adequate current. Charging voltage below 13.5V points to the alternator rather than the battery — test before replacing parts.