Confession: I learned to do a cartwheel at 24, in front of my entire intramural soccer team, because someone said ex-athletes could “obviously” do one. I could not obviously do one. What followed was the most undignified fifteen minutes of my athletic life — a sideways collapse that my teammates still bring up.
But here’s the thing: the cartwheel is a completely learnable skill, and it’s the gateway to every cool bodyweight move — roundoffs, aerials, handstands. I got mine in about three weeks using the progression below, which I pieced together from gymnastics coaches and a lot of trial and error. Whether you’re an adult beginner or teaching a kid, this works. Let’s break it down like the athletes we are.
Table of Contents
- What a Cartwheel Actually Is (Mechanics First)
- What You Need: Space, Surface, and Strength
- Step 1: The Lunge and Hand Placement
- Step 2: The Wall Walk-Over Drill
- Step 3: The Half Cartwheel (Donkey Kick Over)
- Step 4: The Full Cartwheel, Slow
- Step 5: Speed, Line, and Polish
- Which Side? Picking Your Lead
- The Numbers: How Long Does It Take?
- Safety: How Not to Get Hurt
- 5 Cartwheel Mistakes and Fixes
- Frequently Asked Questions
What a Cartwheel Actually Is (Mechanics First)
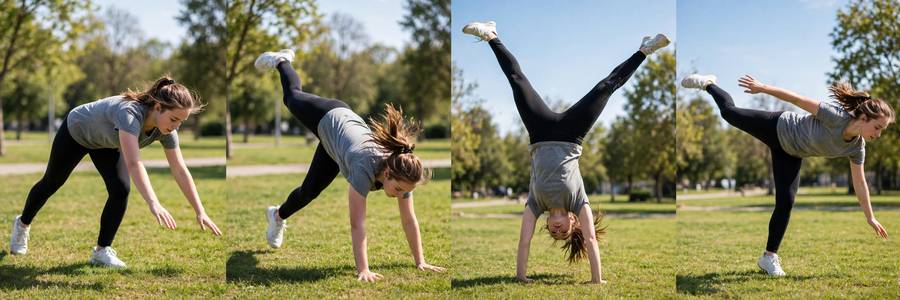
The insight that unlocked it for me: a cartwheel is a controlled fall, not a jump. Momentum carries you over; arms just guide. Beginners muscle it with their shoulders — skilled cartwheelers barely push. Once I stopped trying to “power” it, I started landing them.
Think of it as a wheel rolling: your body is the wheel, your hands and feet are the spokes touching the ground in sequence. Smooth wheels roll; jerky ones don’t.
What You Need: Space, Surface, and Strength
Space: a clear line about 10 feet long and 6 feet wide. No furniture, no walls in the fall zone, no spectators in the landing zone (learned that one the hard way).
Surface: grass is ideal — soft, grippy, forgiving. A gymnastics mat is perfect. Carpet works. Avoid concrete until you’re consistent; one bad landing on concrete teaches fear, and fear kills cartwheels.
Strength minimums: you should be able to hold a plank for 30 seconds and do 5 decent push-ups. That’s it. The cartwheel briefly puts your bodyweight through your arms, and if your shoulders and core can’t handle that, everything else falls apart. If you’re not there yet, bodyweight exercises to build cartwheel strength will get you there in a couple of weeks — start with how to hold a proper plank and how to do push-ups with perfect form.
Step 1: The Lunge and Hand Placement
Every cartwheel starts from a lunge, and the lunge determines everything. Here’s the setup:
Stand facing sideways to your direction of travel. Step forward into a deep lunge with your lead leg (more on picking sides below). Your arms go up by your ears — biceps squeezing your ears, the classic gymnastics “tight” position. This isn’t decorative; tight arms transfer force cleanly, loose arms collapse.
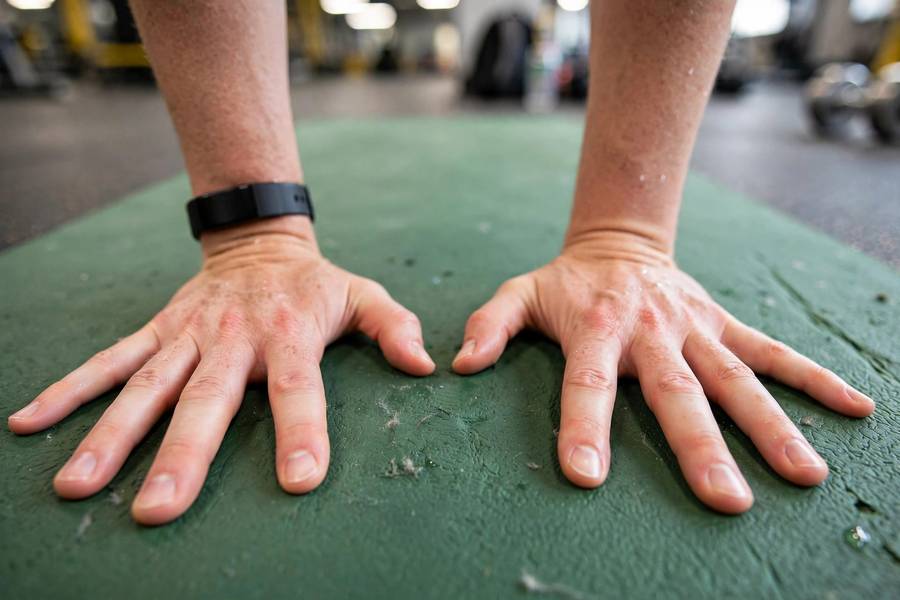
Now hand placement — the detail everyone gets wrong: hands land one after the other in a straight line, fingers spread, shoulder-width apart along your travel line, lead-side hand first. I drew a chalk line for my first week; it fixed my crooked cartwheels instantly.
Drill: just practice the lunge-to-hand-placement without going over. Lunge, place hand one, place hand two, look at your hands. Stand up. Repeat 20 times. Boring? Yes. This is where clean cartwheels are born.
Step 2: The Wall Walk-Over Drill
This drill teaches your body the inverted feeling without the fear of going over. Find a clear wall.
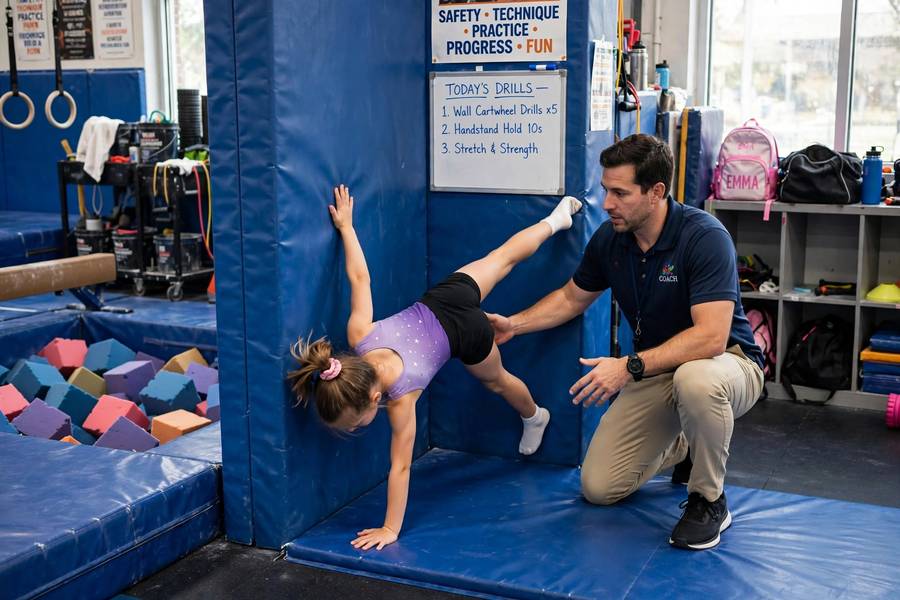
Place your hands on the ground about two feet from the wall, then walk your feet up the wall sideways — so you’re in a sideways handstand position against the wall, legs split. Hold for 5-10 seconds. Walk back down.
This builds shoulder strength in the exact position you need, teaches your brain upside-down is survivable, and ingrains the split-leg shape. Do 5 reps per session — when a 10-second hold feels easy, your shoulders are ready.
Fear of going over is the number one cartwheel killer for adults. This drill murders that fear systematically. I did wall work for a full week before attempting a real cartwheel, and I never had a single scary moment.
Step 3: The Half Cartwheel (Donkey Kick Over)
Now the bridge skill: the half cartwheel. From your lunge, place both hands down and kick your legs up and over to the other side — but instead of splitting them in the air, keep them together and land on both feet. It’s a cartwheel without the split, or a sideways handstand that keeps going.
This teaches the essential feeling: hands down, hips over, feet land — identical momentum to a real cartwheel, simplified leg action. Do these until they’re boring: 10 clean in a row.
Spotter tip: have a friend stand on the far side with a hand hovering near your hips. They probably won’t need to touch you, but knowing they’re there removes the last bit of hesitation. Hesitation is the enemy — cartwheels need commitment.
Step 4: The Full Cartwheel, Slow
Now put it together, slowly. Lunge, hand one, hand two, kick the lead leg up and over in a wide split, follow with the back leg, land lead foot then back foot. The key word is slow — a slow cartwheel with good form beats a fast cartwheel with bad form every time.
Focus on one cue: kick over, don’t push up. Your legs should swing over like a pendulum, driven by the lunge’s momentum. If you’re straining your shoulders, you’re pushing instead of swinging. Go back to the half cartwheel until the swing feeling clicks.
Land in a lunge facing the opposite direction from where you started — that’s a complete cartwheel. The first time you stick one, it’ll feel like magic. It’s not magic; it’s the progression working exactly as designed.
Step 5: Speed, Line, and Polish
Once you’re landing cartwheels consistently, refine them:
Straighten the line. Cartwheel along a straight line on the ground (chalk, tape, a seam in the grass). Your hands and feet should all land on it. Crooked cartwheels waste energy and look sloppy.
Split wider. The wider your leg split at the top, the more stable and impressive the cartwheel. Flexibility helps here — a few minutes of straddle stretching per session pays off.
Point your toes. Details matter. Pointed toes, straight legs, tight core — this is the difference between “can do a cartwheel” and “has a beautiful cartwheel.”
Add speed gradually. A running entry adds power for connected skills (roundoffs, aerials), but only once the standing cartwheel is automatic. Walk before you run.
Which Side? Picking Your Lead
Cartwheels have a dominant side, like writing. Most right-handed people lead with their left leg (lunge left, left hand down first). But not everyone — I’m right-handed and lead right, which confused every coach I worked with until they just accepted it.
Test: do five half-cartwheels leading left, five leading right. One side will feel obviously more natural — less thinking, better balance. That’s your side. Commit to it for at least a month before experimenting with the other. Trying to learn both sides at once is how you learn neither.
The Numbers: How Long Does It Take?
Honest timelines from my experience and the coaches I talked to:
- Kids (5-10): 2-4 weeks of regular practice. They’re fearless, light, and flexible — unfair advantages.
- Teens: 2-6 weeks. Strength is there; coordination varies.
- Adults with athletic background: 3-6 weeks. Strength is fine; the fear factor is the main obstacle.
- Adults starting from zero: 6-10 weeks, mostly spent on the strength prerequisites and fear management.
Practice 15-20 minutes, 3-4 times per week. More isn’t better — wrists and shoulders need recovery, especially for adults.
Safety: How Not to Get Hurt
Cartwheels are low-risk as gymnastics skills go, but respect the basics:
Warm up your wrists. Wrist circles, wrist stretches, 30 seconds each direction. Adult wrists aren’t used to bearing bodyweight, and they’re the most common complaint. I skipped wrist warm-ups exactly once and felt it for three days.
Don’t practice tired. Fatigued shoulders collapse, and collapsing mid-cartwheel is how you land on your head. If your arms are shaking, you’re done for the day.
Use a spotter for the first full attempts. A hand near your hips, not lifting you, just there. It eliminates the fear-bail — the panicked mid-skill abort that causes most cartwheel injuries.
Progress in order. Lunge drill, wall drill, half cartwheel, full cartwheel. Skipping steps is how adults get hurt doing “easy” skills. The progression exists because each step builds the prerequisite for the next.
5 Cartwheel Mistakes and Fixes
1. Bent arms. Arms collapse under your weight, killing the wheel shape. Fix: more wall holds and push-up strength. Think “push the ground away” through the whole skill.
2. The banana. Body arches instead of staying straight, usually from weak core or fear. Fix: hollow-body holds (lie on your back, lift shoulders and legs slightly, hold) and committing to the kick-over.
3. Hands landing everywhere. Hands scatter instead of landing in a line, producing a crooked mess. Fix: the chalk line drill from Step 1. Hands on the line, every rep.
4. Not kicking over. Legs go up but not over, and you collapse back to start. Fix: you’re pushing, not swinging. Go back to half cartwheels and feel the pendulum.
5. Looking at the ground. Head drops, body follows, everything crumples. Fix: pick a spot on the far wall and look at it through the whole skill. Where the head goes, the body follows — use it.

Frequently Asked Questions
Kids typically learn in 2-4 weeks, athletic adults in 3-6 weeks, and complete beginners in 6-10 weeks, practicing 15-20 minutes three to four times per week. Adults mostly need extra time for shoulder strength and overcoming the fear of going upside down — the progression above is designed to handle both.
Absolutely. Adults learn cartwheels regularly — the main obstacles are wrist and shoulder strength (fixable with push-ups and planks) and fear of inversion (fixable with wall drills). I learned at 24. Start on grass, follow a step-by-step progression, and use a spotter for your first full attempts.
Follow a progression: master the lunge and hand placement first, then wall walk-overs to get comfortable upside down, then half cartwheels (legs together), then the full cartwheel slowly. Each step builds the skill and confidence for the next. Skipping steps is the main reason people struggle.
Your lead (dominant) leg lunges forward first, and the same-side hand touches down first. Most right-handed people lead with the left leg, but test both sides — whichever feels more natural and balanced is your side. Commit to one side for at least a month.
Usually one of three causes: bent arms collapsing under your weight (build shoulder strength), not kicking your legs fully over (you’re pushing up instead of swinging over — go back to half cartwheels), or hesitating mid-skill (use a spotter until commitment is automatic). Video yourself — the problem is usually obvious on playback.
No — basic cartwheels need only average flexibility. A wider leg split looks better and adds stability, and shoulder flexibility helps the handstand position, but neither is a prerequisite. If you can touch your toes and hold a plank, you have enough mobility to start learning today.