Spark plugs are the unsung heroes of your engine — tiny parts doing a violent job thousands of times per minute. And changing them is one of the best DIY jobs a car owner can tackle: cheap parts, basic tools, and an immediately noticeable difference when they’re overdue.
I’ve changed thousands of spark plugs over ten years in the shop. I’ve also repaired the damage from every DIY mistake in the book — cross-threaded holes, cracked insulators, wrong plugs. This guide gives you the full procedure plus the hard-won lessons that keep a $30 job from becoming a $500 one.
Contents
- When Do Spark Plugs Need Changing?
- What You’ll Need
- Which Plugs to Buy (This Matters More Than You Think)
- Step-by-Step Replacement
- Gapping: The Step Everyone Skips
- Torque: Tight Enough, Not Too Tight
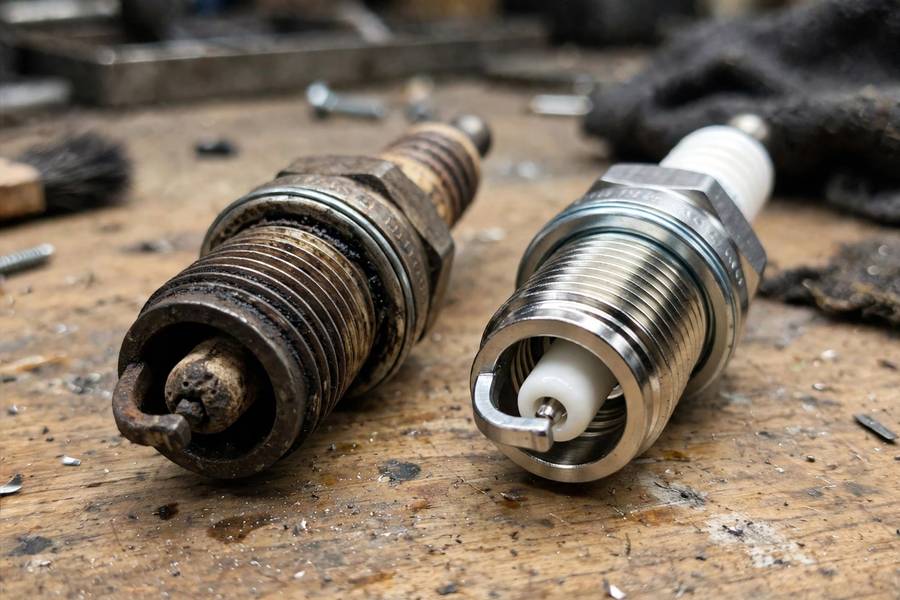
- Reading Your Old Plugs (They Tell a Story)
- Mistakes That Cost Real Money
When Do Spark Plugs Need Changing?
It depends on the plug type:
| Plug type | Typical interval |
|---|---|
| Copper | 20,000–30,000 miles |
| Platinum | 60,000–100,000 miles |
| Iridium | 80,000–120,000 miles |
Symptoms of worn plugs: rough idle, hesitation on acceleration, misfires (possibly a flashing check engine light), worse fuel economy, hard starting. If your car has 100,000 miles on the original plugs, they’re done — even if it “runs fine.” Worn plugs stress the ignition coils, and coils cost a lot more than plugs.
Check your manual for the spec. And note: “100,000-mile plugs” means the electrode lasts that long — the plug can still foul from oil or fuel issues long before.
What You’ll Need
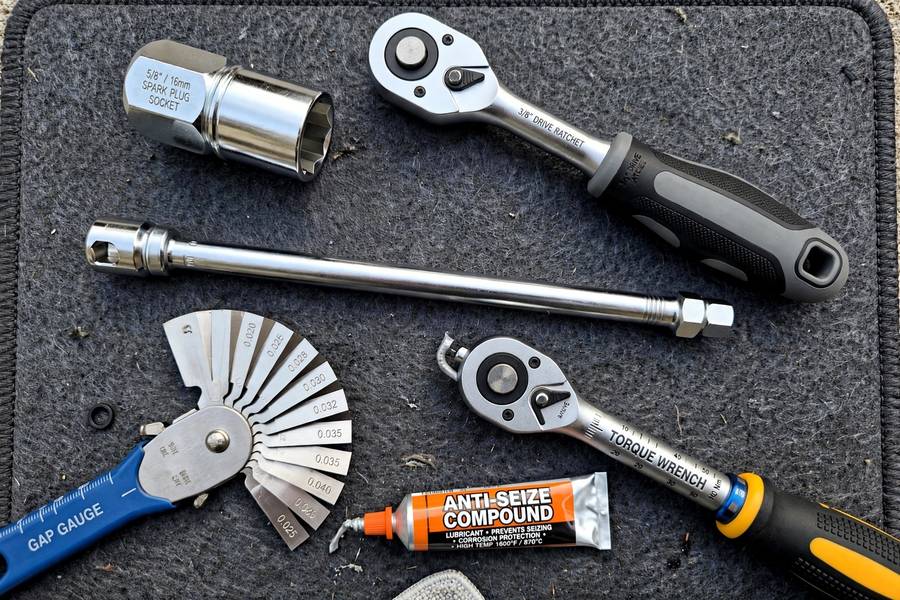
- Spark plug socket (5/8″ or 16mm for most cars — it has a rubber insert that grips the plug)
- Ratchet + extension (6″ usually; some engines need longer)
- Spark plug gap gauge (wire type is best; the coin type works)
- Torque wrench (non-negotiable in my book — see below)
- Compressed air or a shop vac (to blow debris out of the plug wells)
- Dielectric grease (for the boot) and anti-seize (for the threads — with caveats)
- New plugs — the exact spec for your engine
Which Plugs to Buy (This Matters More Than You Think)
Buy the plug your manufacturer specifies. Not “a better one,” not the fancy multi-electrode gimmick — the specified plug.
Here’s why I insist: modern engines are designed around a specific plug’s heat range, gap, and electrode design. I’ve diagnosed misfires and poor running caused by nothing more than “upgraded” plugs that the engine’s computer couldn’t work with properly. The engineers who designed your ignition system knew what they were doing.
Copper vs. platinum vs. iridium: iridium lasts longest and performs consistently; copper conducts slightly better but wears fast. For most drivers, whatever came from the factory is the right answer. Would I spend my own money on exotic plugs? No — I’d spend it on the correct plugs, changed on time.
Step-by-Step Replacement
Do this on a cold engine. Aluminum cylinder heads + hot engine + steel plug threads = a recipe for thread damage. Wait at least an hour after driving. I mean it.
1. Clean around the plugs first. Blow compressed air into each plug well (or vacuum) before removing anything. A grain of sand falling into the cylinder is a disaster you can prevent in ten seconds.
2. Remove one plug wire or coil pack at a time. Don’t pull them all at once — you’ll mix up the firing order. On coil-on-plug engines (most modern cars), unplug the electrical connector and remove the single bolt holding each coil, then pull the coil straight up.
3. Remove the old plug with the spark plug socket. Turn counterclockwise. If it resists, don’t force it — a tiny squirt of penetrating oil and patience beats a snapped plug. (Snapped plugs are a special kind of misery involving extractors.)
4. Check and set the gap on the new plug (see below).
5. Thread the new plug in BY HAND first. This is the most important sentence in this guide. Use just the socket and extension with no ratchet, turning clockwise gently. It should thread smoothly with minimal resistance. If it binds — stop, back it out, realign. Cross-threading a spark plug hole in an aluminum head is a $300–500 thread repair. Hand-threading prevents it entirely.
6. Torque to spec once finger-tight (see below).
7. Reinstall the coil/wire, ensuring it clicks fully onto the plug. A loose boot causes misfires that’ll have you chasing ghosts.
8. Repeat for each cylinder, one at a time.

Gapping: The Step Everyone Skips
The gap — the distance between the center and ground electrodes — must match your engine’s spec (typically 0.028″–0.060″, in your manual or under the hood on the emissions sticker).
Too wide: the spark struggles to jump, causing misfires under load. Too narrow: weak spark, incomplete combustion, lost power and economy.
Many new plugs come “pre-gapped,” but I’ve measured enough out-of-spec new plugs to never trust it. Check every plug with a wire gauge — slide the correct wire between the electrodes; it should drag slightly. Adjust by gently tapping or prying the ground electrode (never the center electrode). Thirty seconds per plug. Do it.
Torque: Tight Enough, Not Too Tight
Spark plugs in aluminum heads need surprisingly little torque — typically 15–25 ft-lbs depending on plug size. That’s “snug with a short ratchet,” not “he-man tight.”
- Too loose: poor heat transfer, compression leaks, the plug can literally back out. I’ve seen a plug launch out of a head like a bullet. Terrifying.
- Too tight: stripped threads in the aluminum head. The repair involves drilling, tapping, and installing a thread insert — or pulling the head.
A torque wrench ($25–40) pays for itself the first time it prevents either mistake. If you absolutely don’t have one: finger-tight plus roughly a half-turn for a new plug with a crush washer (check your plug type — tapered-seat plugs are different). But seriously, get the torque wrench.
Reading Your Old Plugs (They Tell a Story)
Don’t just toss them — old plugs are diagnostic gold. Lay them out in order (cylinder 1, 2, 3…) and look:
- Tan/gray deposits: normal. The engine’s healthy.
- Black, sooty: running rich — or lots of short trips. Check air filter, consider driving patterns.
- Oily/wet: oil getting into the combustion chamber — worn valve seals or piston rings. This needs professional diagnosis.
- White/blistered: running too hot or too lean. Check for vacuum leaks or cooling issues.
- One plug looks different from the rest: that cylinder has its own problem — focus your diagnosis there.
I read plugs on every tune-up in the shop. It’s like a blood test for your engine — quick, cheap, and revealing.
Mistakes That Cost Real Money
The hall of shame, from ten years of fixing DIY jobs:
- Working on a hot engine. Stripped threads. Wait for it to cool.
- Not hand-threading first. Cross-threaded plug holes. The #1 expensive mistake.
- Over-torquing. See above. Torque wrench. Every time.
- Skipping the gap check. “Pre-gapped” is a suggestion, not a guarantee.
- Mixing up plug wires/coils. One at a time. Always.
- Dropping a plug. A dropped plug can close the gap or crack the insulator invisibly. If you drop one, re-gap it and inspect carefully — or just replace it. They’re cheap.
- Using anti-seize on everything. Anti-seize changes torque values (lubricated threads need ~20% less torque). Some plug manufacturers specifically say not to use it (many modern plugs have anti-seize coatings already). Follow the plug maker’s guidance.
An hour of your Saturday, $30–60 in parts, and your engine breathes easier. Understand your car instead of fearing it — and the jobs that used to intimidate you start looking like what they are: straightforward mechanical work, done carefully.
Keep the momentum going: how to jump start a car is the other Saturday-morning skill every driver should have, how to clean car headlights restores nighttime visibility for pocket change, and knowing what cruise control is means you’ll actually use the tech your car already ships with.
Frequently Asked Questions
On a cold engine, clean around each plug, remove one coil/wire at a time, unscrew the old plug, check and set the gap on the new plug, hand-thread it in to avoid cross-threading, torque to spec, and reinstall the coil. Work one cylinder at a time.
Copper plugs: 20,000–30,000 miles; platinum: 60,000–100,000; iridium: 80,000–120,000. Check your owner’s manual for your engine’s specific interval and always use the manufacturer-specified plug type.
Yes — always check the gap even on “pre-gapped” plugs, as they frequently arrive out of spec. Use a wire gauge matching your engine’s specified gap (typically 0.028″–0.060″), found in the manual or on the under-hood sticker.
Over-tightening strips the threads in aluminum cylinder heads, requiring expensive thread repair ($300–500+). Too loose is also bad — poor heat transfer and the plug can back out. Always use a torque wrench to the specified value (typically 15–25 ft-lbs).
Yes — it’s one of the best DIY car jobs, requiring only basic tools and about an hour. The critical rules: work on a cold engine, hand-thread plugs first to avoid cross-threading, check the gap, and torque to spec. Some transverse V6 engines have hard-to-reach rear plugs that may warrant a shop.