How to Do Lunges with Correct Form: A Coach’s Step-by-Step Guide

If I had to pick the exercise I correct most often, it would not even be close: the lunge. I have watched thousands of reps across a decade of coaching, and I would estimate most people doing lunges in commercial gyms are doing them wrong in ways that either waste the movement or quietly punish their knees. So let us fix it once and for all. How to do lunges with correct form comes down to a handful of non-negotiable positions — and once you feel them click, you will never unfeel them. The lunge done right is one of the best lower-body exercises that exists. Done wrong, it is just knee pain with extra steps.
Why the lunge deserves your attention: it trains each leg independently (fixing the strength imbalances that bilateral exercises like squats let you hide), it builds the glutes, quads and hamstrings through a deep range of motion, it challenges balance and core stability with every rep, and it transfers directly to real life — stairs, hills, getting up off the floor. It is also infinitely scalable, from assisted beginner versions to loaded walking lunges that humble advanced lifters. Worth learning properly? Absolutely.
The Setup: Before You Take a Step
Stand tall with feet hip-width apart, core braced like someone is about to poke your stomach, shoulders back and down, eyes forward. Pick a point on the wall at eye level and keep your gaze there — where your eyes go, your torso follows, and torso position drives everything in the lunge. If you are new to the movement, do your first sessions next to a wall or sturdy chair for balance support. There is no shame in assistance; there is only shame in face-planting because of pride.
Footwear matters more than people think: flat, stable shoes (or barefoot on a mat at home). Running shoes with big squishy heels create an unstable platform — you are essentially lunging on marshmallows. If all you own are cushioned runners, go barefoot on a non-slip surface instead.
How to Do Lunges with Correct Form: The Rep, Step by Step
Step 1 — the step: take a long step forward, roughly two to three feet depending on your height. Longer than feels natural at first — most beginners step too short, which is mistake number one (more below). Land heel first, then settle the foot flat.
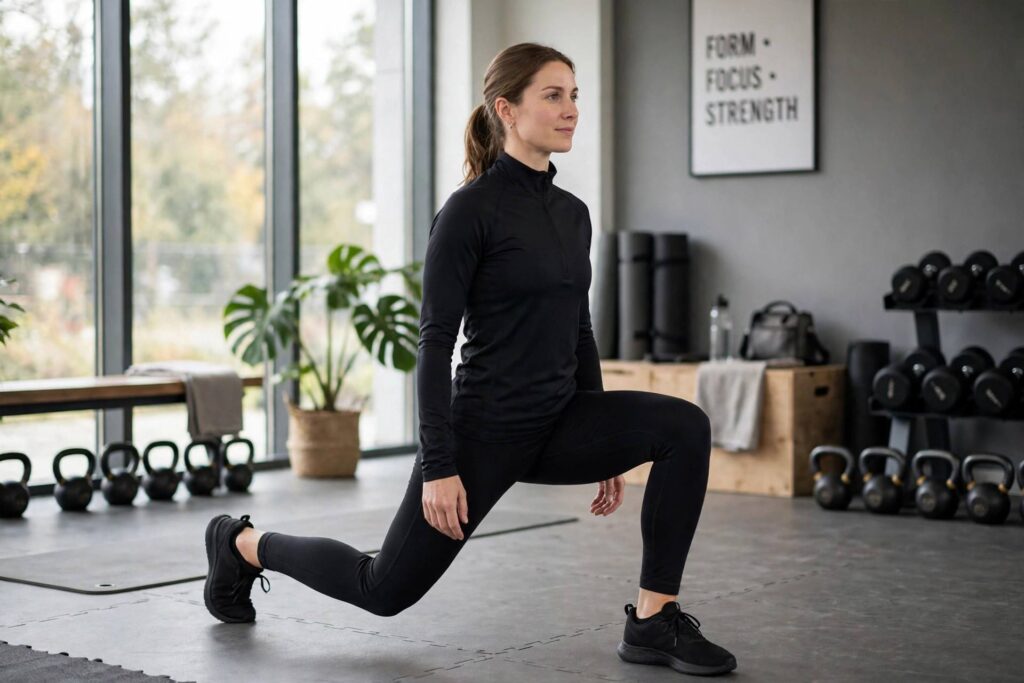
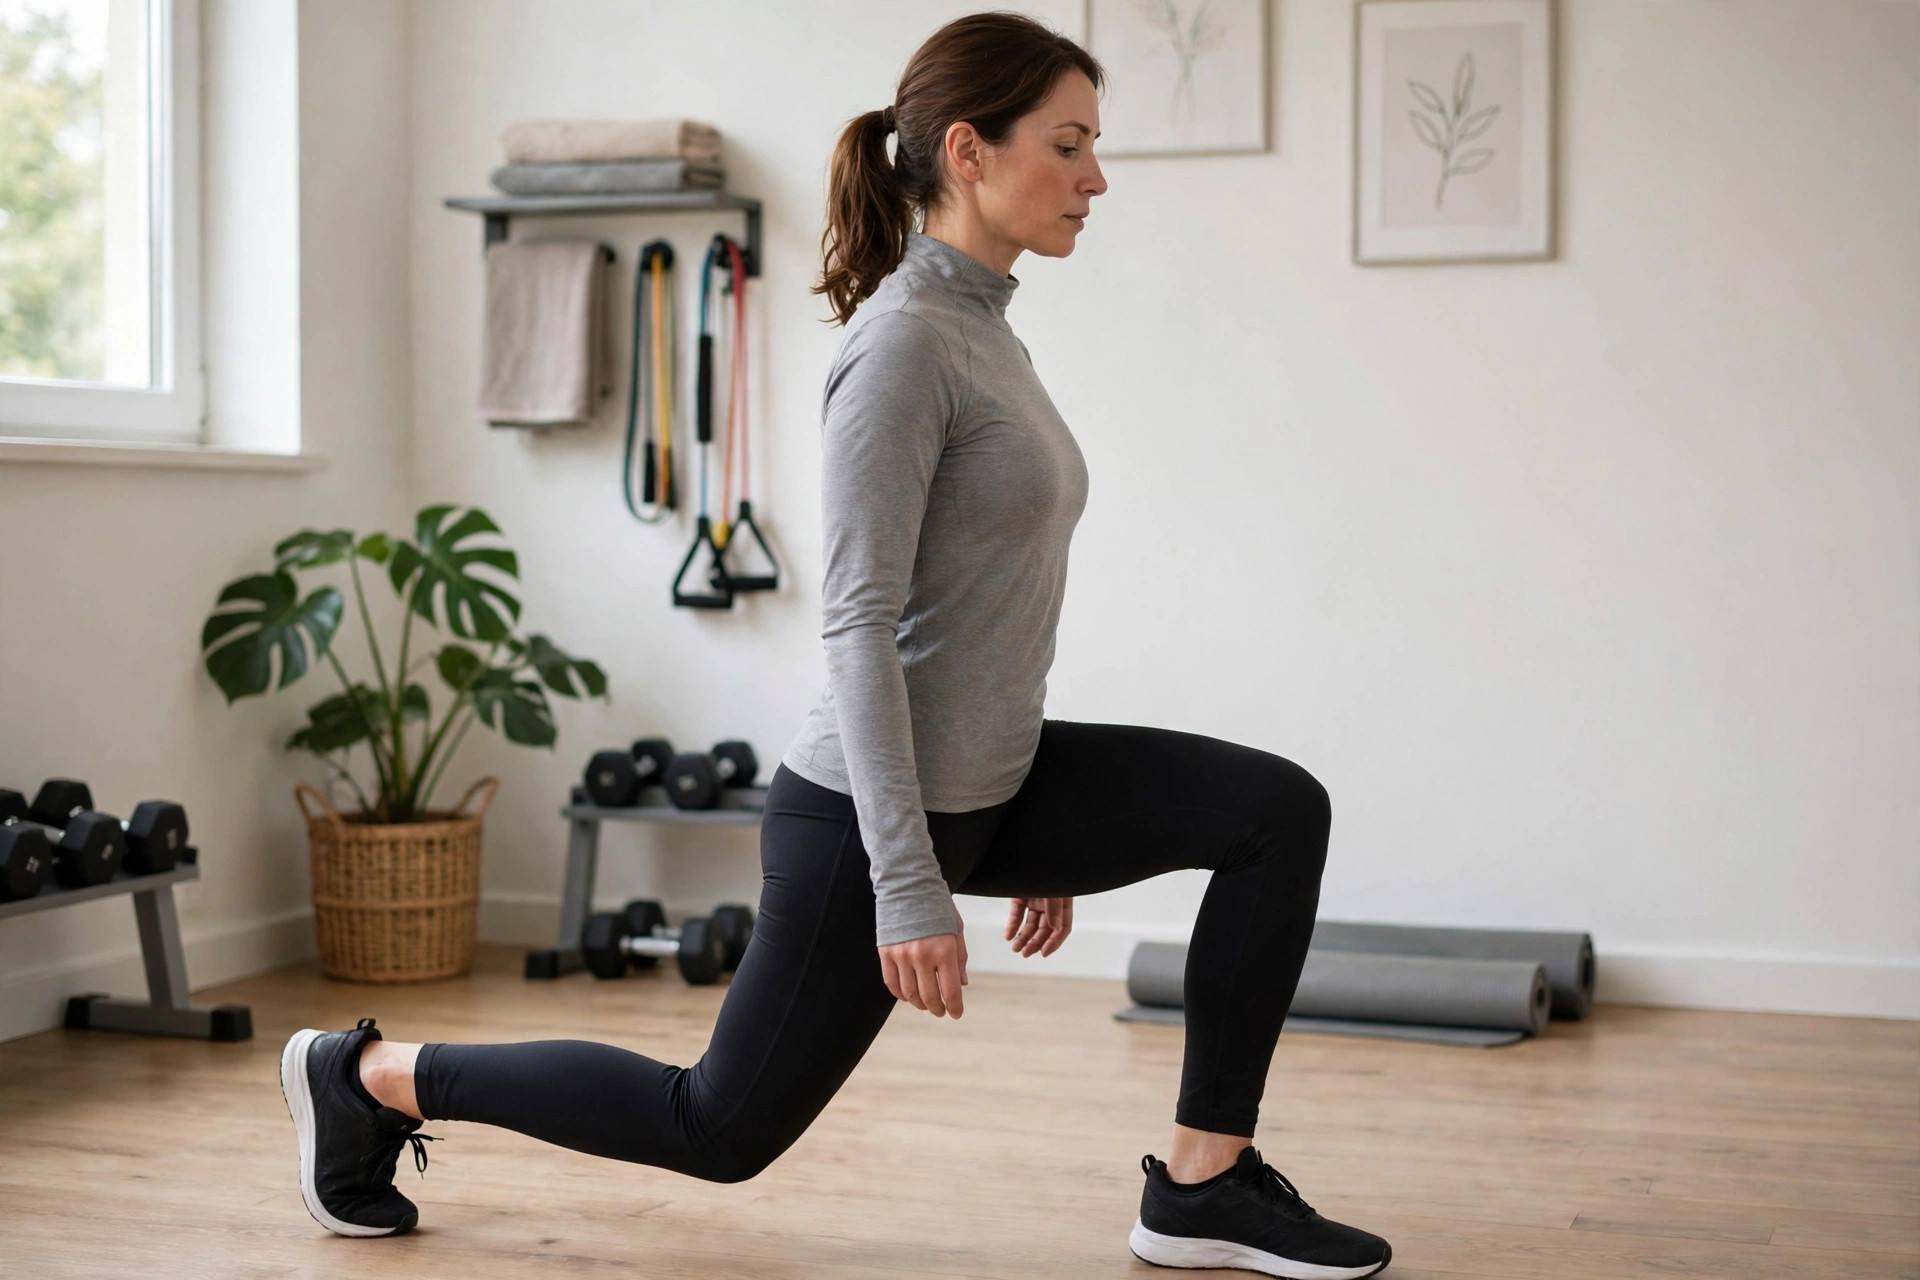
Step 2 — the descent: lower straight down, not forward. Think elevator, not escalator — your torso stays vertical as your hips drop between your legs. Both knees bend to roughly 90 degrees: front thigh parallel to the floor, back knee hovering an inch or two above the ground. The descent should take about two seconds — controlled, not dropped.
Step 3 — the positions (the checklist): front knee tracks over the front ankle — it should not cave inward or shoot past the toes excessively. Torso stays upright — no leaning forward over the front leg. Core stays braced throughout. Weight is distributed across the whole front foot, with a slight emphasis on driving through the heel and midfoot. Back heel is lifted, weight on the ball of the back foot.
Step 4 — the drive: push through the front heel to stand back up, bringing the feet back together. One second up, with control — no bouncing out of the bottom. That is one rep. Alternate legs or complete all reps on one side before switching; both work, and alternating gives each leg a brief rest.
Breathing: inhale on the way down, exhale as you drive up. Bracing plus breath timing turns a wobbly rep into a solid one — it is the invisible half of good form.
The Mistakes I Correct Every Week
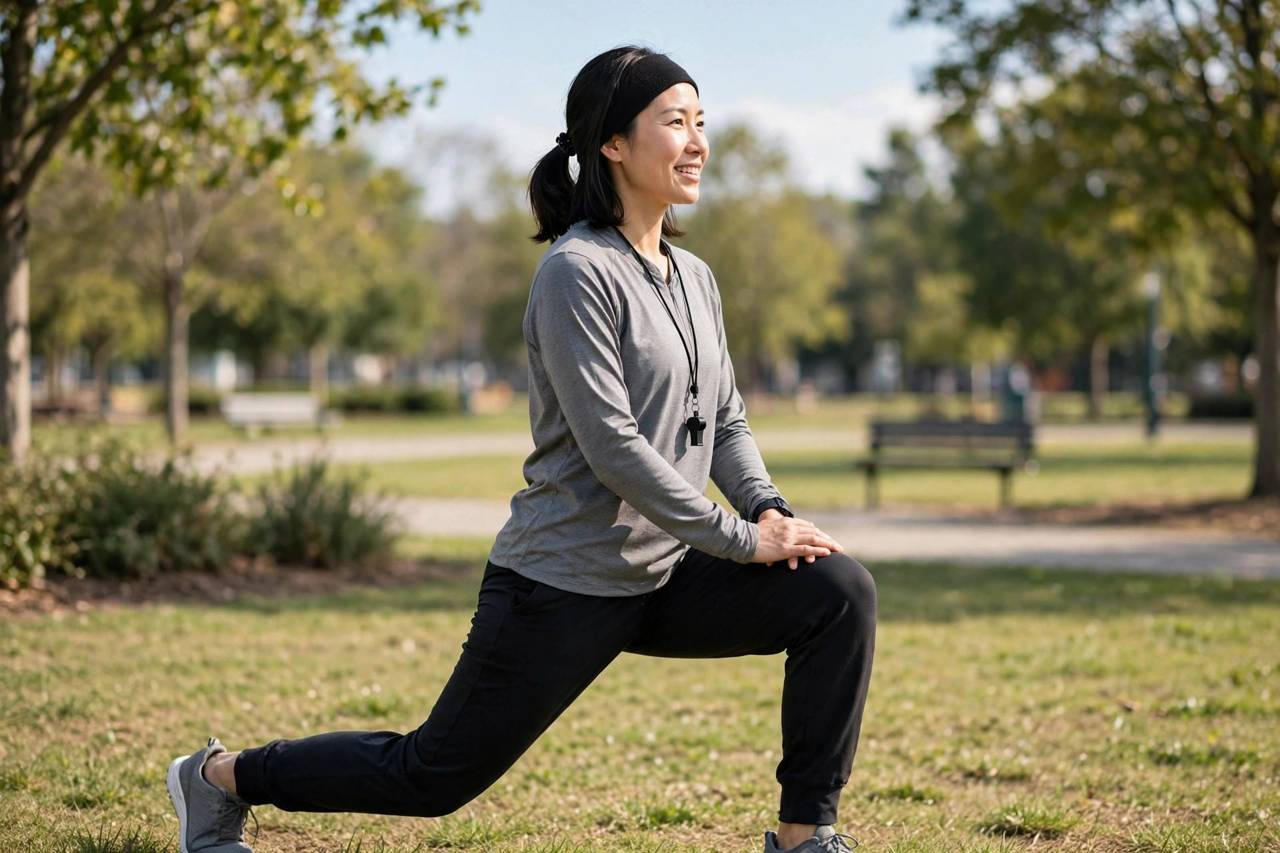
Stepping too short. The most common error, and it causes most of the others. A short step forces the front knee far past the toes and loads the knee joint instead of the muscles. Fix: step longer. When in doubt, step longer than you think — then a little more.
Knee caving inward. The front knee collapses toward the midline, especially on the way up. This is usually weak glutes failing to stabilize — and it is the pattern most associated with knee pain. Fix: think “knee over pinky toe,” and if you cannot hold it, regress (below) until you can. Never push through knee cave with added weight.
Leaning the torso forward. The upper body tips over the front leg, turning the lunge into a weird bow. Usually caused by tight hip flexors or just habit. Fix: pick the eye-level focal point, brace the core, and think “chest proud.” A light touch of fingertips on a wall helps recalibrate.
Bouncing out of the bottom. Dropping fast and rebounding uses momentum instead of muscle — it feels easier because it is easier, and it skips the strength-building part. Fix: two seconds down, one second pause at the bottom, drive up. The pause kills momentum and builds real control.
Back leg going dead. People forget the back leg exists. It should be active — glute engaged, knee tracking straight down, hovering just off the floor. A lazy back leg dumps all the work (and instability) onto the front side.
Regressions: If the Full Lunge Is Too Much Right Now
There is a correct starting point for every body, and starting too advanced is how form breaks down. Work up this ladder.
Split squat (stationary lunge). Get into the bottom lunge position and stay there — just go up and down without stepping. Removing the step removes the balance challenge, letting you own the positions first. Master 3 sets of 10 per leg here before moving on.
Assisted lunge. Full stepping lunge, but with a hand on a wall, chair or suspension trainer. Assistance for balance only — your legs still do all the work. Reduce assistance gradually.
Short-range lunge. Full movement, but only descend halfway. Builds the pattern and the strength progressively — increase depth over weeks, not days.
Reverse lunge. Step backward instead of forward. Easier on the knees (less forward knee travel), easier to balance, and many coaches’ preferred default — including mine for beginners with knee sensitivity. If forward lunges bother your knees, try these before giving up on the movement entirely.
Only add load (dumbbells, then barbell) when you can do 3 sets of 12 clean bodyweight reps per leg with every position on the checklist holding. Weight magnifies whatever your form is — good or bad.
Programming: Sets, Reps and Variations
For general strength and muscle: 3–4 sets of 8–12 reps per leg, 1–2 times per week, as part of a lower-body day. Rest 60–90 seconds between sets. When 12 clean reps feel easy, add weight before adding reps — endless high-rep lunges build endurance, not strength.
Once the basic lunge is solid, the family expands: walking lunges (continuous forward motion — the classic, brutal and effective), lateral lunges (side step — trains the often-neglected frontal plane), curtsy lunges (diagonal step back — heavy glute emphasis), and deficit lunges (front foot elevated — deeper range for advanced lifters). Each is the same positions, new direction. And lunges slot naturally into a full program — if you are building one from scratch, a beginner workout routine shows you where they fit alongside the other fundamentals.
Programming Variations for Specific Goals
Once the basic lunge is solid, tailor the variation to the goal. For glute growth: deficit reverse lunges and curtsy lunges, 3–4 sets of 10–12, with dumbbells — the longer range of motion and hip emphasis shift work to the glutes. For athletic power: walking lunges with a load, or jumping lunges (advanced only, and only with perfect landing mechanics) for explosiveness. For knee-friendly training: reverse lunges and short-range split squats keep shear forces low while building the same muscles. For conditioning: bodyweight walking lunges for distance or time — two minutes continuous is humbling. The positions never change; only the direction, load and intent do. Master the checklist once and the whole family is yours.
A note on soreness: lunges produce notorious delayed-onset muscle soreness in beginners — the deep eccentric stretch under load is a potent stimulus. Expect days two and three to be memorable. It fades as your body adapts (usually within two to three weeks of consistent training), and it is not a sign of injury — just of a movement your body had not met before. Train through mild soreness; rest through sharp pain. They are different signals, and learning to tell them apart is part of the education.
Frequently Asked Questions
Should your knee go past your toes in a lunge?
A little forward knee travel is normal and safe for healthy knees — the old “never past the toes” rule is outdated. What matters is that the knee tracks in line with the foot (no caving inward) and the weight stays through the whole foot rather than shifting entirely to the toes.
Why do lunges hurt my knees?
The usual causes: stepping too short (overloads the knee), knee caving inward, or descending too fast. Try reverse lunges, shorten the range of motion, and check the form checklist. Persistent sharp pain — as opposed to muscle effort — means stop and get assessed rather than pushing through.
Are forward or reverse lunges better?
Neither is universally better. Forward lunges are the classic and slightly more demanding on balance; reverse lunges are kinder to knees and easier to learn. Beginners with knee sensitivity should start with reverse lunges. Most experienced lifters benefit from using both.
How many lunges should a beginner do?
Start with 2–3 sets of 8–10 reps per leg, bodyweight only, 1–2 times per week. Add a set or a few reps when all reps are clean. Add weight only after 3×12 perfect bodyweight reps per leg.
Do lunges build glutes?
Yes — lunges are among the best glute builders available, especially with a longer stride and an upright torso, which increase glute activation. For maximum glute emphasis, think about driving the hips forward as you stand and consider curtsy and deficit variations once the basics are solid.
The Bottom Line
How to do lunges with correct form: long step, elevator descent, knee tracking over the ankle, upright torso, braced core, controlled drive through the front heel. Fix the mistakes (short steps, knee cave, forward lean) before adding weight, regress without shame, and program 3–4 sets of 8–12 per leg. The lunge rewards patience like few exercises do — put in the form work now and it pays you back for years.