Corroded battery terminals are the most common cause of “my car won’t start but the battery is fine” — and the fix takes ten minutes with supplies you probably already own. That white, crusty buildup isn’t just ugly; it’s electrical resistance, and resistance between the battery and your car means slow cranking, dim lights, and charging problems. I’ve revived countless “dead” cars with nothing but a wire brush and baking soda. Here’s the full procedure: safe disconnection, proper cleaning, and how to keep the corrosion from coming back. For the bigger battery picture, see how long car batteries last.
Table of Contents
- What That Crusty Buildup Actually Is
- How Corrosion Causes Starting Problems
- What You’ll Need
- Safety First
- Step-by-Step: Cleaning the Terminals
- The Baking Soda Method vs Commercial Cleaners
- When Cleaning Isn’t Enough
- Preventing Corrosion From Coming Back
- Frequently Asked Questions
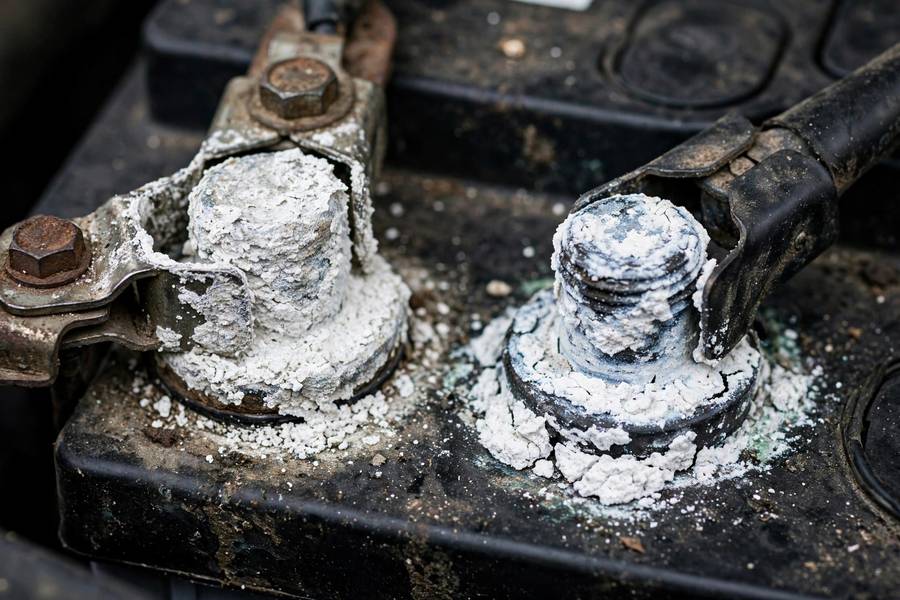
What That Crusty Buildup Actually Is
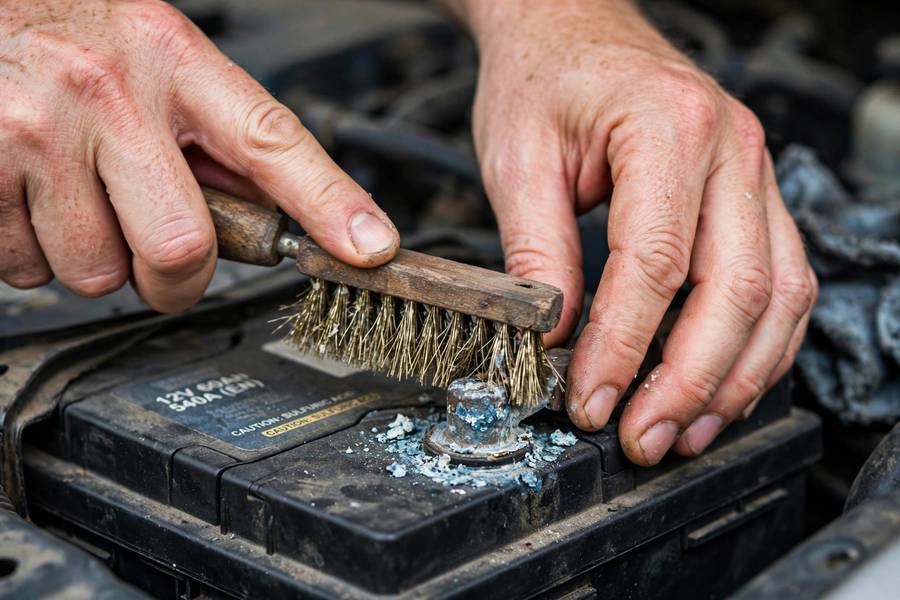
The white, blue-green, or greenish crust on battery terminals is corrosion — metal salts formed when sulfuric acid vapor from the battery reacts with the lead terminals and copper cable clamps. White powder is typically lead sulfate; blue-green indicates copper sulfate from the cable clamps corroding. It’s a normal byproduct of battery operation: batteries vent small amounts of acid vapor during charging, especially in heat, and the vapor condenses on the nearest metal — the terminals.
Some corrosion over time is inevitable. Excessive corrosion — thick buildup returning within weeks of cleaning — signals a problem: the battery is venting excessively (overcharging, internal failure, or just old age), or there’s a poor connection generating heat that accelerates the reaction. Light annual corrosion is maintenance; heavy recurring corrosion is a symptom worth investigating.
Don’t confuse corrosion with the fuzzy white stuff on some new batteries — that’s sometimes just manufacturing residue. And don’t confuse terminal corrosion with a leaking case: if the crust is on the case itself or there’s wet acid around the base, that’s a leak, not terminal corrosion, and the battery needs replacement, not cleaning.
How Corrosion Causes Starting Problems
Electricity needs clean metal-to-metal contact. Corrosion is not metal — it’s a salt compound with high electrical resistance sitting between the battery post and the cable clamp. Even a thin layer adds measurable resistance, and starting current is enormous (200-600 amps), so even small resistance creates a large voltage drop. The math is brutal: 0.01 ohms of corrosion resistance at 400 amps drops 4 volts — nearly a third of your battery’s voltage, gone before it reaches the starter.
The symptoms mimic a dying battery perfectly: slow cranking, clicking, dim lights, intermittent no-starts. The difference: the battery itself is fine — the power just can’t get out. I’ve had customers authorize battery replacements for corrosion problems; a $0 cleaning would have done it. Always clean and retest before replacing anything.
Corrosion also causes charging problems in reverse: the alternator’s charging current faces the same resistance going in, so the battery never fully charges — which accelerates sulfation and shortens battery life. And intermittent connections create voltage spikes that stress electronic modules. That crusty terminal is costing you in three directions: starting, charging, and electronics longevity.
What You’ll Need
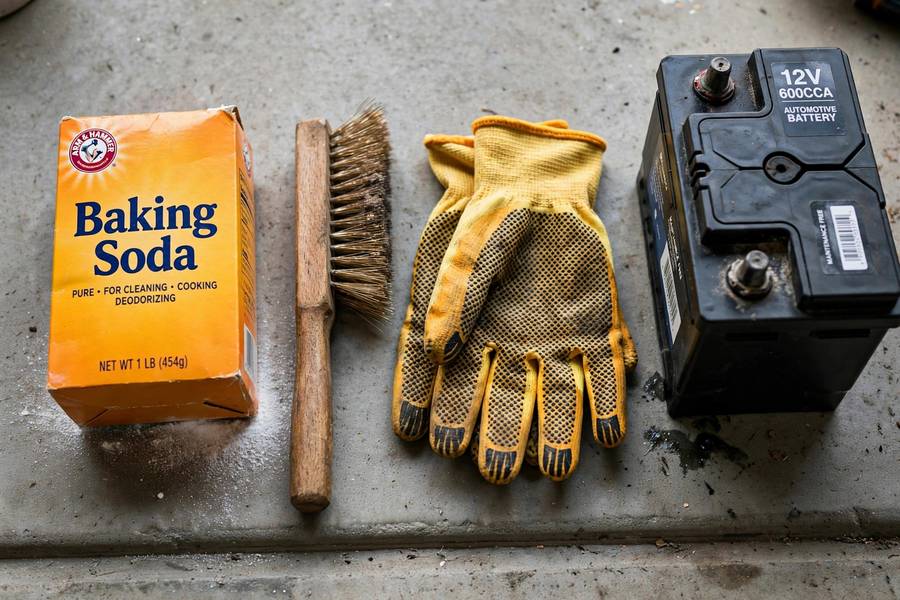
The basics: a wire brush (a dedicated battery terminal brush is $5 and worth it — it has an internal brush for the posts and an external one for the clamps), baking soda, water, an old toothbrush or small brush for application, clean rags, and protective gloves and eyewear. A 10mm or 13mm wrench (most terminal bolts are one of these — check yours) for loosening the cable clamps.
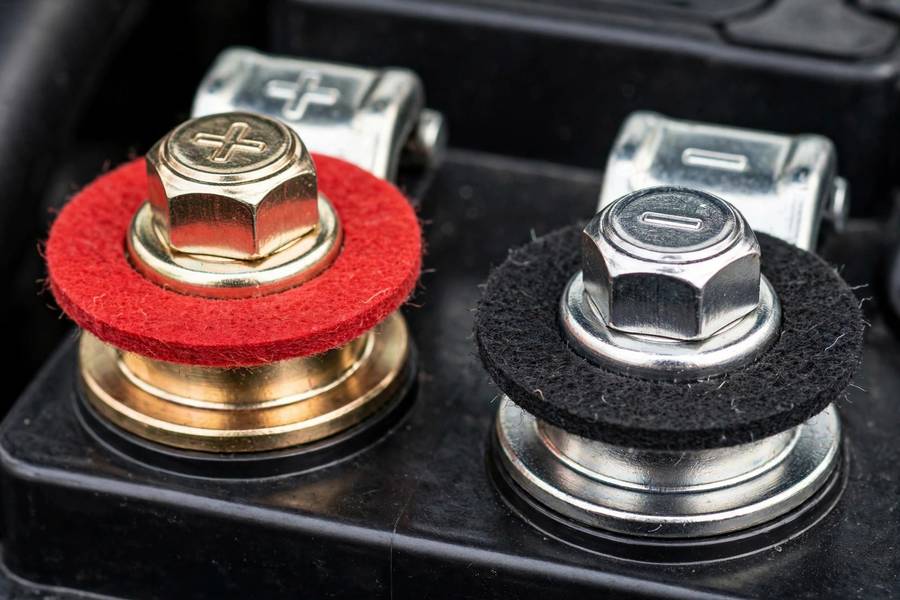
Nice to have: a battery terminal cleaner spray ($8 — sprays on, foams, neutralizes acid), anti-corrosion felt washers ($3 for a pair — they sit under the cable clamps and neutralize vapor), dielectric grease or petroleum jelly for protection after cleaning, and a terminal puller ($10) if your clamps are seized on — don’t pry with a screwdriver, you’ll crack the battery case or break the post.
What you don’t need: Coca-Cola (the folk remedy — it works because it’s acidic, but it leaves sticky sugar residue that attracts dirt; baking soda and water is better and cheaper), a Dremel or power tool (easy to remove too much metal), or any “miracle” corrosion dissolver at 10x the price of baking soda.
Safety First
Gloves and eye protection — non-negotiable. You’re dealing with dried sulfuric acid compounds; you don’t want them in your eyes or on irritated skin. If corrosion dust gets in your eyes, flush with water for 15 minutes and seek medical attention.
Work in a ventilated area, and no smoking or open flames — you’re working directly on the battery, which vents hydrogen. Remove metal jewelry from your hands. And the disconnection sequence matters: negative cable off FIRST, negative cable on LAST. Why? If your wrench touches the car’s metal body while loosening the positive terminal with the negative still connected, you create a dead short — sparks, melted wrench, possible battery damage. With negative disconnected first, that accident can’t happen.
Keep baking soda and water handy not just for cleaning but for neutralization: if you spill or splash anything, baking soda neutralizes acid on contact. And wash your hands thoroughly when done — corrosion residue on your hands, then your face or lunch, is an avoidable unpleasantness.
Step-by-Step: Cleaning the Terminals
- Engine off, keys out. Everything electrical off. Put on gloves and eye protection.
- Disconnect negative first: loosen the negative (−) cable clamp bolt and wiggle the clamp off the post. Tuck it aside where it can’t spring back onto the terminal.
- Disconnect positive: same procedure on the positive (+) clamp. Note the routing so you reconnect correctly.
- Inspect: look at the posts, clamps, and cables. Green corrosion deep into the cable strands, cracked insulation, or swollen cable ends mean the cable itself is compromised — cleaning the terminal won’t fix a rotten cable.
- Apply baking soda solution: mix a tablespoon of baking soda in a cup of water, and brush it onto the terminals, posts, and clamps with the toothbrush. It’ll fizz — that’s the acid neutralizing. Let it work for a few minutes on heavy buildup.
- Scrub: use the terminal brush on the posts (internal brush) and inside the clamps (external brush) until you see clean, shiny metal. Shiny is the goal — dull gray means there’s still oxidation. For heavy crust, repeat the baking soda application.
- Rinse and dry: wipe everything with a damp rag, then a dry rag. Don’t pour water freely over the battery — you don’t want water (and dissolved acid salts) running into the battery vents or across the top creating a conductive path between terminals.
- Reconnect positive first: positive clamp onto the positive post, tighten snug — firm, not gorilla-tight. Overtightening cracks the lead post or strips the clamp bolt.
- Reconnect negative last: same procedure. Then tug-test both clamps — they shouldn’t move or rotate on the posts.
- Protect: apply a thin coat of dielectric grease or petroleum jelly to the terminals, or install anti-corrosion felt washers. This seals out the acid vapor that causes recurrence.
Start the car and verify: it should crank noticeably stronger if corrosion was the problem. If it doesn’t, the battery itself needs testing — but at least you’ve eliminated the most common impostor.
The Baking Soda Method vs Commercial Cleaners
Baking soda and water is my default recommendation: it’s cheap, effective, safe, and you already own it. The chemistry is straightforward — sodium bicarbonate neutralizes sulfuric acid compounds on contact (the fizzing is carbon dioxide releasing). It cleans and neutralizes simultaneously, which matters because residual acid keeps corroding after you “clean.”
Commercial battery cleaner sprays ($8-$12) do the same job with more convenience: spray on, watch it foam and change color (most turn from yellow to pink as they neutralize acid — a neat visual indicator), rinse off. They’re slightly more effective on heavy buildup and the color-change indicator tells you when the acid is neutralized. Worth buying if you maintain multiple vehicles or face heavy corrosion regularly.
What I’d skip: abrasive “restoration” pastes and powered wire wheels. They remove metal aggressively — and battery posts have limited metal to spare. Every aggressive cleaning thins the posts slightly; do it enough times and the clamps won’t tighten properly anymore. Gentle and thorough beats aggressive every time. The goal is clean metal, not new metal.
When Cleaning Isn’t Enough
Sometimes the terminals are beyond cleaning. Replace the cable clamps (or entire cables) when: corrosion has eaten deep into the cable strands under the insulation (peel back a little insulation near the terminal — green, powdery copper deep inside means the cable is compromised along its length); the clamp is cracked or won’t tighten (stripped bolt, spread clamp); the cable insulation is swollen, cracked, or brittle.
Cable replacement costs: terminal ends alone are $5-$15; complete battery cables run $20-$60 depending on length and gauge. It’s a straightforward DIY job — same disconnect sequence, route the new cable the same path, ensure the gauge matches or exceeds original (thinner cable = more resistance = the problem you’re fixing).
Also recognize when the battery is the problem, not the terminals: if heavy corrosion returns within weeks of thorough cleaning, the battery is venting excessively — overcharging, internal damage, or end of life. Cleaning treats the symptom; the battery needs testing and likely replacement. And if the posts themselves are damaged — cracked, loose in the case, or melted from a previous short — no cleaning fixes that. Replace the battery. If the car won’t start on the worn-out battery and you need to drive it to the parts store, a jump gets you there — just use the right cable order, covered in how to jump start a car.
Preventing Corrosion From Coming Back
Prevention is a three-layer defense. Layer one: seal the metal from vapor. After cleaning, coat terminals with dielectric grease, petroleum jelly, or a dedicated battery terminal protectant spray. The coating doesn’t need to be thick — a thin, complete film blocks the acid vapor from reaching the metal. Reapply annually.
Layer two: anti-corrosion felt washers. These $3 rings sit around the posts under the cable clamps, impregnated with a vapor-neutralizing compound. They’re the single most effective prevention I’ve seen — cheap, passive, and they last years. Install them on every battery service; there’s no reason not to.
Layer three: address the root cause. Keep the battery properly charged (an undercharged battery gasses more), ensure the charging system isn’t overcharging (above 14.8V cooks batteries and accelerates venting), and replace aging batteries before they vent excessively. A battery that needs terminal cleaning every month is telling you it’s done — listen.
Annual terminal inspection takes two minutes: pop the hood, look at the terminals, clean at the first sign of buildup rather than waiting for starting problems. The ten-minute cleaning you do proactively is always cheaper than the tow truck you call reactively.
Frequently Asked Questions
Disconnect negative first, then positive. Apply a baking soda-water solution to neutralize the acid (it will fizz), scrub posts and clamps with a wire terminal brush until shiny, wipe clean and dry, reconnect positive first then negative, and coat with dielectric grease to prevent recurrence.
Sulfuric acid vapor venting from the battery reacts with the lead terminals and copper clamps, forming metal salt deposits. Some corrosion is normal; heavy recurring corrosion signals overcharging, excessive venting from an aging battery, or a poor connection generating heat.
Yes — it’s one of the most common causes. Corrosion creates electrical resistance between the battery and cables; even 0.01 ohms drops several volts at starter currents, causing slow cranking or no-start. Always clean terminals and retest before replacing the battery.
Yes. Disconnect the negative cable first, then the positive, before cleaning. This prevents short circuits if your tools touch the car body, and lets you clean the posts and clamps thoroughly. Reconnect positive first, negative last.
After cleaning, coat terminals with dielectric grease or petroleum jelly, install anti-corrosion felt washers ($3), keep the battery properly charged, and ensure the alternator isn’t overcharging (above 14.8V). Inspect annually and clean at the first sign of buildup.