
Cross-threading a spark plug is the most expensive mistake in the DIY tune-up world. One moment of impatience — a plug started at a slight angle, forced with a ratchet — and you’ve chewed up the threads in an aluminum cylinder head. The repair starts around $300 at a shop. The prevention costs nothing and takes ten seconds per plug.
I’ve repaired more cross-threaded plug holes than I can count, and every driver says the same thing: “It felt a little tight, but I figured it would straighten out.” It never straightens out. Here are the six rules that make cross-threading nearly impossible.
Contents
- What Cross Threading Is and Why It Costs So Much
- Rule 1: Only Ever Work on a Cold Engine
- Rule 2: Clean the Plug Wells First
- Rule 3: Hand Thread Every Plug, No Ratchet
- Rule 4: The Backward Turn Trick
- Rule 5: Know What Wrong Feels Like
- Rule 6: Never Force It — Back Out and Restart
- If It Already Happened: Your Repair Options
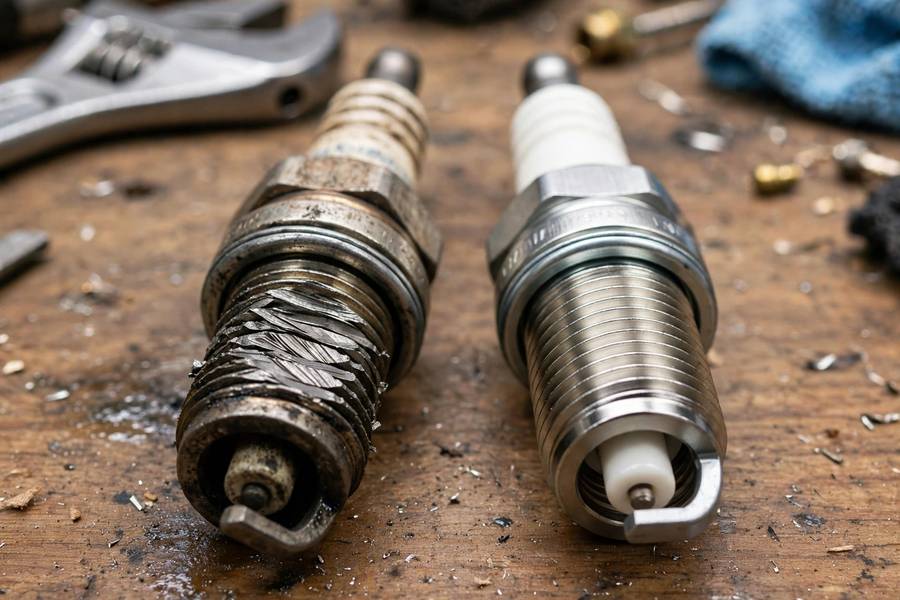
What Cross Threading Is and Why It Costs So Much
Threads are a spiral ramp. Started correctly, the plug’s threads drop into the head’s threads and follow the spiral down. Cross-threading means the plug started at an angle, so its threads cut across the head’s threads — carving a destructive path through soft aluminum. And since steel plug threads are far harder than the aluminum head, every forced turn does more damage to the expensive part.
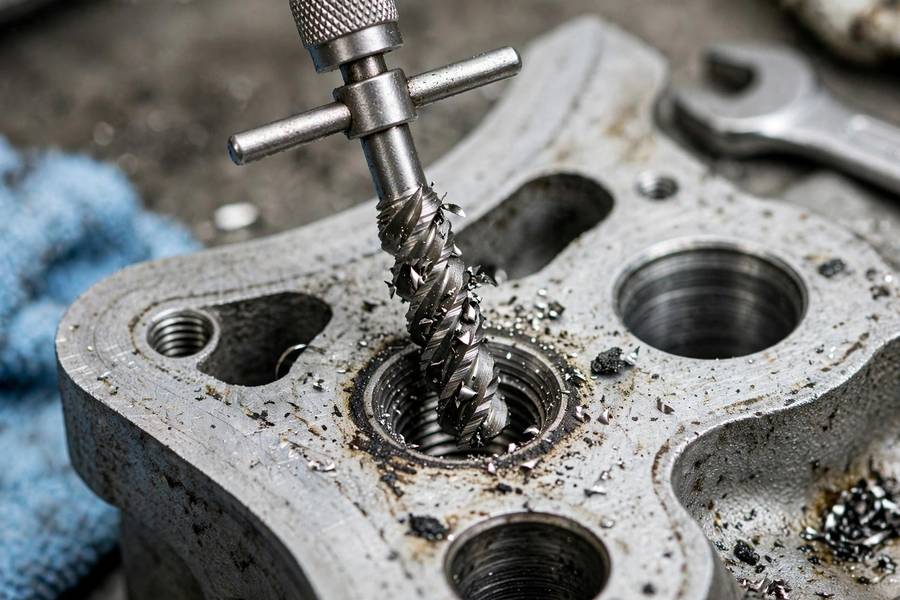
The repair hierarchy: a thread chaser can sometimes clean up very minor damage ($15 tool). A thread insert (Heli-Coil or Time-Sert) means drilling the hole oversize — $300–500 at a shop. Worst cases, where the head has to come off, run $1,000+. All of it preventable with technique.
Rule 1: Only Ever Work on a Cold Engine
Aluminum expands significantly when hot — the plug holes are literally a different size than when cold — and hot aluminum galls and tears far more easily. Wait at least an hour after driving. A hot engine turns a forgiving job into an unforgiving one.
Rule 2: Clean the Plug Wells First
Before the old plug comes out, blow out the plug well with compressed air (or vacuum it thoroughly). This serves two purposes, and the second one is about cross-threading.
First, it keeps debris from falling into the cylinder when the plug comes out — a grain of sand in a cylinder is its own disaster. Second, and relevant here: grit and carbon buildup in the threads themselves create false resistance. You’re trying to feel the difference between “smooth threading” and “something’s wrong,” and that feel is ruined if the threads are full of crud. A clean thread gives you clean feedback.
On the way back in, visually check the new plug’s threads too. Manufacturing burrs are rare but real, and a damaged plug thread will fight you from the first turn. If a new plug’s threads look nicked, exchange it — it’s a $5 part.
Rule 3: Hand Thread Every Plug, No Ratchet
This is the big one. The rule that prevents 99% of cross-threading:
Start every plug using only the spark plug socket on an extension — with no ratchet attached. Hold the extension and turn it with your fingers.
Why this works: your fingers can’t generate enough force to cut new threads in aluminum. If the plug is aligned correctly, it will spin in smoothly with almost no resistance — you’ll feel it glide. If it’s misaligned, your fingers will feel the resistance immediately, long before any damage occurs, because you simply aren’t strong enough to force it wrong. The ratchet is what gives you the force to do damage; without it, damage is nearly impossible.
You’ll feel the plug thread in for several full turns — that’s normal and good. Keep going by hand until it’s finger-tight and seated. Only then do you attach the ratchet for the final snug and torque. I do this on every plug, every time, after ten years. It’s not beginner training wheels; it’s the professional technique. The day you skip it is the day you learn why you shouldn’t.
For hard-to-reach plugs where you can’t get your fingers on the extension: use a piece of rubber hose or fuel line slipped over the plug’s terminal as a flexible hand-starter. It gives you the finger-feel at a distance, and the hose will simply slip if the plug binds — a built-in safety clutch. Old mechanics’ trick, and it works beautifully on buried rear-bank plugs.

Rule 4: The Backward Turn Trick
Here’s a technique from machine shops that works perfectly for spark plugs: before threading the plug in, place it in the hole and turn it counterclockwise (backward) gently until you feel a faint click or drop.
What you’re feeling: the plug’s threads riding up and over the head’s thread starts, then dropping into alignment with them. That little click is the threads seating into each other correctly. Once you feel it, reverse direction and thread it in clockwise — it’ll follow the established path smoothly.
This takes two seconds and it eliminates the most common cause of cross-threading: starting the plug one thread off, at a slight angle, because you began turning before the threads were engaged. The backward turn guarantees engagement before commitment. I teach this to every apprentice on day one, and I still do it myself on every plug. It’s free insurance.
Rule 5: Know What Wrong Feels Like
Correct threading has a specific feel, and you should know it cold:
Right: The plug turns with light, even resistance — smooth, consistent, almost silky. It gets very slightly tighter as the gasket seats, but the turning feel never changes character. Several full turns by hand, easy all the way.
Wrong: uneven, gritty, or sharply increasing resistance within the first couple of turns. A plug that was spinning freely and suddenly binds. Any grinding sensation.
The critical insight: with hand-threading, “wrong” announces itself early and quietly — on turn one or two, when zero damage has occurred. The people who cross-thread plugs felt that early resistance and pushed through it with a ratchet. Trust the feel. Your fingers are smarter than your impatience.
Rule 6: Never Force It — Back Out and Restart
If anything feels wrong — binding, grinding, sudden resistance — stop immediately. Back the plug all the way out, blow out the well again, and restart from the backward-turn trick. There is no scenario where forcing a resistant plug ends well. The plug will not “straighten out” — every forced turn cuts deeper into the head.
This rule also applies to removal: if an old plug resists coming out, work it back and forth gently with penetrating oil and patience. A plug that snaps off in the head is a special kind of misery.
If It Already Happened: Your Repair Options
If you’re reading this section with a sinking feeling, here’s the honest triage:
It bound up but you stopped immediately. Back it out, inspect. If the plug’s threads look okay and the hole looks okay, clean everything, restart carefully with the backward-turn trick, and you may be fine. Minor thread deformation on the first turn or two sometimes cleans up with correct re-threading. Test by hand-threading — if it goes in smooth now, you dodged it.
It’s in but went in hard. Back it out and inspect both the plug and the hole. If the head’s threads are visibly damaged, stop — a thread chaser (not a tap) run carefully by hand can sometimes restore lightly damaged threads, but if you’re unsure, this is the moment for a professional.
It’s genuinely cross-threaded and tight. Don’t drive it — it won’t seal properly and can loosen or blow out. The fix is a thread insert installed by someone experienced, keeping every metal shaving out of the cylinder. A $300–500 shop job, worth every penny versus the alternative.
The through-line: catch it early and it’s a restart; catch it late and it’s a repair bill. Every rule above is about catching it at the “restart” stage, when the cost is ten seconds. Which is why, when you do the full job, you do it by the book — my complete procedure is in how to change spark plugs, where hand-threading is step one of the installation for exactly this reason.
And if a plug comes out looking alarming — oily, white, or damaged — before you even get to installation, check what your check engine light means and consider what the old plugs were telling you. Sometimes the threading isn’t the only thing that needs attention. A clean air filter helps everything downstream too — how to change your engine air filter is the fifteen-minute companion job.
Ten seconds of patience per plug. That’s the whole price of never cross-threading. Pay it gladly.
Frequently Asked Questions
Hand-thread every plug using only the socket and extension — no ratchet — so your fingers feel resistance before damage occurs. Use the backward-turn trick (turn counterclockwise until you feel the threads click into alignment), work on a cold engine, clean the plug wells first, and never force a plug that binds.
Uneven, gritty, or sharply increasing resistance within the first couple of turns — completely different from the smooth, silky feel of correct threading. If a plug that was spinning freely suddenly binds, stop immediately, back it out, and restart. Never force it.
Minor damage can sometimes be cleaned up with a thread chaser. Serious cross-threading requires a thread insert (Heli-Coil or Time-Sert), typically a $300–500 shop job. Caught in the first turn or two — back it out and restart correctly — there’s often no damage at all.
Always. Thread the plug in with just the socket and extension, turning with your fingers, until it’s fully seated. Your fingers can’t generate enough force to damage aluminum threads, so misalignment announces itself as resistance before any harm is done. Attach the ratchet only for final tightening.
You shouldn’t. A cross-threaded plug doesn’t seal properly, leaks combustion pressure, runs hot from poor heat transfer, and can loosen or blow out of the head entirely. Have the threads repaired with a thread insert before driving.