How to Clean a Dryer Vent: A Fire-Safety Guide


Learning how to clean a dryer vent is one of those jobs most homeowners put off until something scares them into it — a burning smell, clothes that take three cycles to dry, or a friend telling them lint caused their fire. I’ve cleaned hundreds of vents over the years, and the pattern is always the same: the lint screen in the door looks fine, but the vent run behind the dryer is packed solid. This guide walks you through the whole job, step by step, with the safety warnings that actually matter.
Why Dryer Vent Cleaning Is a Fire-Safety Issue, Not Just a Chore
A dryer pushes hot, moist air — and fine lint — through a duct every time it runs. Lint is extremely flammable, and the inside of a duct is the perfect place for it to collect: warm, dark, and full of moving air. When the duct clogs, the dryer runs hotter, dries slower, and the lint around the heating element or in the duct itself can ignite. This is not a theoretical risk. It is one of the most well-documented preventable fire hazards in a house.
Beyond fire safety, a clogged vent costs you money every single month. A dryer fighting against a blocked duct can take two to three times longer to dry a load. That is extra electricity or gas burned for nothing, plus extra wear on the machine itself. Bearings, belts, and thermostats all live longer when the dryer breathes easily. Cleaning the vent is the cheapest dryer maintenance there is.
Warning Signs Your Dryer Vent Is Clogged
Your dryer will tell you the vent needs attention long before anything dangerous happens. Watch for these:
- Clothes are still damp after a full normal cycle, or need a second run.
- The top of the dryer feels unusually hot to the touch.
- A musty or burning smell in the laundry room while the dryer runs.
- The outside vent flap barely opens, or doesn’t open at all, while drying.
- Lint collecting around the dryer door seal or behind the machine.
- The room gets noticeably humid during a drying cycle.
If you notice two or more of these, clean the vent this week. Don’t let it ride for another month.
Tools You Need to Clean a Dryer Vent
You don’t need much, and the one specialty tool pays for itself the first time you use it:
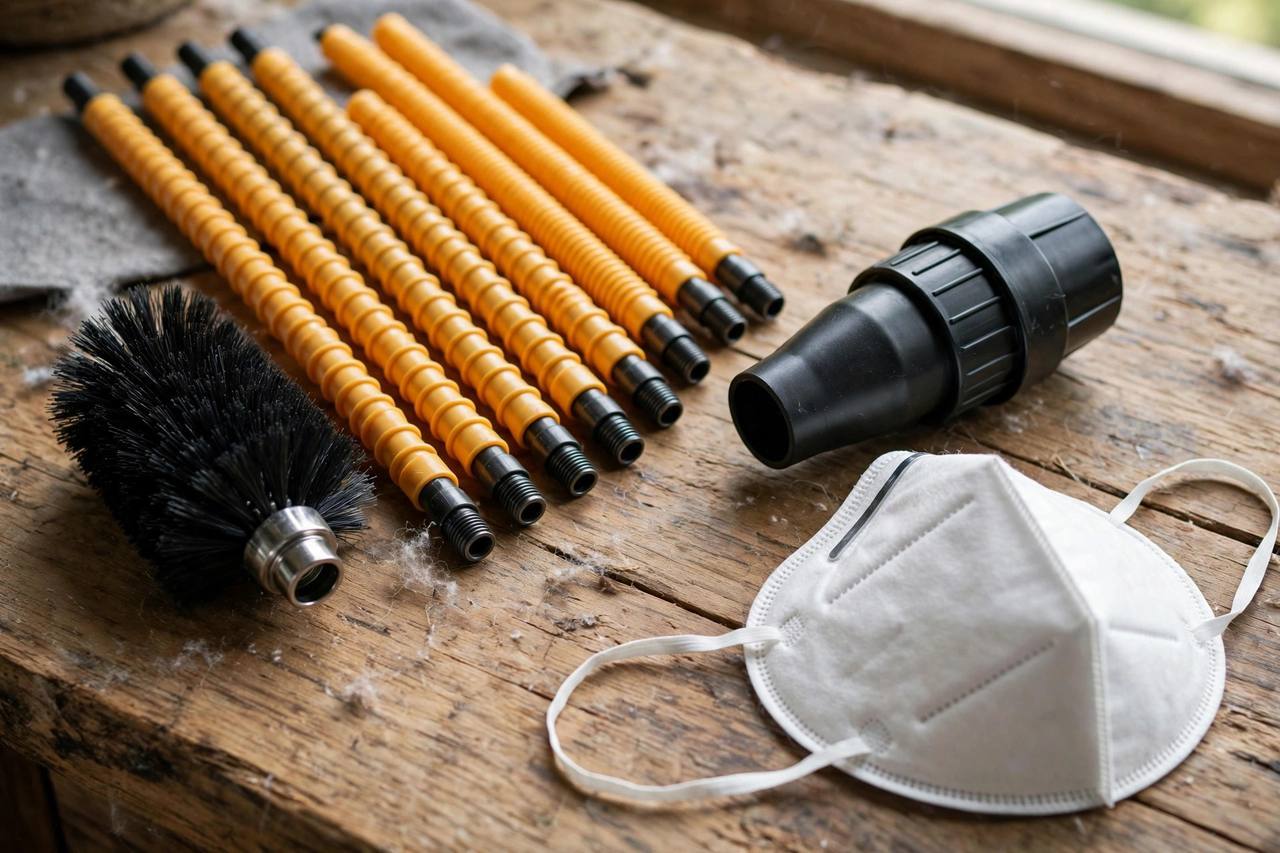
- A dryer vent cleaning brush kit — flexible rods with a lint brush head, usually 12 feet long. These attach to a drill and scrub the duct walls.
- A shop vacuum (or a regular vacuum with a hose attachment).
- A screwdriver or nut driver — most vent clamps use 1/4-inch screws.
- A dust mask — you will disturb years of lint dust.
- A ladder — if your exterior vent cap is high on the wall.
- A flashlight — to inspect the duct and the wall cap.
The brush kit is the part people skip, and it is the part that does the real work. Vacuuming alone can’t reach into a 10-foot run of duct. The kit costs less than one service call.
How to Clean a Dryer Vent: Step by Step
Step 1: Unplug the Dryer and Pull It Out
Safety first. Unplug an electric dryer. For a gas dryer, turn the gas supply valve off and unplug the power cord. Then carefully slide the dryer away from the wall so you can reach the vent connection on the back. Go slow — the vent duct is attached, and yanking can kink flexible ducting or pull connections apart.
Step 2: Disconnect the Vent Duct
Loosen the clamp holding the vent duct to the dryer’s exhaust port — usually a worm-drive clamp you loosen with a screwdriver. Slide the duct off. Have your vacuum ready, because lint will spill out. This is your first look at the problem: if the duct interior looks gray and furry, you’re overdue.
Step 3: Vacuum the Dryer Port and Accessible Duct
Vacuum the exhaust port on the dryer itself, getting into it as far as the hose reaches. Then vacuum the disconnected end of the duct. This clears the loose stuff before you scrub.
Step 4: Run the Brush Kit Through the Duct
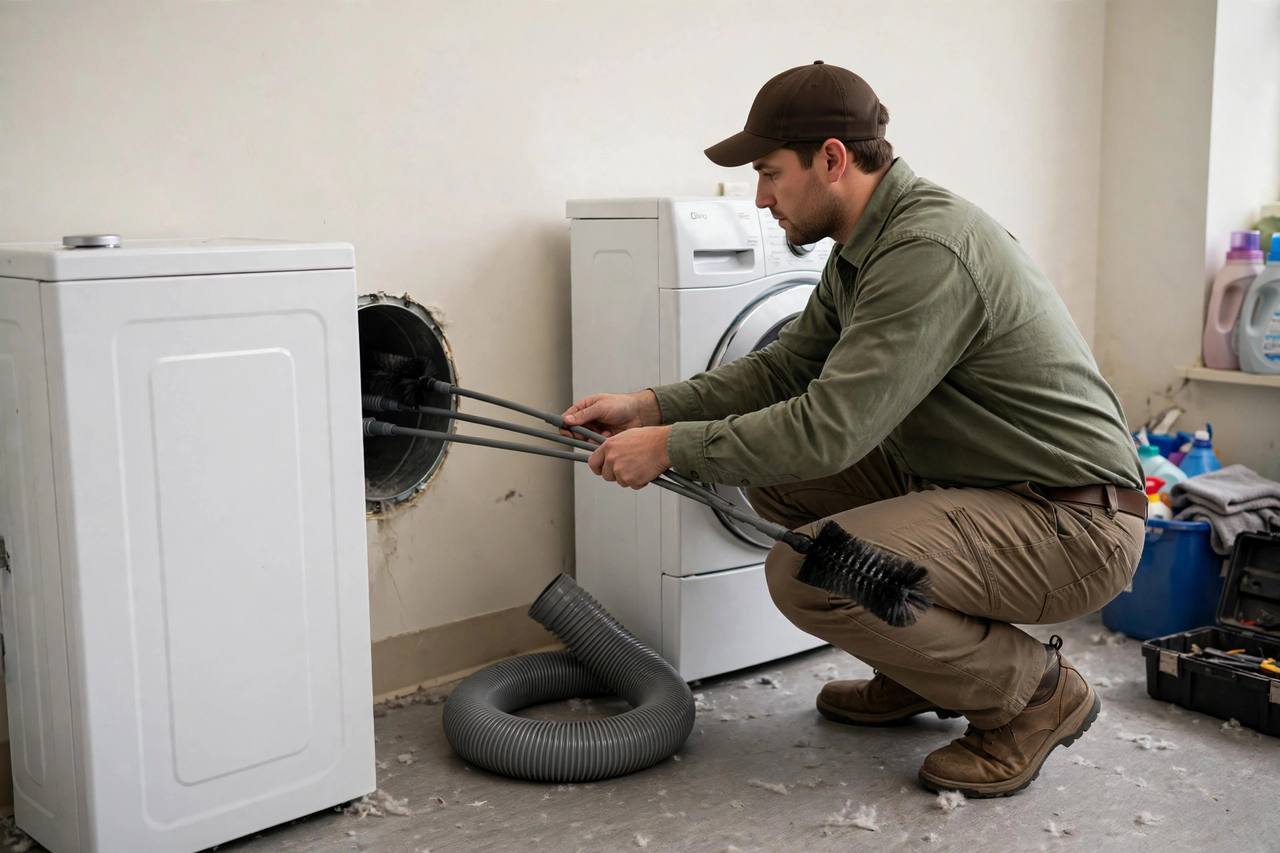
Assemble two or three rods with the brush head and feed them into the duct from the dryer side. Attach the other end to a drill (or crank it by hand for short runs). Run the drill at a moderate speed — high speed whips the rods and can damage foil ducting. Feed the brush in slowly while it turns, adding rods as you go until you reach the exterior cap or the rods stop.
Work the brush back and forth. You’ll feel resistance where lint has packed in. Keep at it — a clean duct should offer almost no resistance. When you pull the brush back out, vacuum the duct end again to catch what the brush loosened.
Step 5: Clean the Exterior Vent Cap
Go outside to the vent cap. These get ignored for years and can be fully blocked by lint, spider webs, or even bird nests. Remove the cap if it’s the snap-on type, or unscrew it. Scrub it with the brush, vacuum it, and make sure the flap or louvers move freely and close fully when nothing is flowing. A flap that sticks open lets cold air and pests in; one that sticks closed blocks airflow.
Step 6: Reconnect and Test
Reattach the duct to the dryer, tighten the clamp snugly, and push the dryer back — don’t crush the duct between the dryer and the wall. Leave at least a few inches of space. Run the dryer on a normal cycle with a damp load and check the outside cap: the flap should be blowing open strongly. That’s your airflow test. If it’s weak, something is still blocked.
How Often Should You Clean a Dryer Vent?
The honest answer depends on how much you dry. For a typical family running four or more loads a week, once a year is the standard recommendation. Larger households, homes with pets (pet hair accelerates clogging dramatically), and short ducts that run straight out can get away with the same yearly schedule, but I’d lean toward every six to nine months in those cases.
Some setups need more frequent attention:
- Long or convoluted duct runs — every bend is a lint trap. If your duct runs 20+ feet or has multiple elbows, clean every six months.
- Foil or plastic flex duct — the ridges catch lint faster than smooth rigid duct. Check every six months.
- Dryers in enclosed closets — heat and lint concentrate. Quarterly visual checks are smart.
And clean the lint screen — the one in the door — after every single load. That takes ten seconds and is the easiest part of this whole maintenance habit.
Flexible Duct vs. Rigid Duct: What to Know
When you pull the dryer out, look at what kind of duct you have. There are two main types, and they behave very differently:
- Rigid metal duct — smooth walls, best airflow, slowest lint buildup. This is what every dryer should have.
- Flexible foil duct — the crinkly accordion stuff. Acceptable in short runs but clogs faster and can be crushed or kinked behind the dryer.
- Flexible plastic or vinyl duct — this should not be in your house. It’s flammable and sags, creating lint traps. If you find it, replace it with rigid metal.
If your run uses flex duct longer than a couple of feet, consider replacing it with rigid metal duct while you’re back there. It’s a one-time upgrade that makes every future cleaning easier and safer.
When to Call a Professional
Most vents are a straightforward DIY job, but call a pro when:
- The duct runs through walls or the attic and you can’t reach both ends.
- The duct is damaged, crushed, or disconnected inside a wall.
- You’ve cleaned everything accessible and airflow is still weak.
- Your home uses flexible plastic ducting that needs replacement.
- The exterior vent cap is on the roof — get someone comfortable with roof work.
A professional dryer vent cleaning typically takes under an hour and uses a high-pressure air system. It’s cheap insurance compared to a dryer that runs hot for another year.
Common Dryer Vent Cleaning Mistakes
- Only cleaning the lint screen. The screen catches the big stuff. The duct catches everything else.
- Using a leaf blower from outside. This can pack lint tighter into bends or push it back into the dryer. The brush-and-vacuum method is more reliable.
- Ignoring the exterior cap. A cap blocked with lint or a nest makes the whole cleaning pointless.
- Crushing the duct when pushing the dryer back. Leave clearance. A kinked duct clogs faster than a dirty one.
- Cleaning with the dryer still plugged in. Disconnect power (and gas) first. Every time.
Frequently Asked Questions
How long does it take to clean a dryer vent?
About 30 to 60 minutes for a typical setup: pulling the dryer out, brushing the duct, cleaning the exterior cap, and reconnecting. First-timers should allow the full hour.
Can I clean my dryer vent myself or should I hire someone?
You can absolutely do it yourself if you can reach both ends of the duct — the dryer connection and the exterior cap. Call a professional if the duct runs through walls or the attic, is damaged, or if the exterior vent is on the roof.
How do I know if my dryer vent is clogged?
Clothes taking longer to dry, a dryer that runs hot to the touch, a burning smell during cycles, and an exterior vent flap that barely opens are the classic signs. If you spot two or more, clean the vent promptly.
What happens if you never clean a dryer vent?
Lint accumulates until airflow is severely restricted. The dryer runs longer and hotter, energy bills climb, components wear out faster, and lint — which is highly flammable — builds up around heat sources. It is one of the most preventable fire hazards in a home.
Is a leaf blower a good way to clean a dryer vent?
Not really. Blasting air from one end can pack lint into bends or push it back into the dryer housing. A rotary brush kit with a vacuum is more thorough and less likely to create a bigger blockage.