I’ve been under cars for thirty years and I’m still a little bit afraid of jacks — which is exactly the right attitude. A car falling off a jack is one of the few genuinely life-threatening things in DIY auto work, and it happens to experienced people who get casual. The good news: every jack accident I’ve ever seen came from skipping a basic rule, not from mysterious equipment failure. Follow the rules and jacking is routine. Skip them and you’re gambling. Here’s the full safety playbook. The tire-change itself is covered at how to change a tire — this is about the lifting.
Table of Contents
- The One Rule Above All
- Know Your Jack: Scissor, Floor, and Bottle
- Before You Lift: The Setup
- Finding the Jack Point
- Lifting: Slow and Square
- Jack Stands: When and How
- Lowering Safely
- The Mistakes That Drop Cars
- Frequently Asked Questions
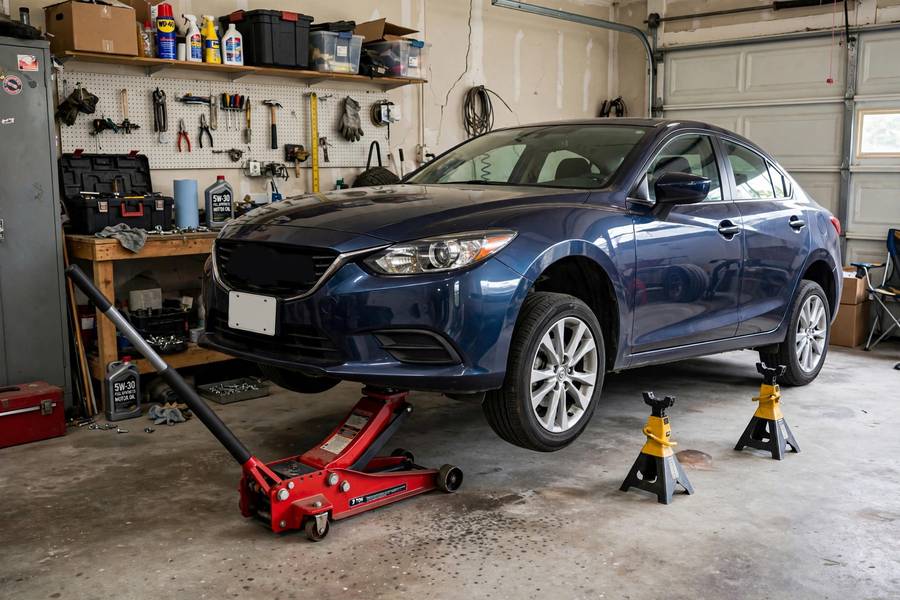
The One Rule Above All
Never put any part of your body under a car supported only by a jack.
Read it again. Jacks lift; they don’t reliably hold. A scissor jack can tip, a hydraulic seal can fail, a base can sink into hot asphalt — and then two tons of car comes down. If any part of you needs to go under the vehicle, the car must be on jack stands (plural, rated for the weight, on solid ground). For a tire change you’re working at the side of the car, not under it — keep it that way.
Every other rule in this guide is elaboration on this one. Internalize it and the rest follows naturally.
Know Your Jack: Scissor, Floor, and Bottle
Scissor jack (the one in your trunk). Mechanical screw mechanism, compact, slow. Perfectly adequate for tire changes — it’s what the manufacturer intended. Weaknesses: narrow base (tippy), slow cranking, and absolutely not for getting under the car. Use it on flat, solid ground only.
Floor jack (the garage workhorse). Hydraulic, wide base, fast lift, easy positioning. The right tool for home garage work. Still a lifting device, not a support device — pair with jack stands whenever you go underneath. Get one rated well above your vehicle’s weight (a 3-ton jack for a 2-ton car gives comfortable margin).
Bottle jack. Compact hydraulic, tall lift height, tiny base. Common in trucks. Powerful but the least stable of the three — that small footprint demands perfect placement on solid ground. Fine for lifting; never for supporting.
Whichever you use, check its condition before trusting it: scissor jacks should crank smoothly without grinding; hydraulic jacks shouldn’t leak or drift down under load. A jack that’s been rattling around a trunk for a decade deserves an inspection — test-lift in your driveway before you need it on the shoulder.
Before You Lift: The Setup
The lift starts before the jack comes out:
- Flat, solid, level ground. Concrete or asphalt. Not grass, not gravel, not dirt, not a slope. Soft ground lets the jack base sink and tilt; slopes let the car roll. If you’re on the roadside and the only flat spot is fifty yards ahead, drive there on the flat tire (slowly, hazards on). I keep saying this because people keep not doing it.
- Parking brake engaged, transmission in Park (or in gear for manuals). The car must not be able to roll. This is non-negotiable.
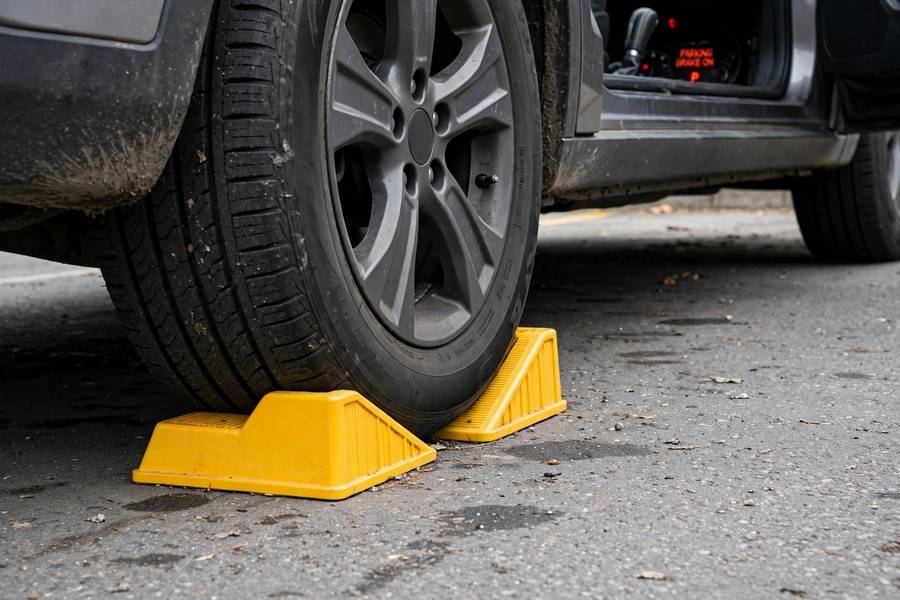
- Chock the wheels. Wedge something solid against the tire diagonally opposite the one you’re lifting — a real wheel chock, a brick, a chunk of wood. The parking brake holds two wheels; the chock backs it up. On any grade at all, chock both directions.
- Loosen lug nuts first (half turn, while the wheel’s on the ground). Covered in the tire guide, but it belongs in the safety sequence too — fighting tight nuts on a lifted car rocks the vehicle on the jack.
- Clear the area. Passengers out of the car and away from it. Pets secured. Nobody leaning on the fenders.
Five minutes of setup prevents the entire category of “the car moved while I was lifting it” accidents.
Finding the Jack Point
This is where most DIY damage happens — not injuries, but bent metal. Your car has designated jack points engineered to take the load. Everything else under there is not.
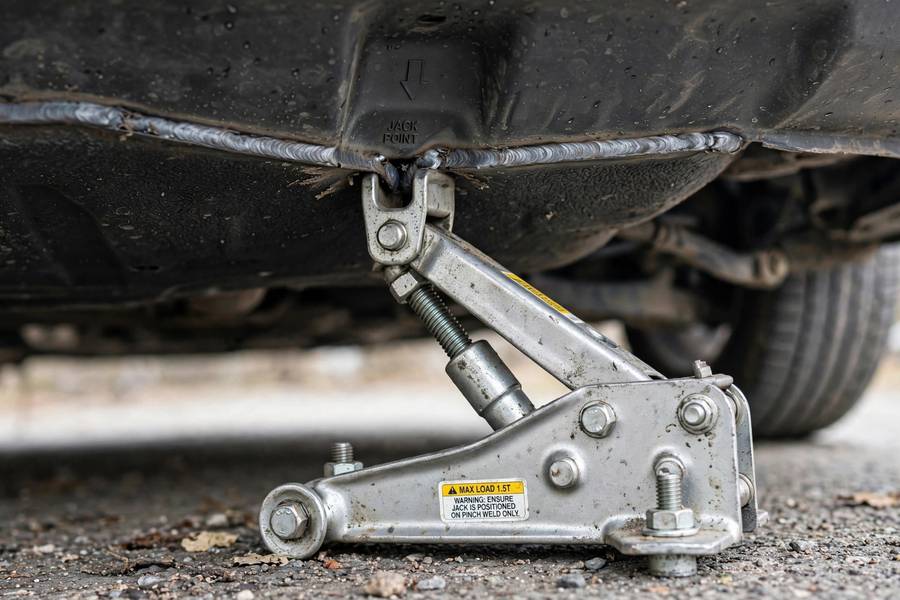
- Where they are: usually the reinforced pinch weld along the rocker panel (the seam under the doors), near each wheel — or a marked reinforced pad. Your owner’s manual diagrams them. Some cars have a central front/rear jack point for floor jacks plus the corner points for the scissor jack.
- How to identify the pinch weld: it’s the vertical seam where two body panels meet, with a reinforced section near each wheel. The scissor jack’s saddle straddles it.
- What NOT to jack on: oil pan (it’ll crush), transmission pan, plastic undertrays, suspension arms (unless the manual says so), the floor pan, bumpers, or anything that looks like it might be hollow. When in doubt, the manual’s diagram is the answer — not your best guess.
- Rust check: on older cars, inspect the jack point area for rust-through before loading it. A rusted pinch weld can fold under load. If it looks crusty, that’s a shop job, not a driveway job.
Bent rocker panels from wrong-point jacking are one of the most common cosmetic damages I fix. Thirty seconds with the manual prevents it.
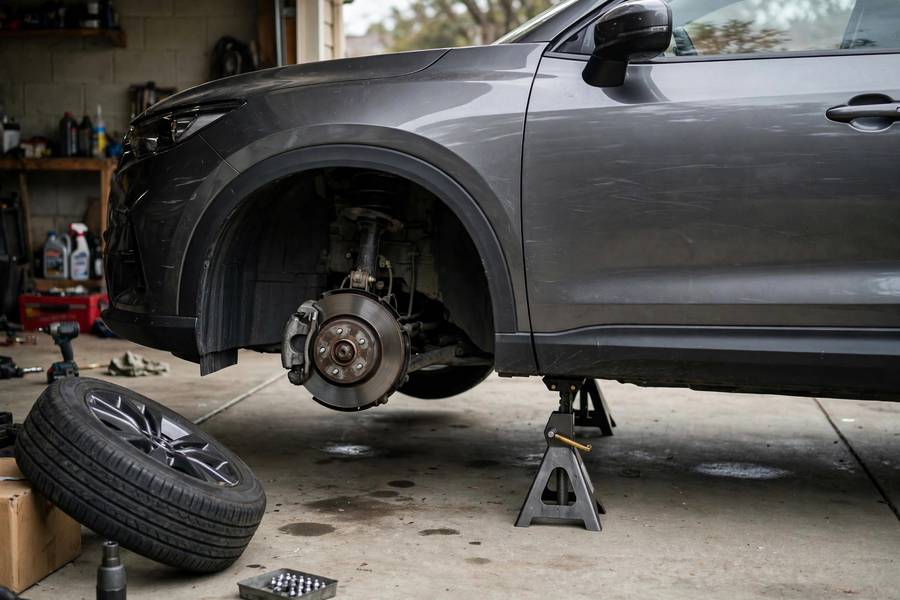
Lifting: Slow and Square
With setup done and the point located:
- Position the jack so the saddle contacts the jack point squarely and the base sits flat on the ground. The jack should be vertical — any lean at the start gets worse as it rises.
- Take up the slack until the saddle just contacts the point, then double-check alignment before loading weight.
- Lift slowly. On a scissor jack, steady cranking; on a hydraulic, smooth pump strokes. Watch the contact point as weight transfers — if the saddle starts sliding or the base starts tilting, lower immediately and reposition.
- Lift only as high as needed. For a tire change, the flat just needs to clear the ground — an inch or two. Every extra inch is extra instability for zero benefit.
- Watch and listen. Creaking, shifting, tilting — any of these means stop, lower, and reassess. A good lift is boring: smooth, quiet, vertical.
If anything feels wrong, it is wrong. Lower the car and start over. There’s no prize for powering through a sketchy lift.
Jack Stands: When and How
For a tire change, you don’t need jack stands — you’re not going under the car. But the moment your work requires any body part beneath the vehicle (brakes, oil, exhaust, anything), stands are mandatory. Here’s how:
- Rated capacity: stands are rated per pair — a “3-ton” pair supports 3 tons total. Your stands’ pair rating must exceed the weight they’ll actually hold (roughly half the car’s weight per axle, but just match or exceed the car’s total weight for margin).
- Placement: under structural points — frame rails, subframe mounting points, or the designated stand points in your manual. Not under suspension components that move, not under the floor pan.
- Procedure: lift with the jack, place the stands, then lower the car onto the stands so the weight transfers off the jack. Give the car a firm shake test — it should be rock solid. If it rocks, reposition.
- Two minimum. Never work under a car on a single stand. Pairs, always.
- The jack stays as backup. After lowering onto stands, many mechanics leave the jack lightly loaded as a secondary support. Belt and suspenders.
The shake test is the moment of truth. If the car moves on the stands, something’s wrong — fix it before any part of you goes underneath.
Lowering Safely
Lowering deserves the same care as lifting:
- Clear everything first. Tools, the old tire, your feet, your hands — nothing under or near the car except the jack.
- Lower slowly. On a scissor jack, controlled reverse cranking; on a hydraulic, crack the release valve gently — a quarter turn, not a spin. Fast lowering drops the car with a slam that can shift the wheel or damage the jack point.
- Guide the wheel as it touches down if you’re finishing a tire change — make sure it’s seating squarely.
- Remove the jack only after the car’s full weight is on the ground and stable.
- Final check: lug nuts torqued (star pattern), tools collected, nothing left under the car.
The most common lowering mistake is rushing the hydraulic release — the car drops six inches in half a second, the wheel slams, and something bends. Slow is smooth, smooth is safe.
The Mistakes That Drop Cars
The accident patterns, from thirty years of seeing the aftermath:
- Skipping the chock and brake. Car rolls off the jack. The single most common cause. Two minutes of prevention.
- Soft or sloped ground. Jack sinks, tilts, walks. If the ground isn’t concrete-solid and level, don’t lift there.
- Wrong jack point. The jack punches through a floor pan or slips off a suspension arm. The manual’s diagram exists for this exact reason.
- Body under a jack-only car. Reaching under to grab a dropped bolt, sliding under “just for a second.” Seconds are all it takes.
- Over-lifting. Cranking way past what’s needed, maximizing instability for no reason. Lift to the task, not to the sky.
- Leaking hydraulics ignored. A floor jack that drifts down under load is telling you its seals are shot. Rebuild or replace — don’t compensate by pumping periodically while you’re under the car.
- Passengers in the car. Extra weight shifts, someone bumps the shifter, a kid releases the brake. Everyone out, every time.
None of these are exotic failures. They’re all ordinary carelessness — which means they’re all preventable by ordinary care. While you’re building safe DIY habits, how to jump start a car is another roadside skill worth having dialed before you need it.
Frequently Asked Questions
Never. Jacks lift but don’t reliably hold — they can tip, leak, or sink. If any part of your body goes under the vehicle, it must be supported by jack stands (rated for the weight) on solid, level ground.
Usually the reinforced pinch weld under the rocker panel near each wheel, or a marked reinforced pad — your owner’s manual diagrams the exact locations. Never jack on the oil pan, plastic undertrays, floor pan, or bumpers.
Yes, for tire changes on flat, solid ground — it’s what the manufacturer intended. It’s slow and tippy compared to a floor jack, so setup matters more: level ground, chocked wheels, correct jack point, and never any body part underneath.
No — for a tire change you work at the side of the car, never underneath it, so the jack alone suffices. Jack stands become mandatory the moment any work requires part of your body under the vehicle.
The usual causes are the car rolling (parking brake off, no chocks), soft or sloped ground letting the jack tilt, wrong jack point slipping, or over-lifting. Every jack failure I’ve seen traced to skipping a basic setup rule.