

My first passport application was a disaster, and I mean that in the most literal sense. I showed up at the post office with the wrong form, a photo the clerk took one look at and rejected, and a check made out for the wrong amount. I had to come back twice. The trip I was rushing to get the passport for? I missed the cheap flight window and paid about $200 more for my ticket than I needed to.
That was years ago. This guide is the one I wish someone had handed me back then — the real version. What it costs, where people mess up, and what I’d do differently. Follow these steps and your application should go through on the first try.
One quick note: this guide walks through the U.S. process, since that’s the one I know from personal experience and it’s where most of my readers are. The general steps — documents, photo, fees, submission — look similar in most countries, but the forms, fees, and timelines are different. If you’re applying outside the U.S., check your own government’s official passport site for the local version.
Do You Actually Need a Passport Right Now?
Before you start gathering paperwork, make sure you actually need one — and the right kind. You need a passport book for international air travel. That’s the standard one, the little blue booklet.
A passport card is cheaper, but it only works for land and sea travel between the U.S., Canada, Mexico, Bermuda, and the Caribbean. It will not get you on an international flight. I’ve watched someone at an airport learn this the expensive way. If there’s any chance you’ll fly internationally in the next ten years, get the book.
Also check: do you already have one that’s expired? If your last passport was issued when you were 16 or older, is less than 15 years old, and is undamaged, you can usually renew by mail — which is a completely different, much easier process. This guide is for first-time applicants (and a few edge cases below). If you’re renewing, skip to that section at the end.
Step 1: Gather Your Documents First
Here’s the mistake most people make: they fill out the form first and hunt for documents later. Do it the other way around. You need two things — proof of U.S. citizenship and proof of identity — and finding them can take longer than you’d think.
Proof of citizenship is typically one of these:
- A certified U.S. birth certificate (the one with the raised seal from the state — the decorative hospital keepsake doesn’t count)
- A previous undamaged U.S. passport (even an expired one)
- A Certificate of Naturalization or Certificate of Citizenship
Proof of identity is usually one of these:
- A valid driver’s license
- A state-issued ID card
- A military ID
You’ll bring the originals plus photocopies (front and back) of each. The originals get mailed in with your application and returned to you separately — usually a few weeks after your passport arrives, which panics everyone the first time. It’s normal. They don’t get lost in the void; they just travel on a different schedule.
My practical advice: if you can’t find your birth certificate, order a certified copy from your birth state’s vital records office before you do anything else. That order alone can take several weeks, and it’s the number-one reason first-time applications stall.
Step 2: Fill Out the Application Form (Don’t Sign It Yet)
First-time U.S. applicants use Form DS-11. You can fill it out online and print it, or print it blank and complete it by hand in black ink. Either way works, but the online version is cleaner — handwriting that a processor can’t read will slow you down.
Here’s the part that gets people: do not sign the form at home. You sign it in front of the acceptance agent when you submit it. I know, it feels wrong to hand over an unsigned form. But an application signed in advance can be rejected, and then you’re starting over. This is the mistake I made on my first visit. The clerk slid my form back across the counter and said, “Come back with an unsigned one.” I wanted to argue. There was no argument to make. She was right.
Fill out everything else completely. Leave nothing blank that applies to you — if a field doesn’t apply, write “none” rather than leaving it empty. Double-check your name spelling against your birth certificate, not your driver’s license.

Step 3: Get Your Passport Photo Right
Passport photos have rules, and they’re pickier than you’d expect. The short version:
- 2 x 2 inches, taken within the last six months
- Plain white or off-white background
- Full face, front view, neutral expression (no smiling — I know, it’s a terrible photo, everyone looks miserable in theirs)
- No glasses, no hats, no uniforms
- Printed on matte or glossy photo-quality paper
You can get them done at most pharmacies, big-box stores with photo centers, AAA offices, and many post offices. It usually costs around $10–15 for a pair, and takes about ten minutes.
Could you take your own? Technically yes, if the photo meets every requirement. But here’s my honest take: the $15 is worth it. A rejected photo doesn’t just cost you another $15 — it costs you weeks, because the rejection notice travels to you by mail and your corrected photo travels back. My first photo was rejected over a faint background shadow. Get it done professionally and move on.
Step 4: Pay the Fees (Here’s What It Actually Costs)
Let’s talk money, because the fee structure confuses everyone. For a first-time adult applicant (16 and older) getting a passport book, you pay two separate payments:
- The application fee — paid to the “U.S. Department of State.” For an adult passport book, this has been around $130 in recent years. You pay this by check or money order only — no cash, no cards for this portion.
- The execution fee — paid to the acceptance facility (the post office, clerk’s office, wherever you submit). This has been around $35, and this one you can usually pay by card, check, or money order depending on the facility.
So the all-in cost for a standard adult first-time passport book lands around $165, give or take — fees do change, so confirm the current amounts on the official State Department site before you go. If you need it fast, expedited processing adds roughly another $60, plus overnight delivery fees each way if you want them (around $20–30 each direction).
For kids under 16, the application fee is lower (around $100 in recent years) but the execution fee is the same $35. Both parents generally need to appear with the child or provide notarized consent — don’t skip this detail if you’re applying for a little one.
Write the check carefully. It needs to be payable to “U.S. Department of State,” with your full name and date of birth in the memo line. My first check was made out wrong — wrong payee name — and that alone earned me a second trip. The execution fee is a separate payment to the facility, so bring two forms of payment. I bring a checkbook and a debit card and let the clerk tell me what works.
Is expedited worth it? If your trip is within about three months, I’d say yes. Standard processing has ranged from roughly 6–8 weeks in recent years, and it stretches longer during busy seasons. Expedited cuts that roughly in half. Do the math on your departure date and add a buffer — passport timelines are estimates, not promises. I’ve seen standard processing swing by weeks in either direction depending on the season.
Step 5: Submit Your Application In Person
First-time applicants have to apply in person at an acceptance facility — you can’t mail in your first application. The good news: there are thousands of these. Post offices, county clerk offices, and some public libraries all serve as acceptance facilities. Use the State Department’s facility search tool to find the nearest one, and check whether you need an appointment. Many facilities now require them, and walk-in hours — where they still exist — fill up fast.
What to bring:
- Your completed, unsigned DS-11
- Proof of citizenship (original + photocopy, front and back)
- Proof of identity (original + photocopy, front and back)
- Your passport photo
- Two payments (check/money order for the State Department + payment for the execution fee)
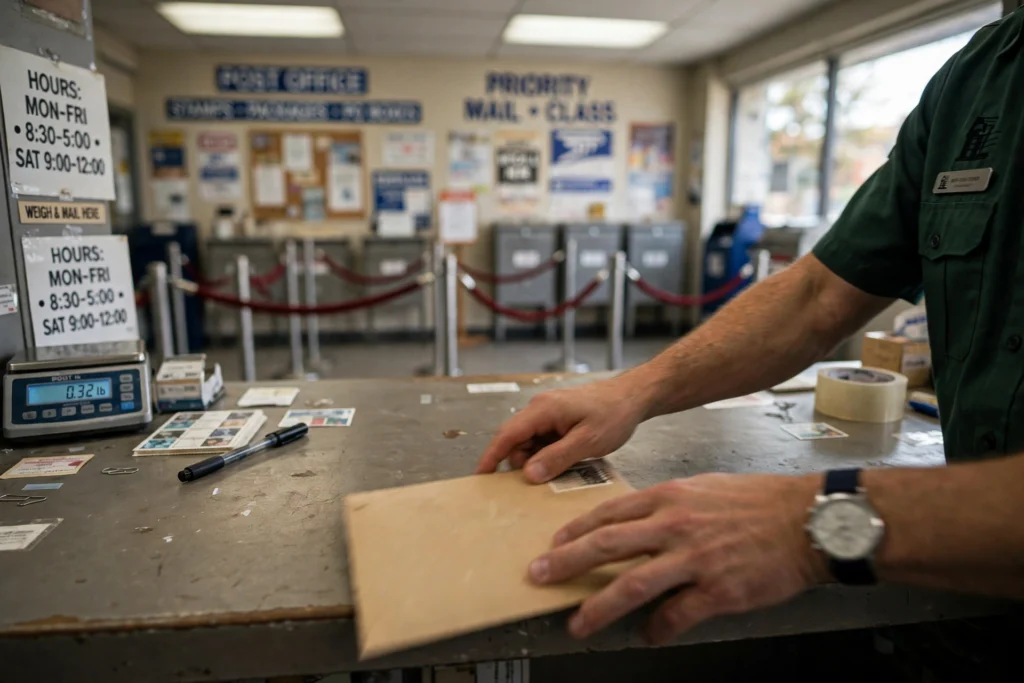
What actually happens: the agent reviews everything, watches you sign the form, seals it all into an envelope, and sends it off. The whole appointment takes about 15 minutes if your paperwork is right. Go early in the day and don’t schedule anything tight afterward — even with an appointment, these offices run on government time.
Step 6: Track It, Then Wait
After you submit, you can track your application status online — it usually shows up in the tracking system within a week or two of submission. You’ll get your passport book by mail, and your original documents (birth certificate, etc.) come back separately, typically a few weeks later. Again: this is normal. Don’t panic when the passport arrives without your birth certificate. It’s coming.
Do not book non-refundable international travel until the passport is in your hands. I know the deals are tempting. I know waiting feels like losing money. But I have watched too many people — myself included, once — sweat through the final weeks before a trip because a fare sale was too good to pass up. Book refundable, or wait. The passport always takes exactly as long as it takes, and it does not care about your itinerary.
If your travel date is approaching and your application is still pending, there are options: you can call to upgrade to expedited service after submitting, and for genuine emergencies (life-or-death situations), there are urgent travel appointments. But these are safety nets, not plans. Plan ahead and you won’t need them.
Renewing an Existing Passport (The Easy Version)
If your last passport was issued when you were 16 or older, it’s undamaged, and it’s less than 15 years old, you can renew by mail with Form DS-82 — or online, since online renewal has rolled out for eligible adults. No in-person visit, no execution fee. You mail the old passport, a new photo, the form, and the fee, and a new one comes back.
Renew early. Many countries require your passport to be valid for six months beyond your travel dates, so a passport that “expires next year” might already be unusable for this fall’s trip. I renew mine about nine months before expiration.
My “Never Again” List: Mistakes That Cost Real Time
Since I promised you the real version, here’s every mistake I’ve made or watched someone make, so you don’t have to:
- Signing the form at home. Unsigned until you’re in front of the agent. Tattoo it on your hand if needed.
- Wrong photo background. A shadow, a tint, an off-white wall that reads as beige — all rejectable. Pay the $15.
- Hospital birth certificate. Cute keepsake, not a legal document. You need the state-issued certified copy with the seal.
- One payment instead of two. The State Department fee and the execution fee are separate payments to separate recipients. Bring both.
- Booking travel before the passport arrives. The single most expensive mistake on this list. Wait for the booklet.
- Not checking the six-month rule. Your passport can be technically valid and practically useless. Check your destination’s entry requirements before you book anything — this matters whether you’re flying abroad to catch the World Cup in person or traveling for a destination wedding (I keep a wedding emergency kit checklist for those too).
What I’d Do Differently
If I could redo my first application, I’d do three things differently. First, I’d order my birth certificate copy a month before I thought I needed it — it’s the invisible bottleneck. Second, I’d pay for expedited without agonizing over the $60, because the rebooked flight cost me triple that. Third, I’d stop treating the passport as trip prep and start treating it as a ten-year asset. Get it when you don’t need it, so it’s there when you do.
A passport is good for ten years. Amortized over a decade of trips, that ~$165 is some of the cheapest money you’ll ever spend on travel.
For more of my travel guides — the real version, costs and mistakes included — browse the travel section.
Standard processing has typically run about 6–8 weeks in recent years, not counting mailing time on either end. Expedited service cuts that roughly in half but costs extra. Timelines stretch during busy travel seasons, so apply at least three to four months before any planned international trip. You can track your application status online once it’s been submitted.
First-time applicants need proof of U.S. citizenship (usually a certified state birth certificate with a raised seal, or a Certificate of Naturalization), proof of identity (like a driver’s license), photocopies of both (front and back), a compliant 2×2-inch passport photo, and two separate payments — the application fee to the U.S. Department of State and the execution fee to the acceptance facility.
For an adult (16+), a first-time passport book costs around $165 total — roughly a $130 application fee plus a $35 execution fee — though fees change periodically, so verify current amounts on the State Department’s official site. Expedited processing adds about $60 more, plus optional overnight delivery fees. Children’s passports cost less but require both parents’ presence or consent.
First-time applicants cannot apply fully online — you must appear in person at an acceptance facility with Form DS-11 so an agent can witness your signature and verify your documents. However, you can fill out the DS-11 form online and print it before your appointment. Online renewal is available for eligible adults renewing an existing passport, which is a separate, simpler process.
The most common reasons are a background that isn’t plain white or off-white (shadows and tints count), the wrong size, glasses or head coverings in the shot, or a photo that looks too different from your current appearance. Getting your photo taken professionally at a pharmacy or photo center for around $10–15 is the simplest way to avoid a rejection that can cost you weeks of delay.
Get the passport book. The card only works for land and sea travel between the U.S., Canada, Mexico, Bermuda, and the Caribbean — it is not valid for international air travel. If there’s any chance you’ll fly internationally during the passport’s ten-year validity, the book is the one you want.